

As a strictly carry-on traveler, I always carefully consider each piece of clothing I bring along on any trip. For our upcoming trip to Spain and Italy in March, I needed a versatile trench jacket that would wear as well with a tee and sneakers as it would with a silk scarf and boots. Think Audrey Hepburn in Funny Face.
I could hunt around online or march around stores for countless hours to find my dream jacket, or, I could make one.

I was thinking, “streamlined trench”. Not too bulky but warm, maybe a little water repellent. A jacket suited for the probable springtime evening temps of 40-50°F with the ability to shed off a sprinkling of rain while walking with an umbrella.
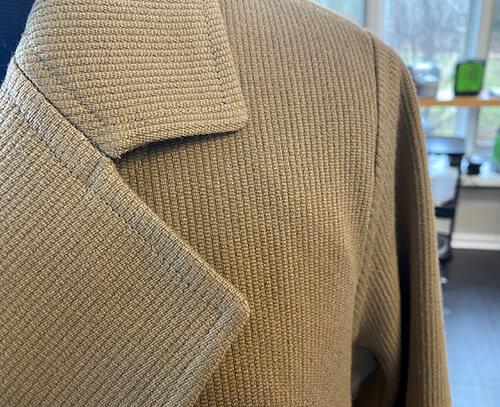
I knew that with a few changes, I could get the look I wanted with the Sienna Maker Jacket pattern from indie patternmaker Closet Core. This pattern has a utilitarian vibe and structure, and a trenchy belt to give the garment a bit of shape. Added plus, I already owned the pattern.
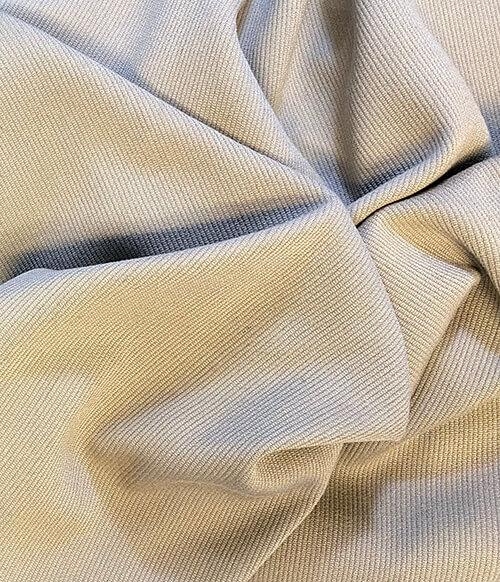
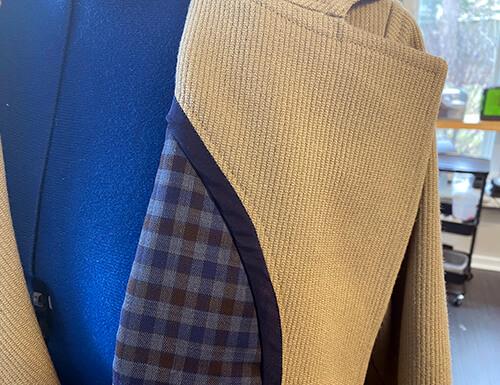
As always, fabric choice was crucial, and I spent way too much time dithering about it. Taking a cue from the classic Burberry trench, my dream jacket needed to be constructed of a wool twill in a neutral tan tone. Wool is naturally water repellent, and it is warm. I landed on this wool ottoman in a classic beige at Mood Fabrics. Though the ottoman was a little thicker than I had in mind, I was drawn to the ribbed texture and thought the texture would give the jacket a modern feel.
To line, or not to line?
The Sienna Maker is designed as an unlined piece, but the ottoman fabric I chose is a bit rough on the underside and needed to be lined.I really didn’t want to have a standard silky lining flopping around on the inside – just didn’t seem streamlined to me. I toyed for a moment with the idea of a removable lining per Closet Core’s blogpost regarding lining the Sienna Maker. But in the end I went with the solution of simply underlining the wool ottoman.

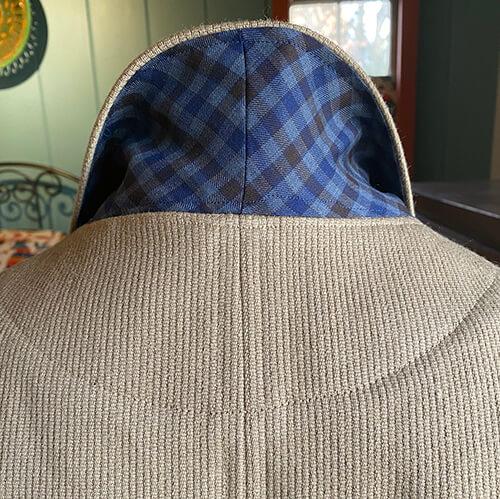
I found a beautiful worsted wool tattersall check suiting at the Textile Outlet (read the post My Favorite Fabric Stores in Chicago to learn about this crazy fabric warehouse) for less than $10 per 62″W yard! Though not a traditional underlining fabric, the tattersall provides a silky interior finish, additional warmth, a nice pop of color, and is a nod to the iconic plaid lining found in the classic trench.
One of the perks of making your own clothes is the ability to customize the details. I made a quick muslin test garment for a fit and style check. I like Closet Core patterns for their extensive size inclusivity. The size 14 D-cup version of Sienna Maker is beautifully drafted with a bust dart in place, making my customary FBA (full bust adjustment) unnecessary. Much appreciated!
I did alter the pattern design in the following ways to achieve the look I was seeking:
- ditched the interior and exterior chest pockets
- added in-seam bag pockets in lieu of the rather large hip patch pockets – cute but not for this jacket
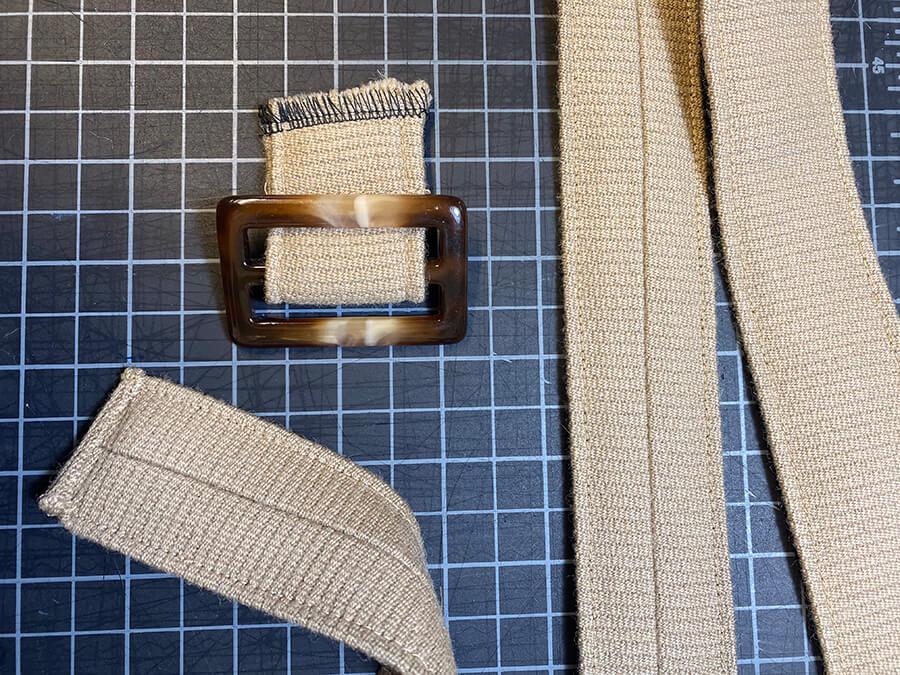
- cut the belt on the crossgrain for added textural interest and pressed the seam to the center
- opted for a traditional trench horn slider buckle from my fastener collection in lieu of the double d-ring belt closure
- shortened the overall garment length
- deepened the back vent opening by 2″
Finishing Touches
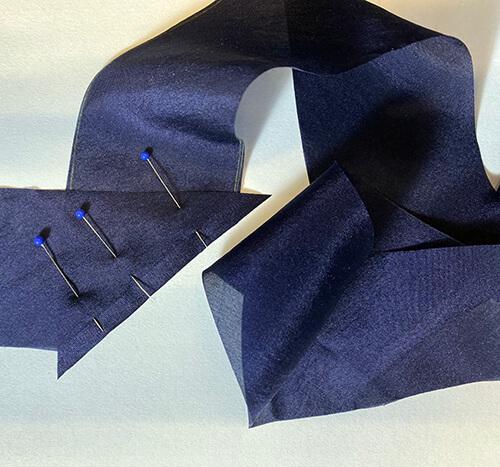
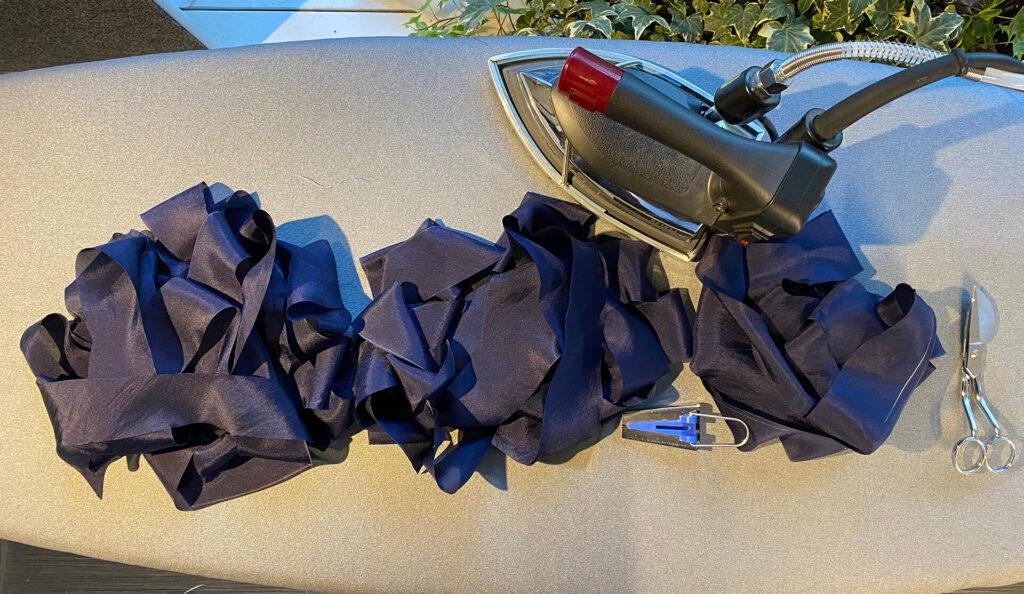
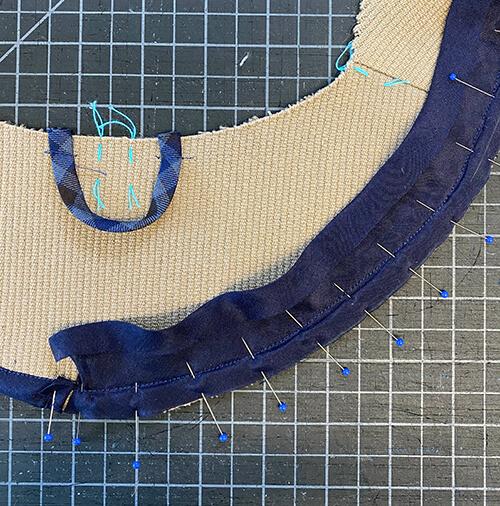
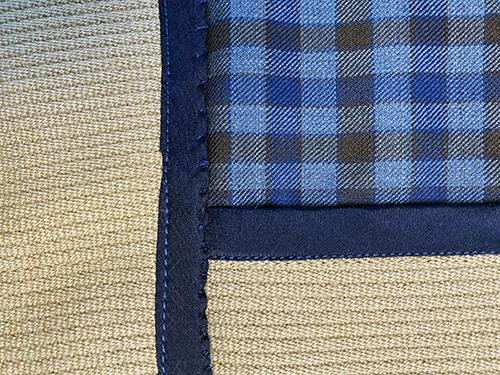
Seams, facings and hem edges are bound with self-made silk bias tape. I am a bit obsessed with making my own bias binding tape using remnants I have in my stash and one of these nifty bias tape tools. In this case I used a piece of navy silk habotai lining from a previous project.
The jacket is streamlined. The process was not.
In retrospect, I probably should have gone with a standard wool gabardine twill. The wool ottoman created bulkier seams which were a bit of a pain to deal with. I needed a lot of patience and the use all my pressing skill and tools to get the lapel and collar points to lie correct. Having a blue interior and a tan exterior required multiple spool and bobbin thread swaps, which complicated the process. Due to the thickness of my fabric, I did a single fold hem, trimmed with bias tape and then hand-stitched it invisibly to the underlining, rather than double-fold and topstitch as the pattern called for.

Underlining all the pieces required a lot of pain-in-the-butt hand basting. But the underlining does do all the things an underlining is supposed to do –
- Acted as a base for all the stitch-traced construction marks
- Is a very sturdy layer to secure seam and hem allowances to
- Is additional warmth and a wind barrier
- Everything – seams, pockets, lapels – just feel more solid and durable
The interior of the jacket is very neat and tidy, and I still love that blue – so worth it. All in all, I’m really pleased with the end result on this make.


 A Boho Silk Kimono Welcome
So chic and practical! Just ordered that bias tape maker set! Thanks for the tip!
Great jacket! Sure it’ll be excellent for your trip