The Make it for Mexico Challenge: Make 6 dresses and 1 top for an upcoming trip to Merida, MX for the Dia de los Muertos celebrations.This is a review of Closet Core’s Elodie Wrap dress is the third dress completed for my travel wardrobe for this trip.
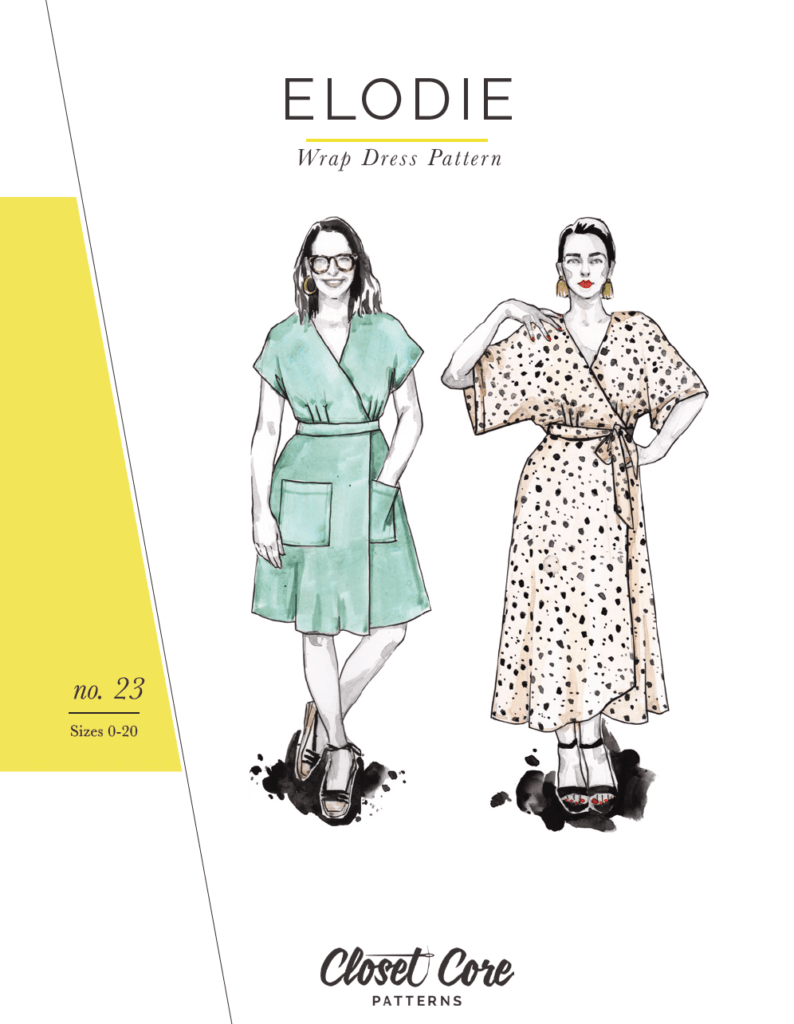
Why Closet Core Elodie?
I had purchased this pattern back in 2020, when it was first introduced, but never got around to sewing it. The Closet Core Elodie wrap dress certainly fit the parameters for the Make it for Mexico sewing challenge. A looser fit, plus Closet Core is one of the independent pattern designers I’ve had good luck with in regards to fit, as they draft their patterns to be size inclusive.
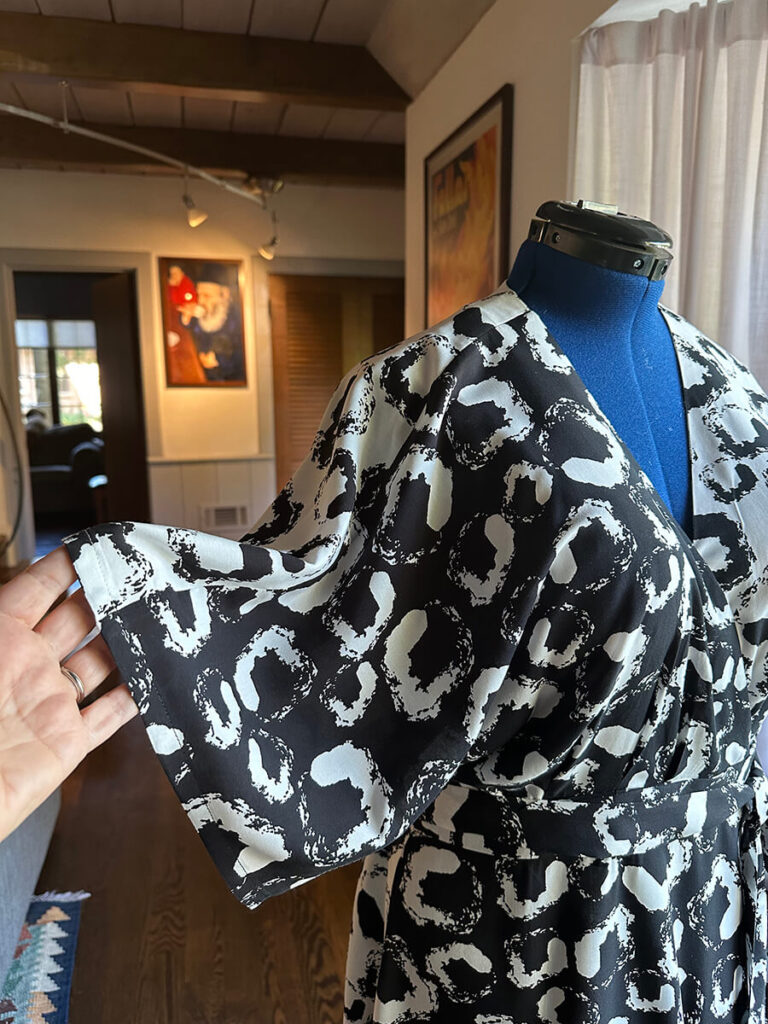
It is really important with a wrap dress to have an accurate fit, otherwise one may have issues with straining or gaping at the wrap point. The Elodie design features a blousy bodice with release pleats and a kimono sleeve, and I knew I wouldn’t need to fiddle with pattern adjustments to get a proper fit. I chose to sew View B long sleeve midi version in size 14, D cup. I did alter the front bodice with 1″ full bust adjustment, following the directions to do so provided on the very helpful Closet Core Blog.
Materials Used
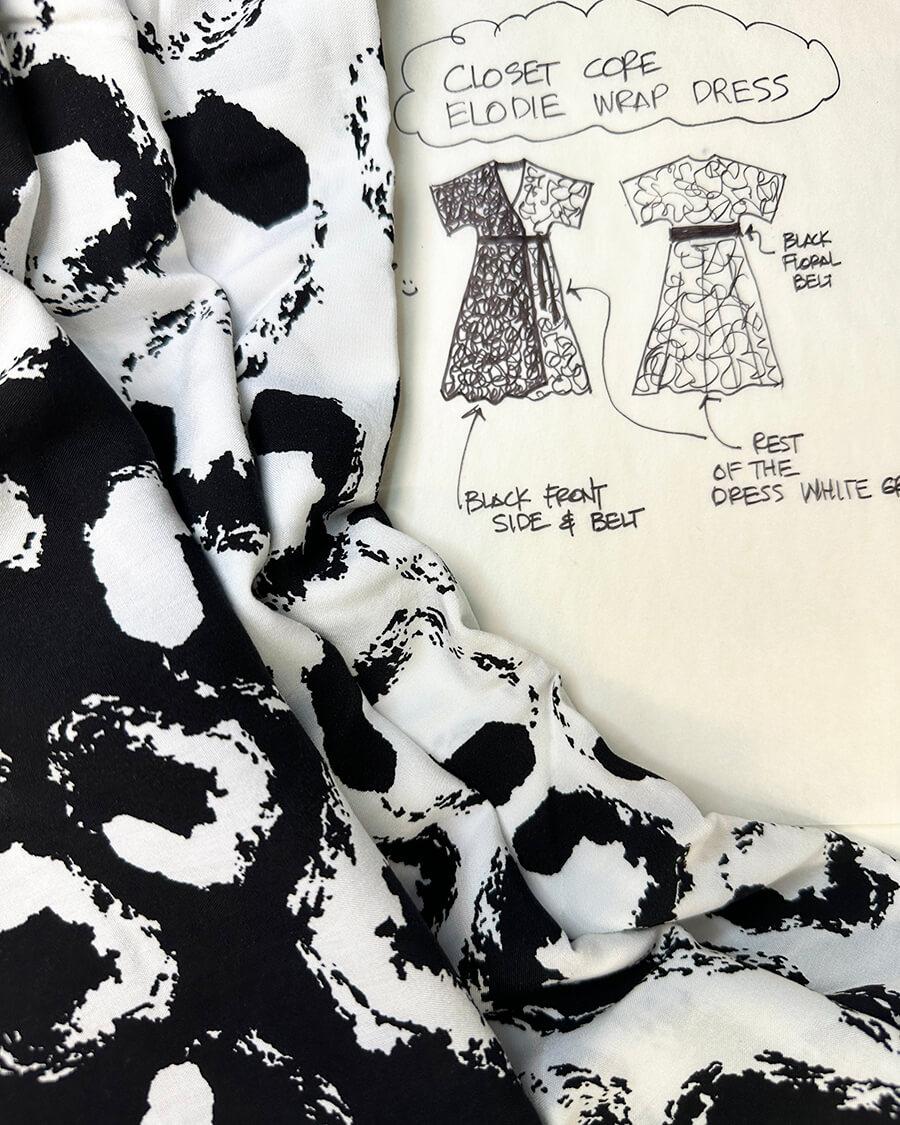
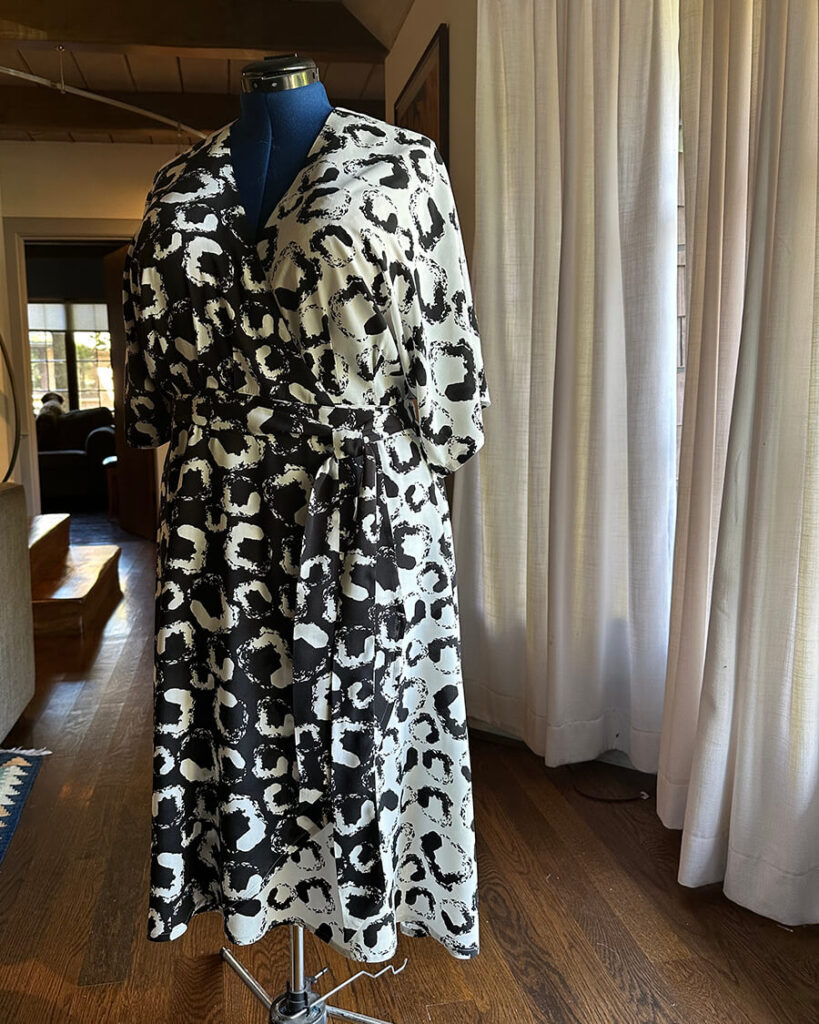
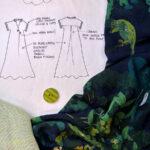
Because the Closet Core Elodie skirt is quasi circular, the full dress requires at least 4.5 to 6 yards of fabric, (depending on fabric width). At first, I didn’t think I had any enough of any fabric appropriate for this dress in my fabric stash. But, before resorting to buying fabric, I always go and give the stash a good going over, just to make sure. Low and behold, the vision jumped right out at me – black and white – two coordinating patterns integrating into one ying-yang wrap dress.
The inspiration came upon seeing these lovely light weight rayons in my stash. Purchased at New Rainbow Fabrics – one of my fave fabric haunts in Chicago – I forgot all about them. OMG! I had 2 yards of the black ground and 3 yards of the white ground! If I was purposeful with my fabric placement and cutting, I was certain I had enough to make one very interesting Elodie wrap dress.
Construction Details
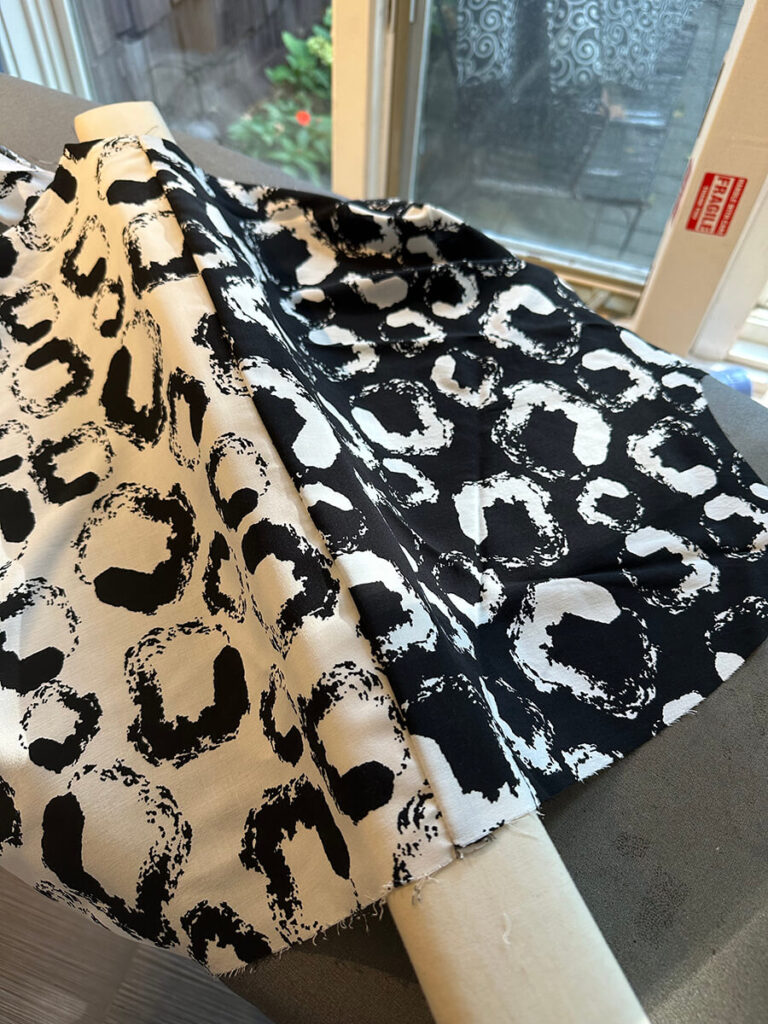
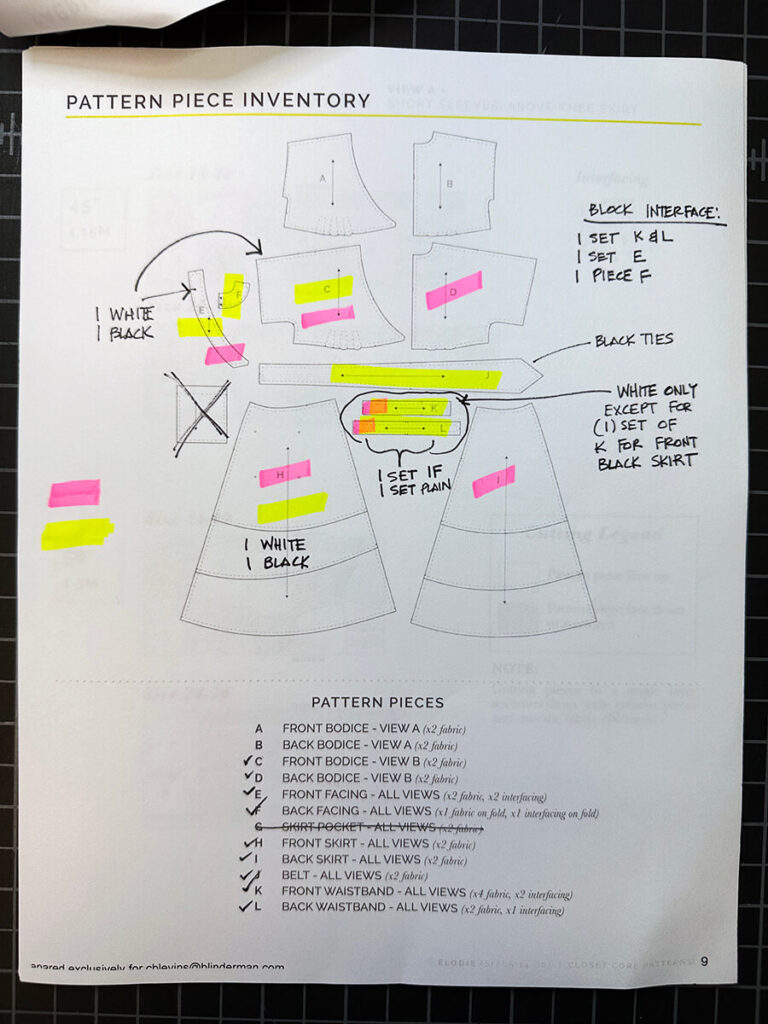
I studied the the pattern peice inventory included in the instructions to figure out exactly which pieces would be black vs. white. Then, I cut this dress out on a single layer, to make sure I had each required piece facing in the right direction. Because the fabric was so hard to keep on grain, I decided to block fuse the pieces that required interfacing. Block fusing is just generally easier and more accurate.In retrospect, I probably spent more time cutting out the dress then I did actually sewing it.

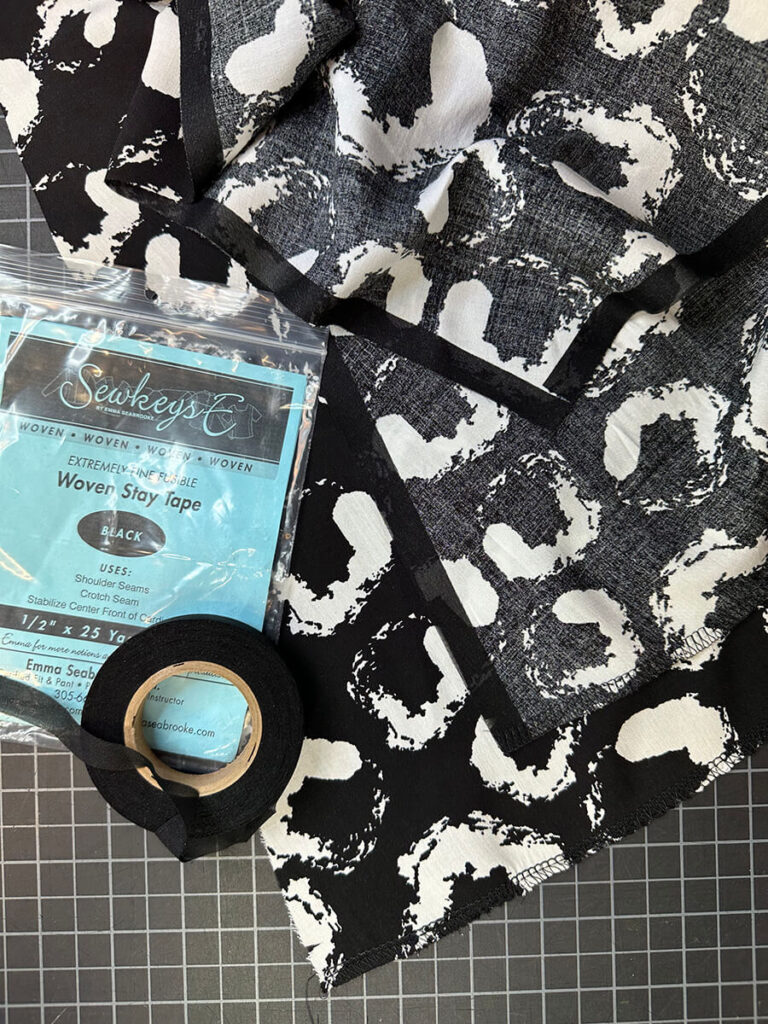
The rayon is lovely and lightweight, but clearly a wriggly fraying beast from the get go. The instructions recommend stay stitching many of the curved and bias cut edges. I hate stay stitching. By the time I get a neckline from the cutting table and through the machine, the stay stitching often accomplishes the opposite of what it is supposed to achieve, stretching the fabric all out of whack.
Instead of stay stitching, I bring each cut fabric piece along with its pattern peice to the ironing board to realign and then I stabilize the edges with a woven iron on stay tape from Sew Keys. Also, I serged the hems of the skirt pieces to minimize fraying during construction.
Making it Work
This make didn’t go as smoothly as the first two Make It For Mexico dresses. First, my gravity feed iron conked out and I needed to wait several days for the new one to arrive. Once I renewed production, I encountered a problem when connecting the waistband to the bodice. The back waistband was about 2″ longer than the back bodice piece it was attaching to. Clearly I had somehow cut the back bodice too small. Arghh! Without any additional fabric available, taking the bodice apart and recutting a new back was not an option. In a “make it work” moment, I was able to get the bodice to fit the waistband nicely by eliminating the two back pleats.
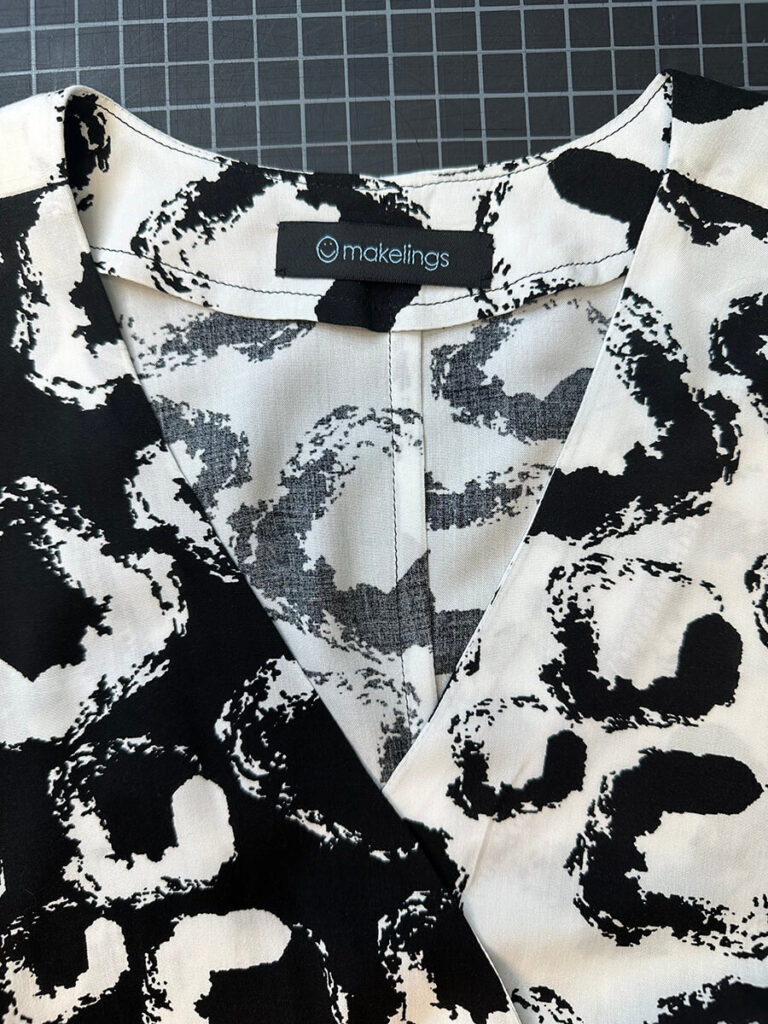
After I attached the skirt to the bodice, I was able to do my first actual wrap try-on of the dress. The the dress fit well across the back and around the waist. Whew! But I did run into a fit issue – significant drooping and gaping at the bodice crossover. In another “make it work” moment, I took up the front bodice excess by tucking it in along the waistband on both right and left front bodice pieces. These simple tucks did the trick and eliminated the droopy gaping.
At this time I made one last change to the dress – purely for aesthetics. I cut the black front skirt panel in a more exagerated arc. The bigger curve on the front panel seemed to better suit the the ying-yang vibe I was going for.
Wrapping it Up
Surprisingly, even with the foul ups, I’m very happy with this Elodie wrap dress. It is a testament to Closet Core’s design that I was able to recover from two self-inflicted make issues, and still end up with a lovely, well-fitting, very wearable dress. With sandals and big tote bag, this dress will be perfect for gadding about an open-air market in Merida.
8 days left in the challenge – 4 garments left to make!!!
Check out the dresses completed for my Make it for Mexico sewing challenge:
Dress #1 McCalls 7969 Pullover Dress
Dress #2 Vogue 1937 Swing Dress

Leave a Reply