The Inspiration
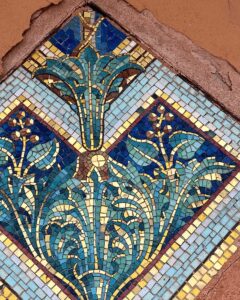
Murano, Italy
I have always had a thing for mosaic tile art. I fell in love with the mosaic murals in Italy, made from tiny glass, stone and ceramic tiles called tessarae. Artists have used tessarae to create highly detailed pictorial designs for thousands years.
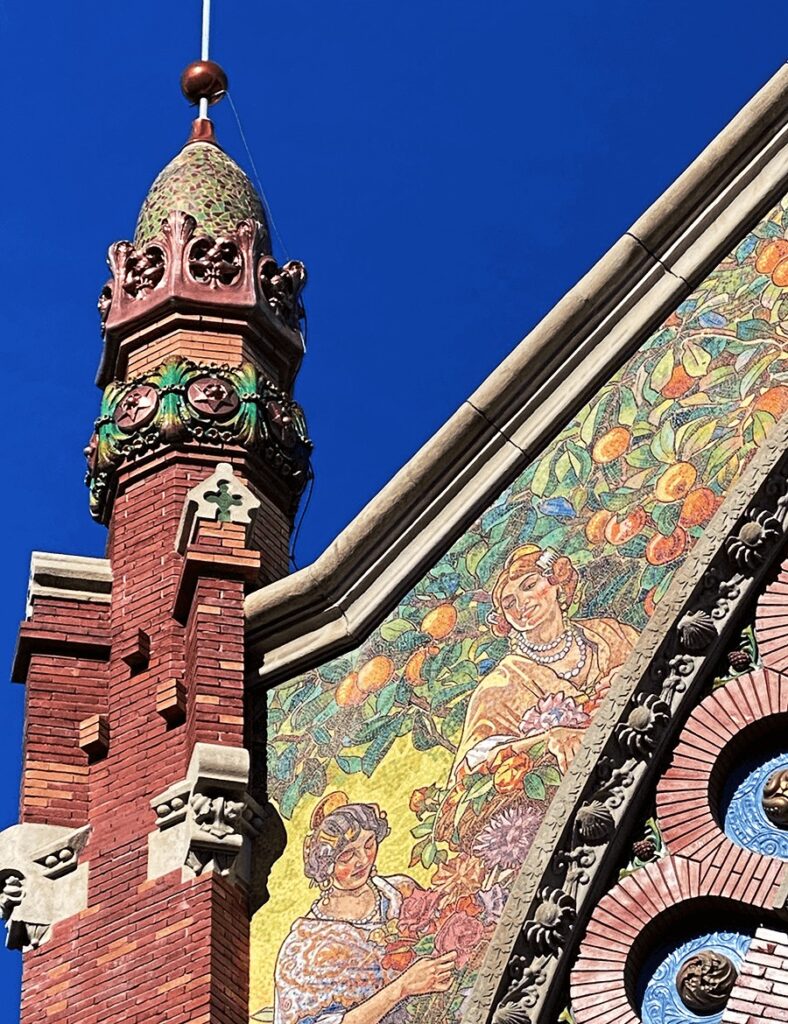
The broken tile mosaic technique known as trencadís is also a favorite of mine. Barcelona is teeming with many examples of Anton Gaudí’s technique –building facades, domes, spires, serpentine garden walls, park benches, fountains – all decorated with broken bits of ceramic tile.
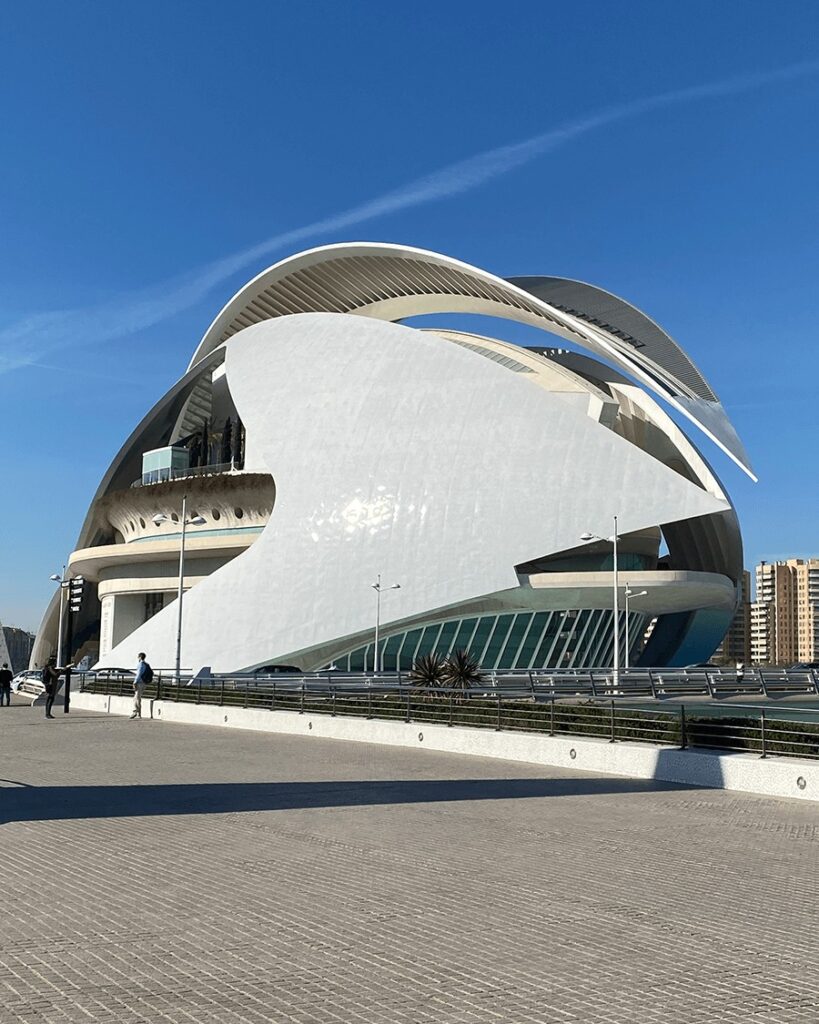
Mosaic tile is on display all over Spain. Both elaborate tessarae murals and trencadís decorate the art nouveau Mercat de Colon in Valencia. When you wander around Valencia’s City of Arts and Sciences museum complex you’ll find trencadís on a monumental scale. Santiago Calatrava clad these sculptural buildings with millions of shards of gleaming white ceramic tile. Quite a testament to the durability of the material.
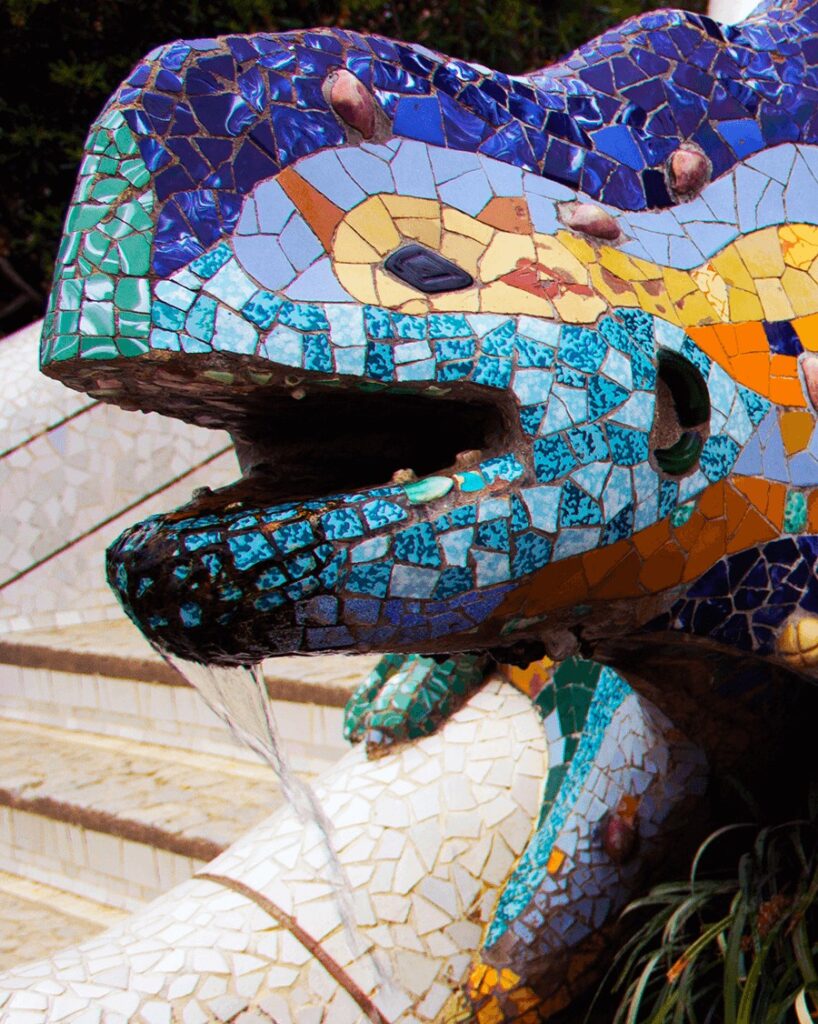
El Parc Guell, Barcelona, Spain
These works, and many others seen on my travels, inspired me to bring this art form into my life here at home.
Project Design
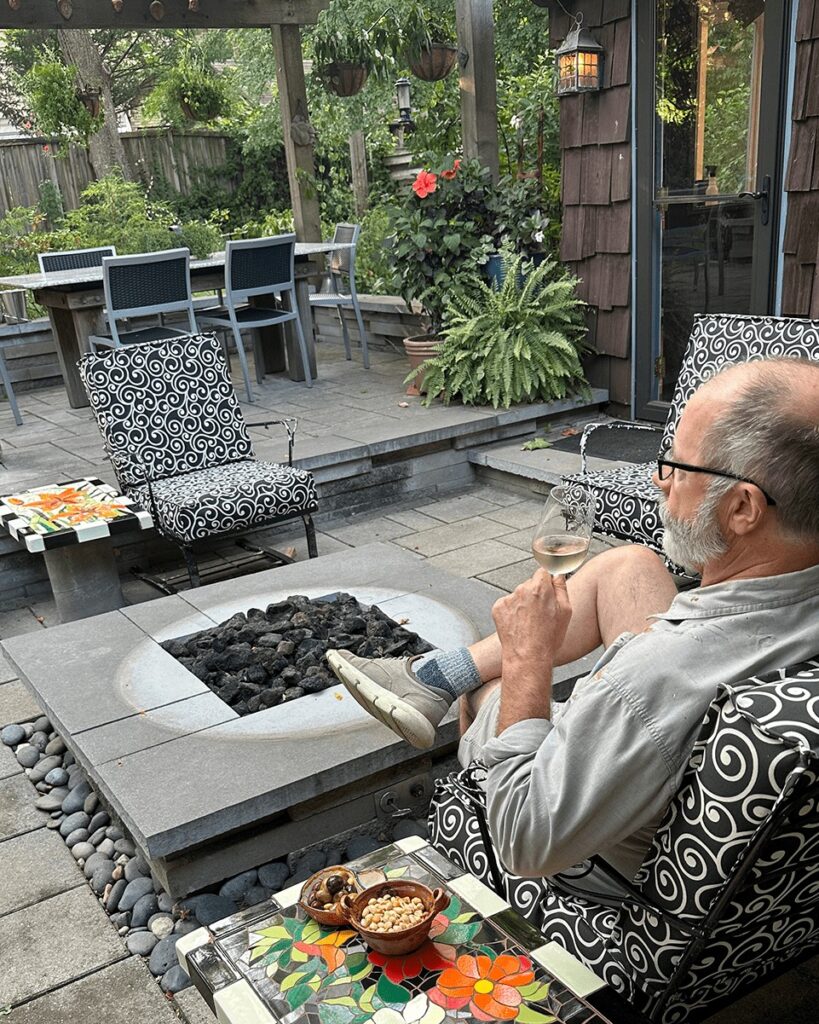
Colorful and durable, mosaic tile is perfect for an outdoor application. I decided to create three mosaic tile tables for our patio sitting area — two side tables and one corner table. This post describes how I made the side tables, as the large corner table is yet a work in progress.
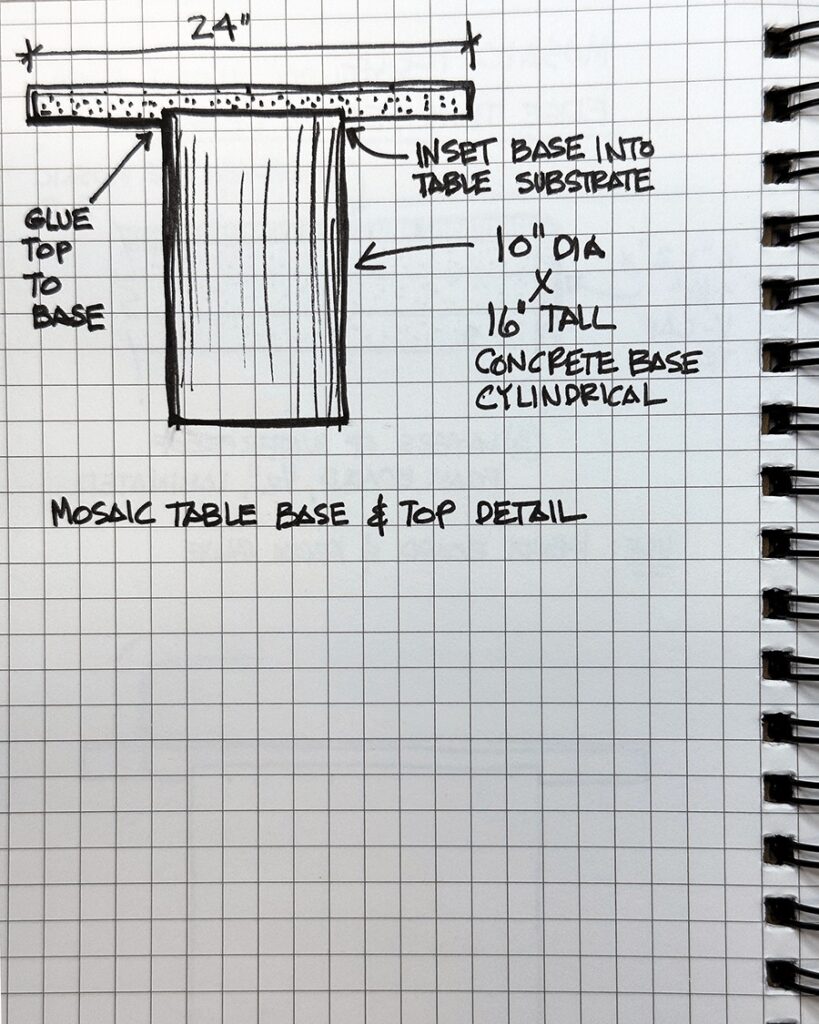
I began by first determining the structure of the table top and base. Tile is heavy, and being located outdoors, the table structure must be waterproof and sturdy. For the tops, the waterproof foam board used in shower stalls would be a stable, lightweight and easy to work with substrate material. And a simple poured concrete cylinder base would support the weight of the top and withstand the elements.
Tile Selection
Set on trying my hand at making table using the colorful trencadís mosaic tile technique I had seen in Spain, I was itching to get to designing the motifs. Of course it was fruitless to think about the mosaic design until I knew more about what tile material was available. Time to do some research.
I was looking for a an easy to work with tile available in small quantities of many bright colors. Although cost wasn’t a huge factor, I didn’t want to pay for more tile than I could use. I landed on Mexican Talavera tile for the following reasons:
- made from terra cotta clay, Talavara is easy to break and shape
- Talavera is available in an array of bright color glazes
- it is a handmade product, with appealing variations and imperfections that would add to the look I was going for
- there are coordinating Talavera trim pieces available and I wouldn’t need to introduce metal or wood frame to finish off the table edges
- a budget friendly choice, as small amounts of broken Talavera can be purchased by the pound
Design Motifs
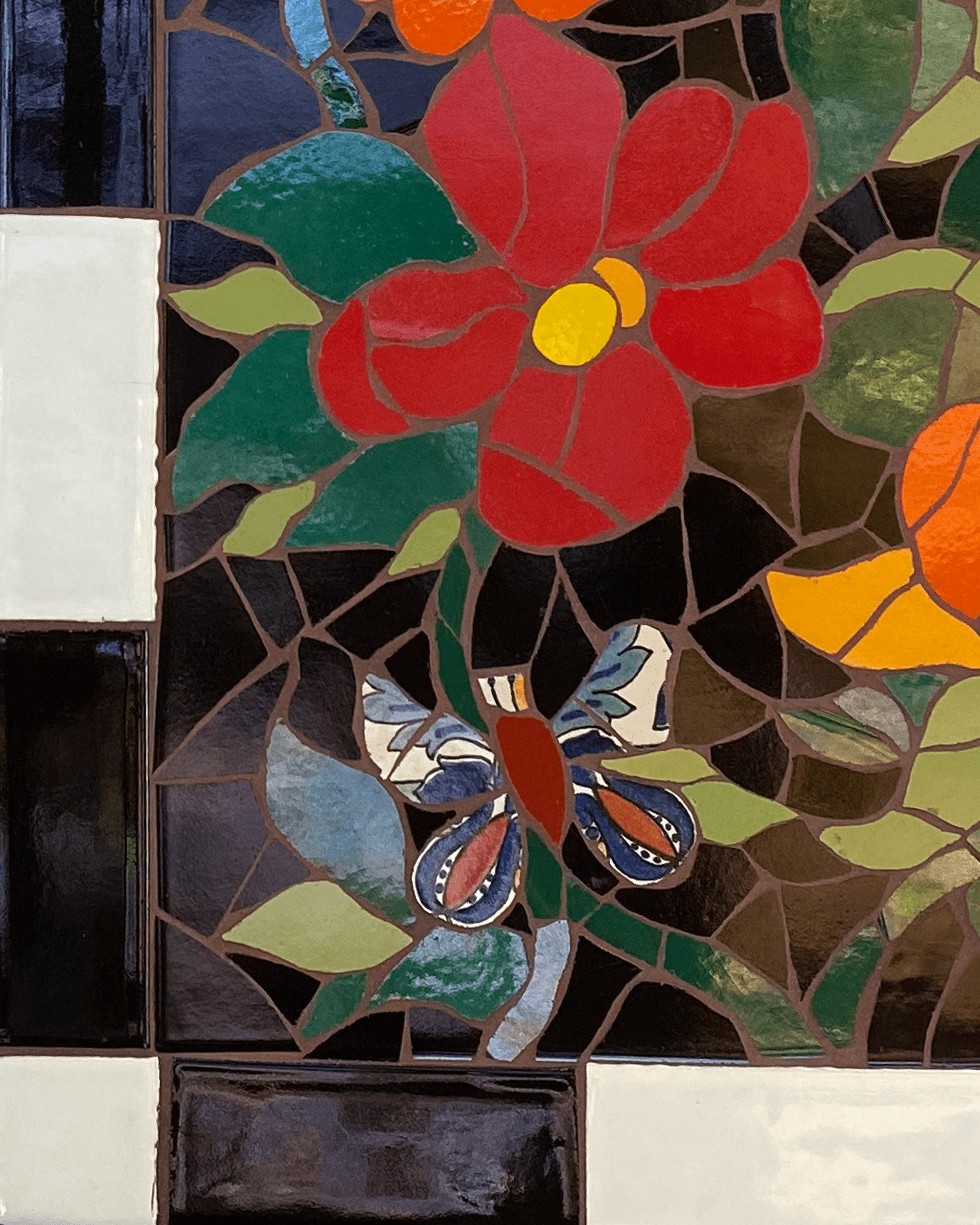
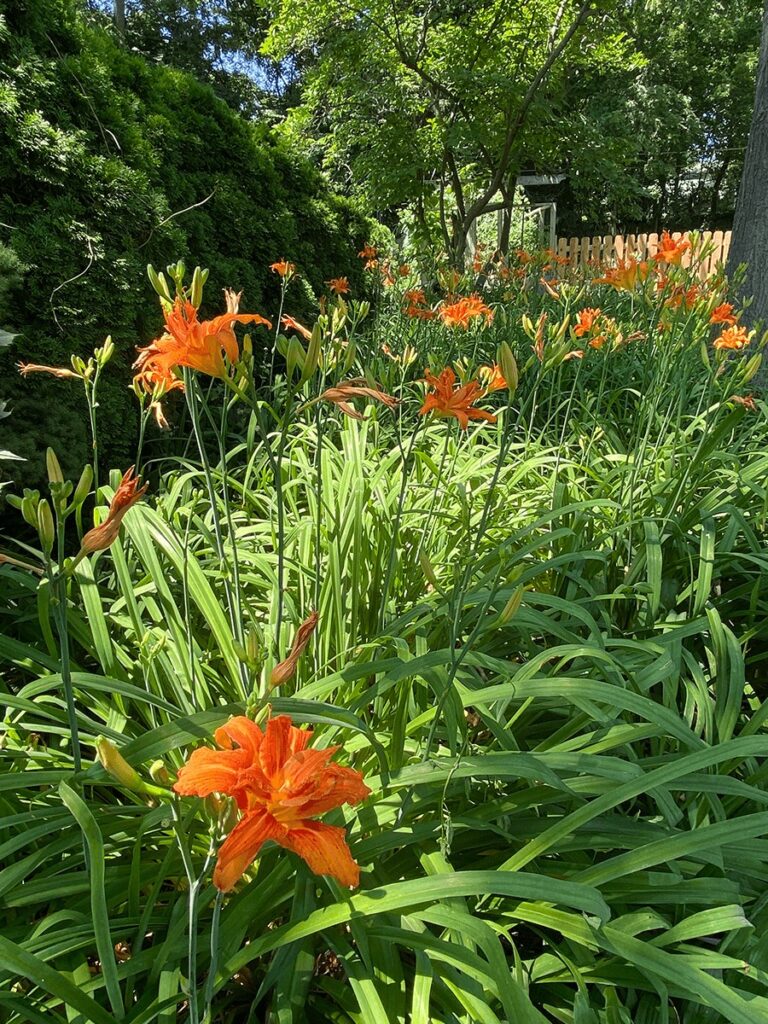
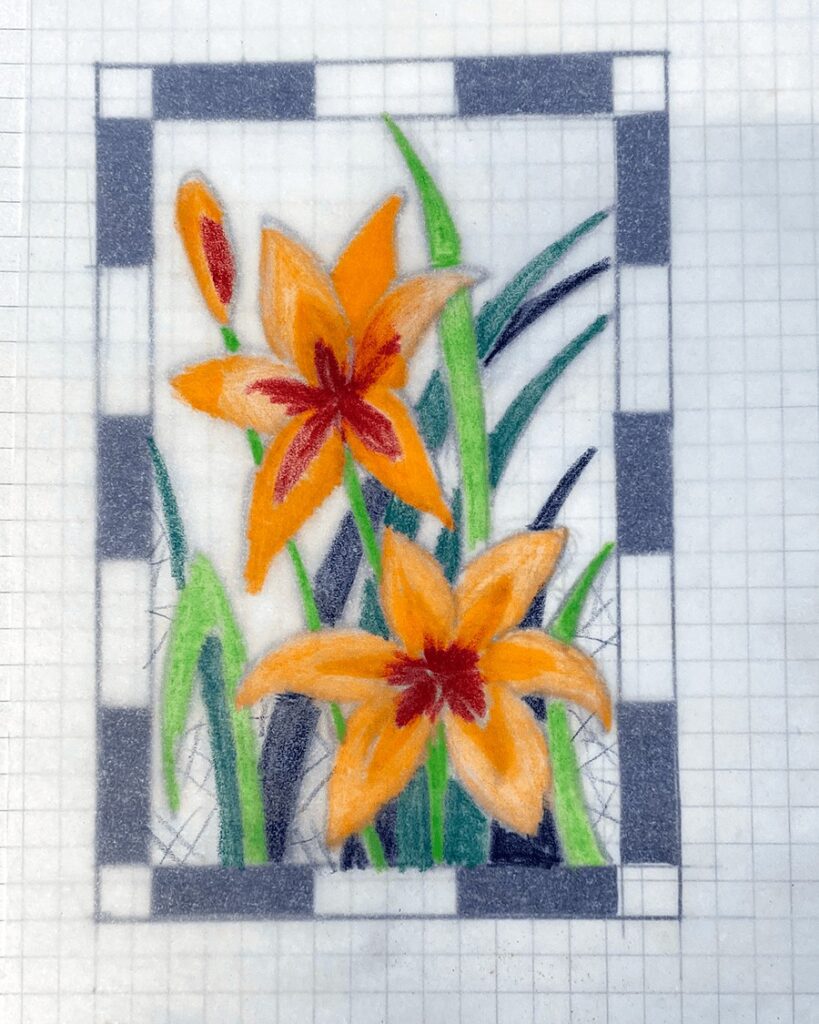
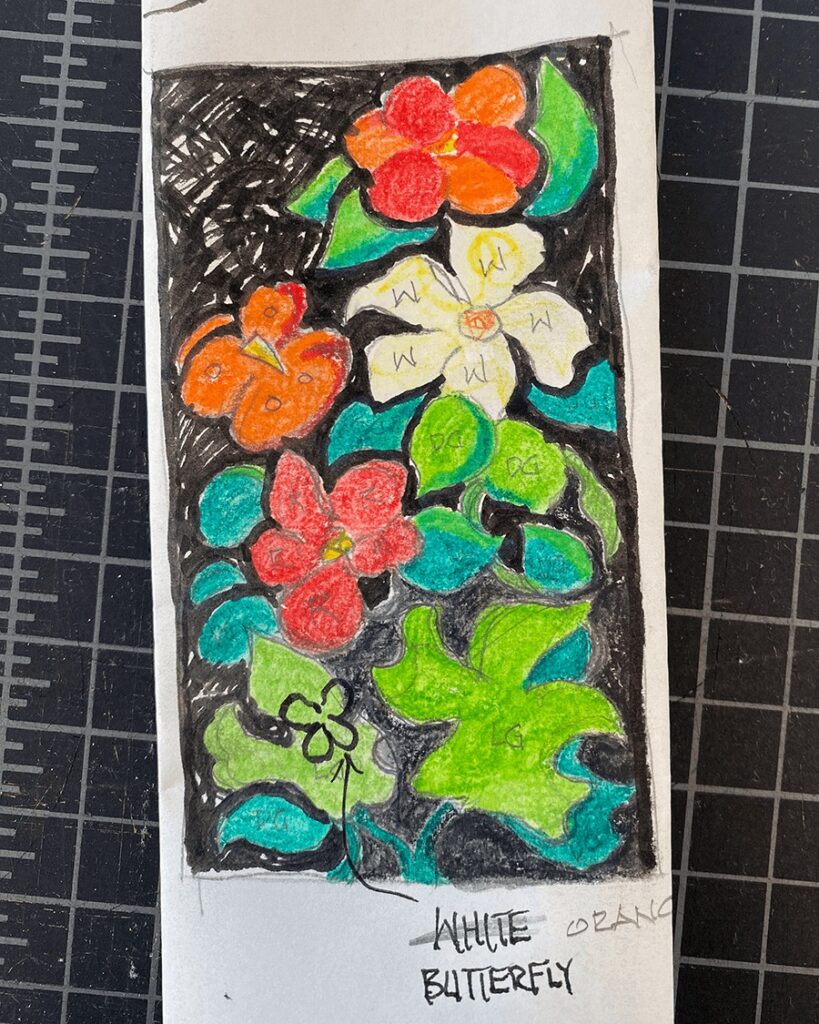
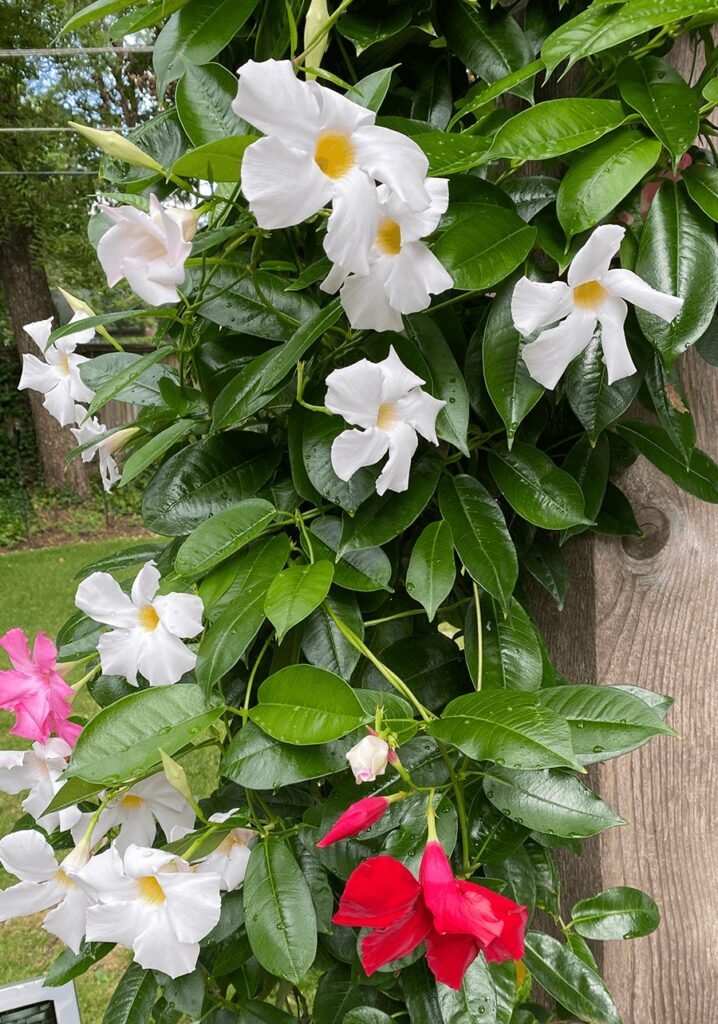
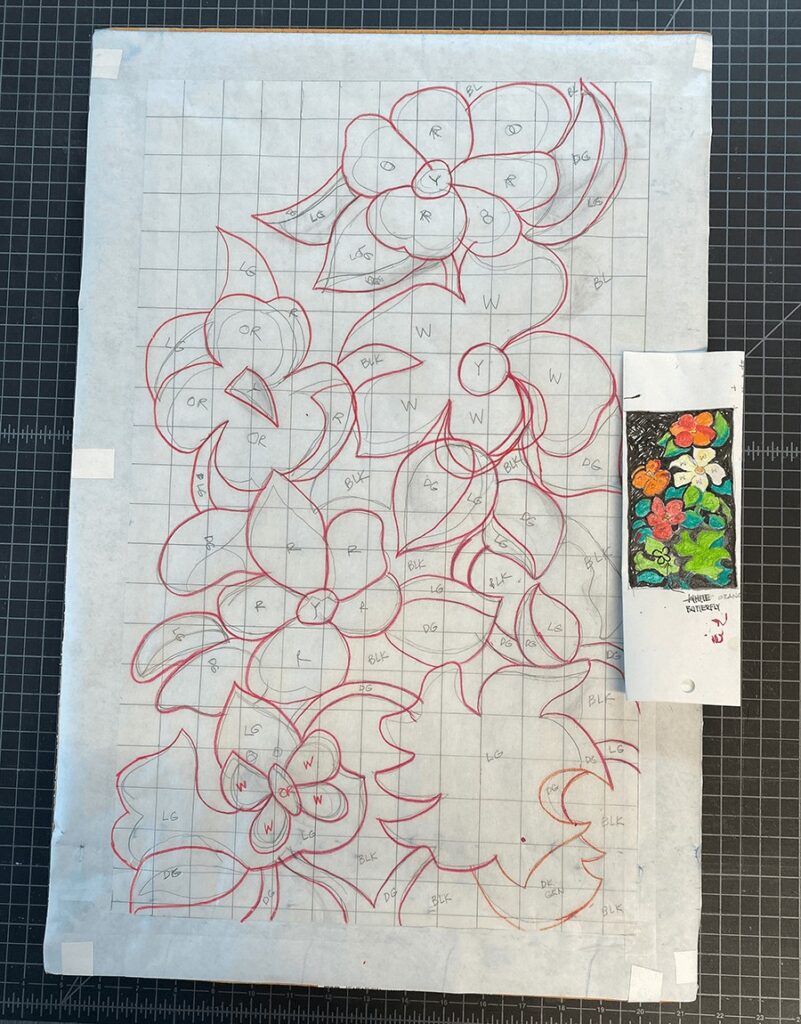
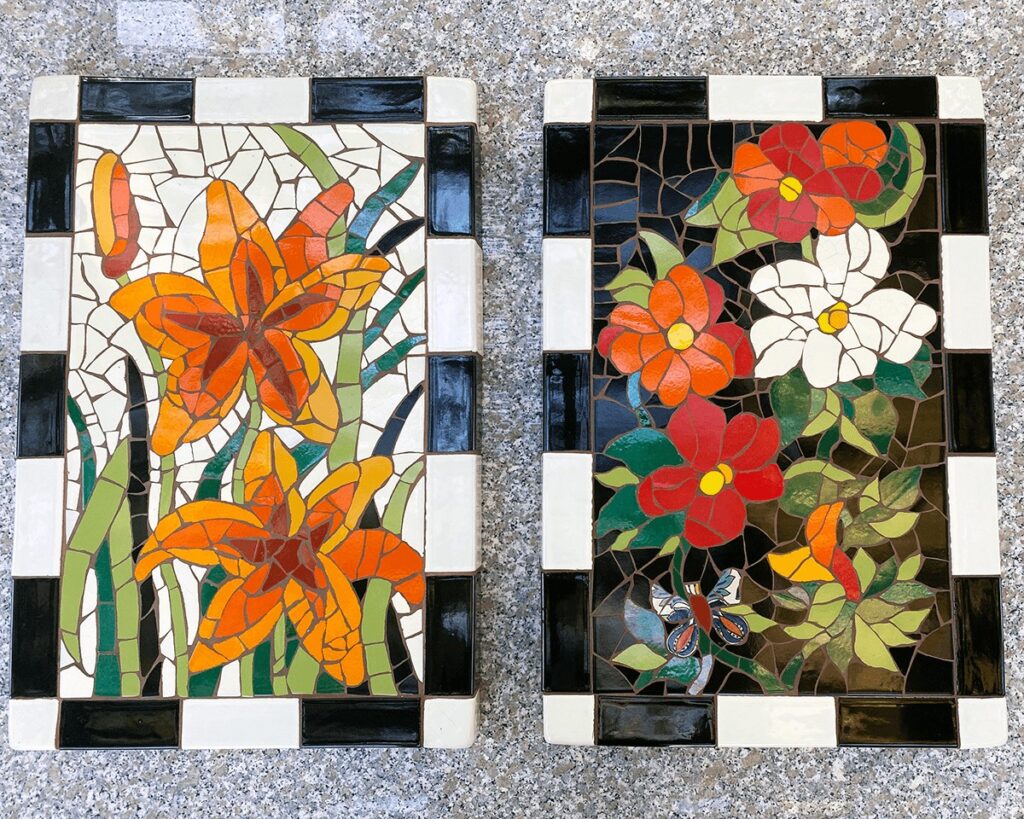
<knuckles cracking> At last! It was time to start designing the mosaic tile motifs. Despite the fact that I would be doing the mosaic tile work, I wanted Brian’s input on design and he was happy to pitch in to develop concepts. Using plants and colors present in our garden as inspiration, Brian and I worked independently on designs we thought would translate well in trencadís. Yep, it was a contest, and guess what? We both won!
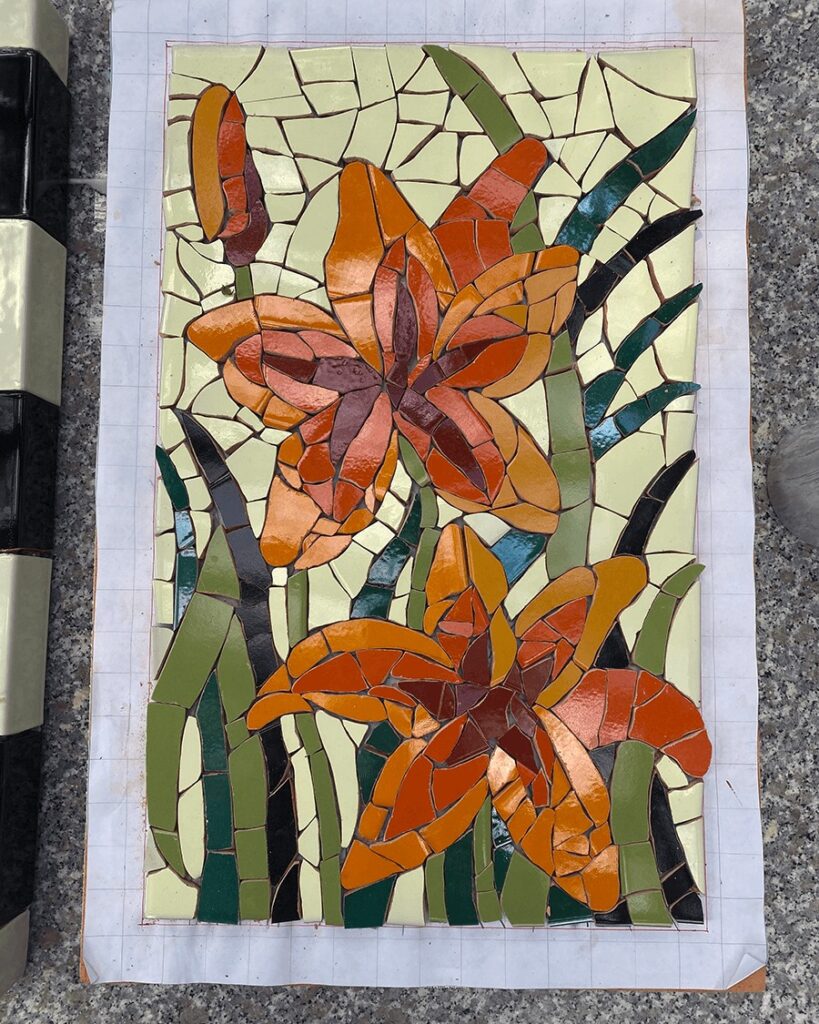
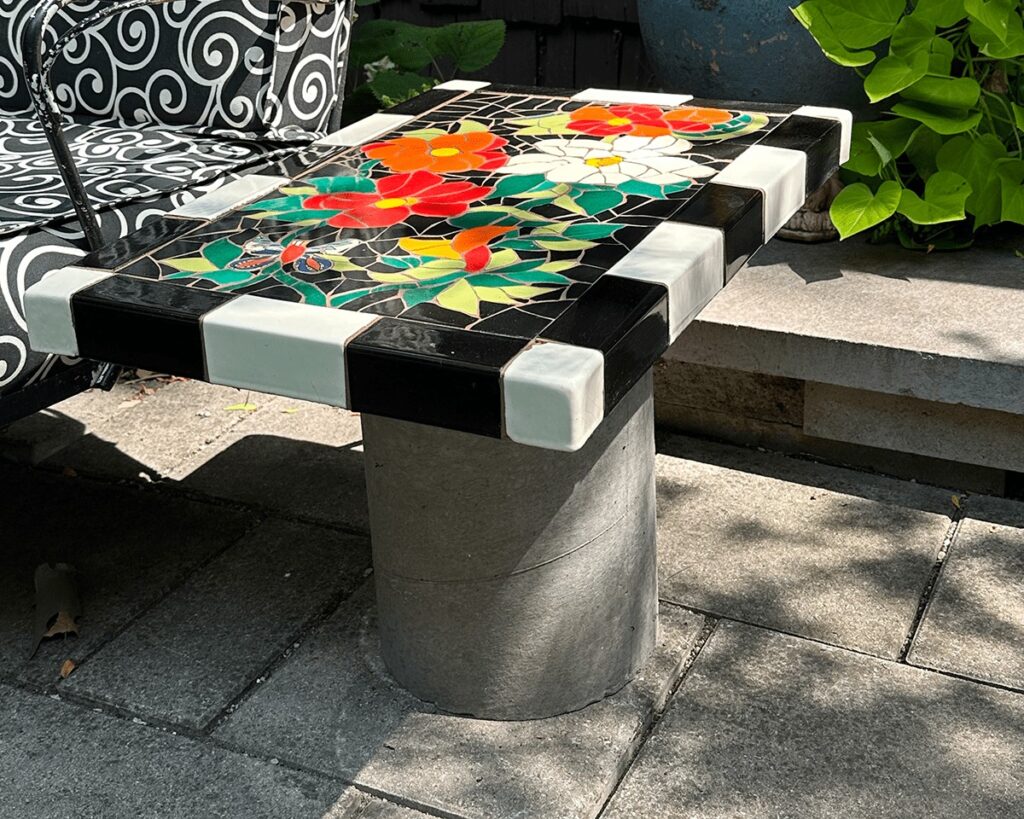
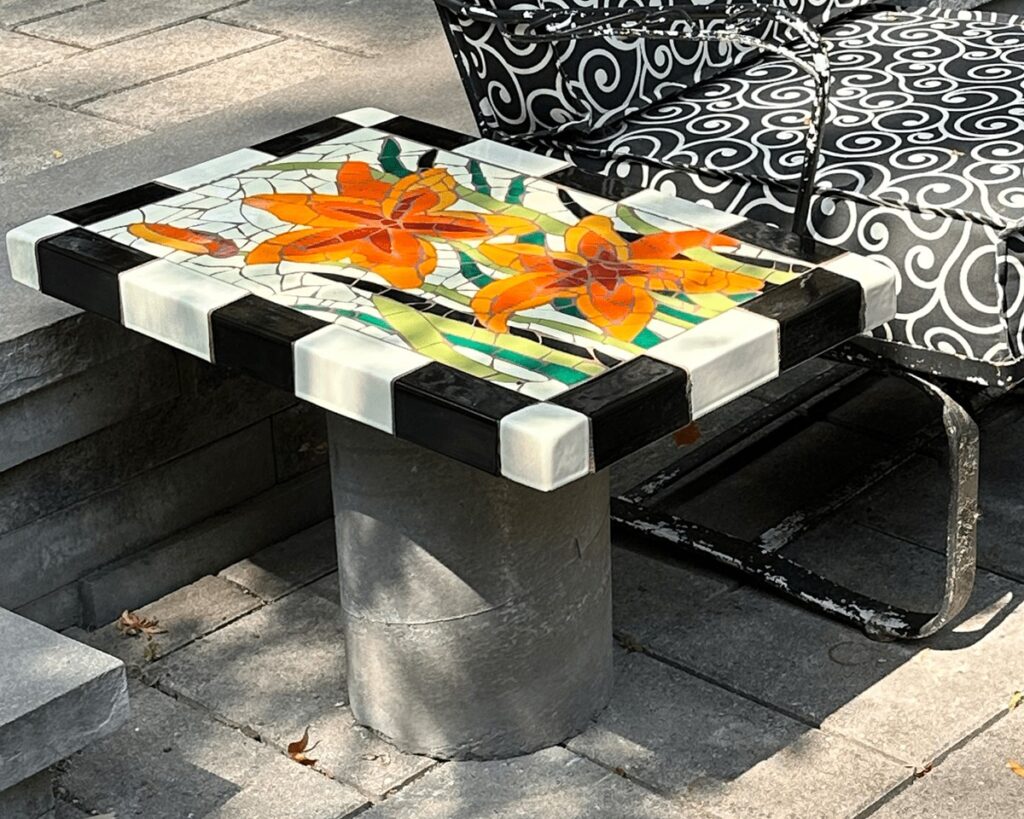
We liked both designs! The day lilies on a white ground (my design) and the mandevilla blossoms on a black ground (Brian’s design) were naturally coordinating. Adding the alternating black and white edge treatment to both tables would further unify the designs. The black and white frame would tie in to our outdoor furniture.
Materials
Design decisions made, it was time to lay in supplies to begin making the mosaic tile tables. These are the products and tools used on this project:
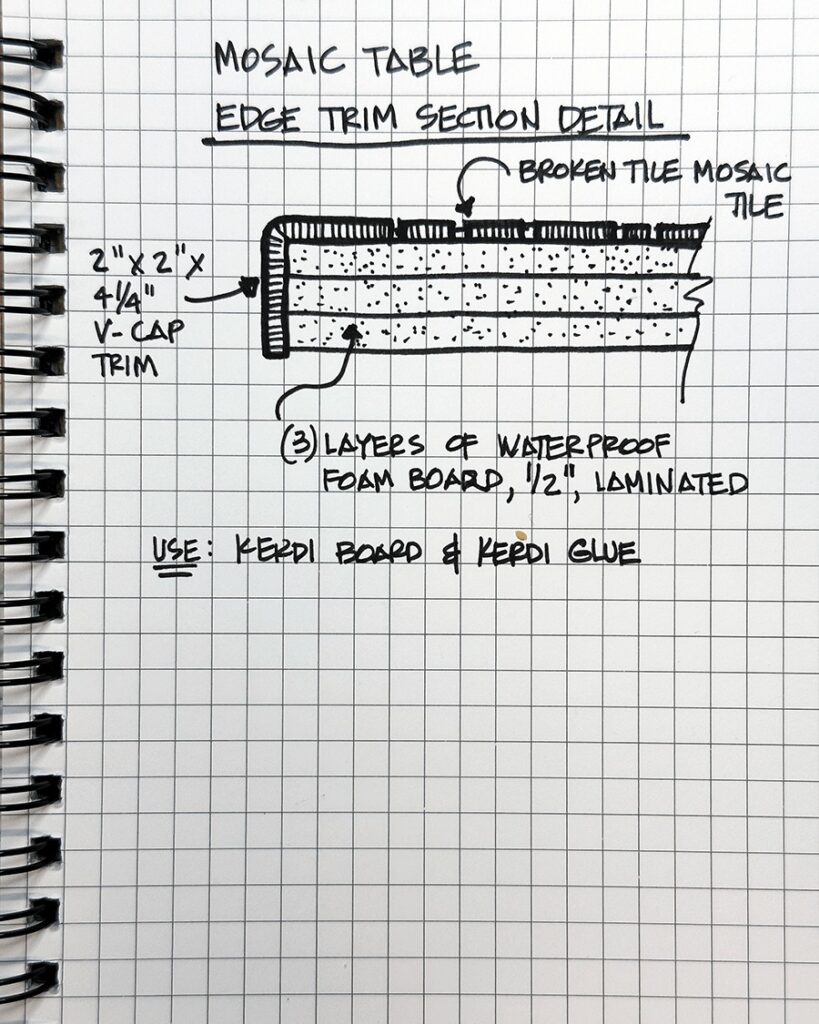
- Tabletop Substrate – Schluter KERDI-BOARD, 1/2″ thick waterproof foam board panel
- Glue – Schluter KERDI-FIX waterproof and weather resistant bonding compound
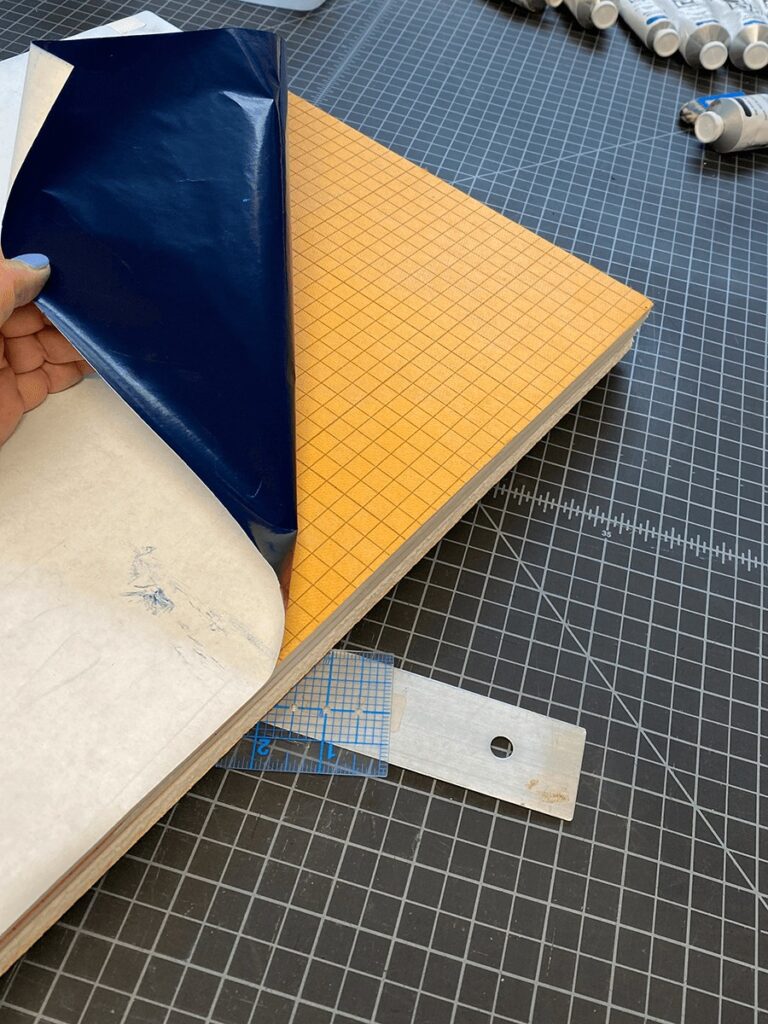
Important: this is the only type of waterproof glue that will adhere to the waterproof membrane on the KERDI-BOARD. - Transfer Paper – navy blue 26″ x 39″ waxed carbon tracing paper
- Tile – broken Mexican Talavara mosaic tile, multiple colors
- Edge Trim – 4″ wide, in black and mexican white Talavara clay v-cap
- Corner Trim – 2″ wide, mexican white Talavara corner cap
- Grout – Mapei Ultracolor FA unsanded grout, color 112, pecan
- Cylinder Base Concrete – Quikrete Countertop Mix
- Concrete Base Form – Sonotube 10″ x 4′ Removable Concrete Forming Tube
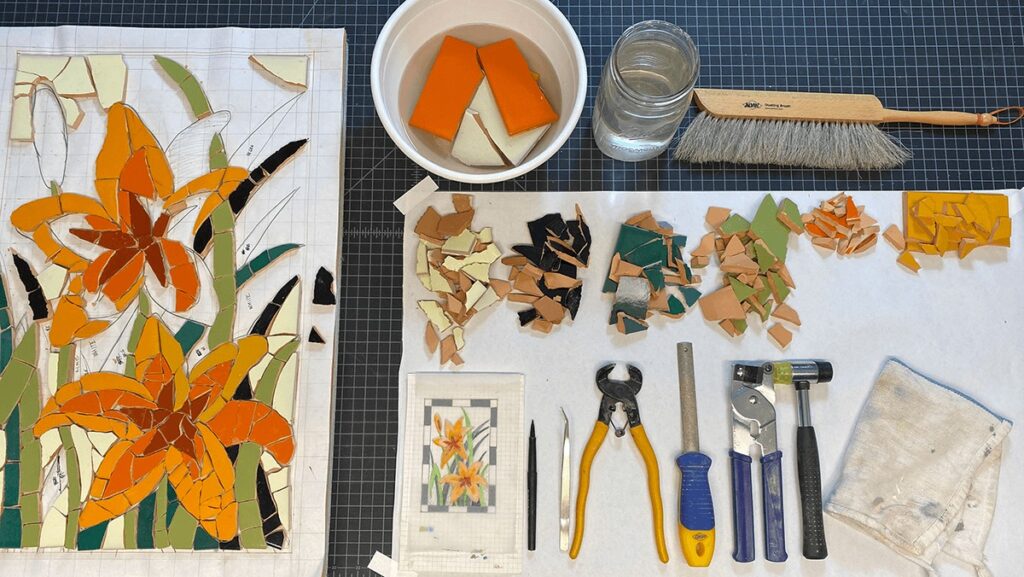
- Handy tools to have on hand –
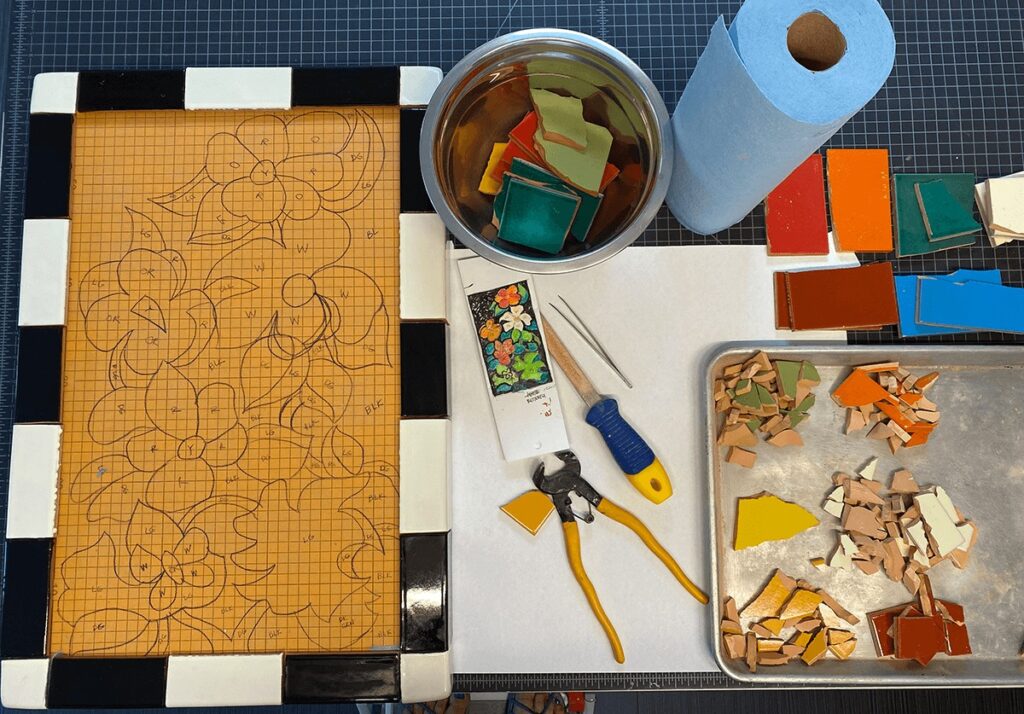
a pair of mosaic tile nippers, a hammer or mallet, a diamond grit file, a handheld tile cutter, a 6″ long sewing machine tweezers, a grout float and sponges, a paddle drill attachment for mixing concrete
Preparing the Tabletop Substrate
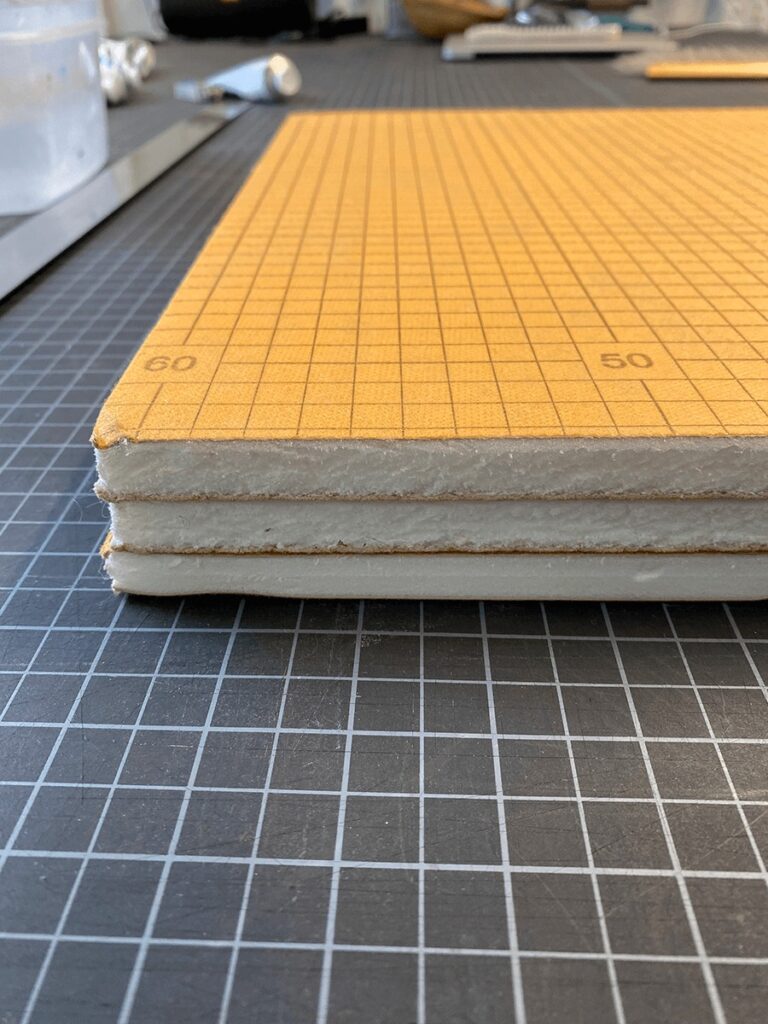
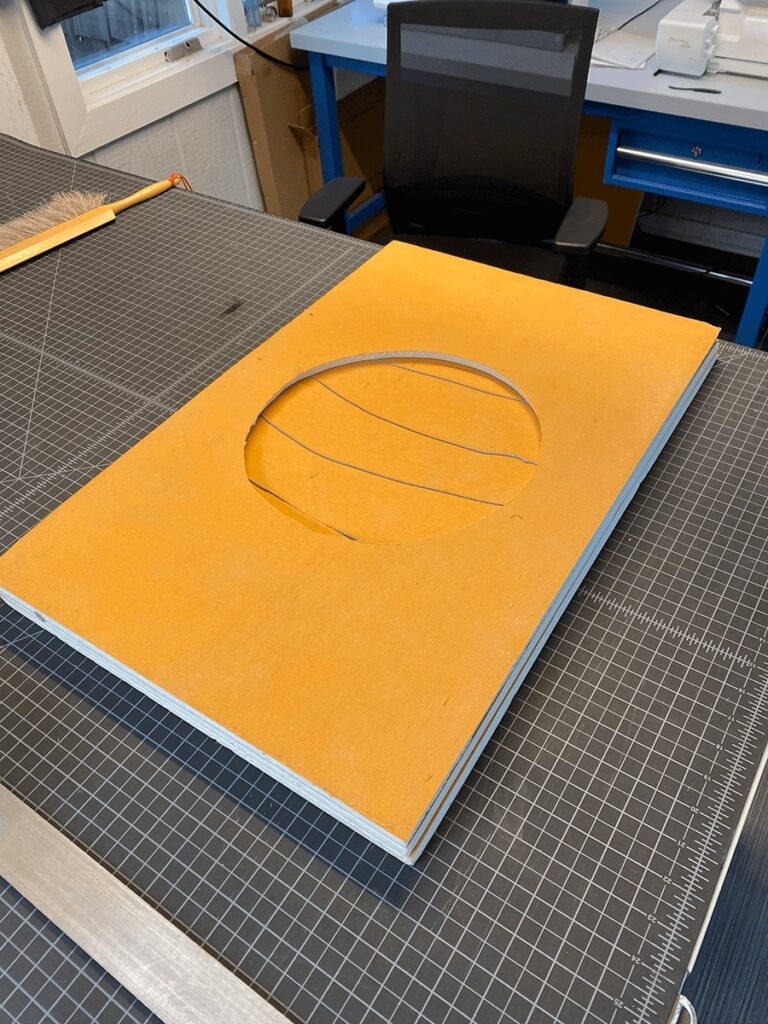
For added strength and durability, each tabletop substrate is composed of three layers of 1/2″ KERDI-BOARD. The third layer includes a 10″ diameter cutout to eventually fit the concrete cylinder base. It is really easy to make accurate cuts in KERDI-BOARD using a standard utility knife with a good sharp blade. I cut (6) 16″w x 24″ long pieces. I cut a 10″ circle from the center of two of the pieces. Using the KERDI-FIX bonding compound, and with careful alignment, I glued three pieces together. The side with the cut circle became the bottom surface of the table top.
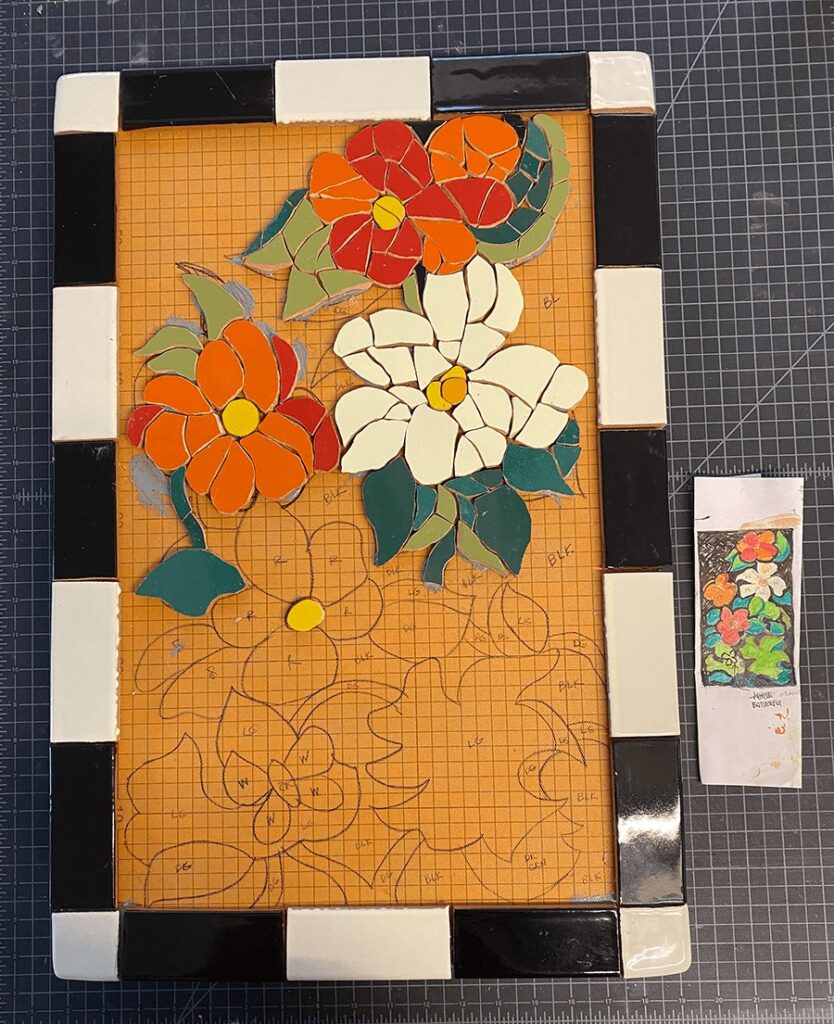
Transferring the Design to the Substrate
With anything I do, I learn and improve my methods along the way. I worked on the day lily table first. Using the grid method, I enlarged my design to fit the 16″ x 24″ tabletop, taking into account the space required for the border trim pieces. Then I cut and fit the individual pieces onto this enlarged drawing. When I had it laid out perfectly on paper, I began to transfer and glue each piece to to the substrate.
Big mistake! Not only had I added an additional, rather tedious step to an already time consuming process, the pieces weren’t fitting as perfectly on the board as they had on paper. As a result, I ended up having to do even more nipping and shaping and adjusting before gluing the tiles in place on the board.
Lesson learned. I improved my method for the mandevilla table. Using the same type of waxed carbon paper I use for sewing, I transferred the enlarged drawing directly onto the KERDI-BOARD. Then I moved along, cutting, trimming and glueing the pieces. This table progressed at a much quicker pace then the first.
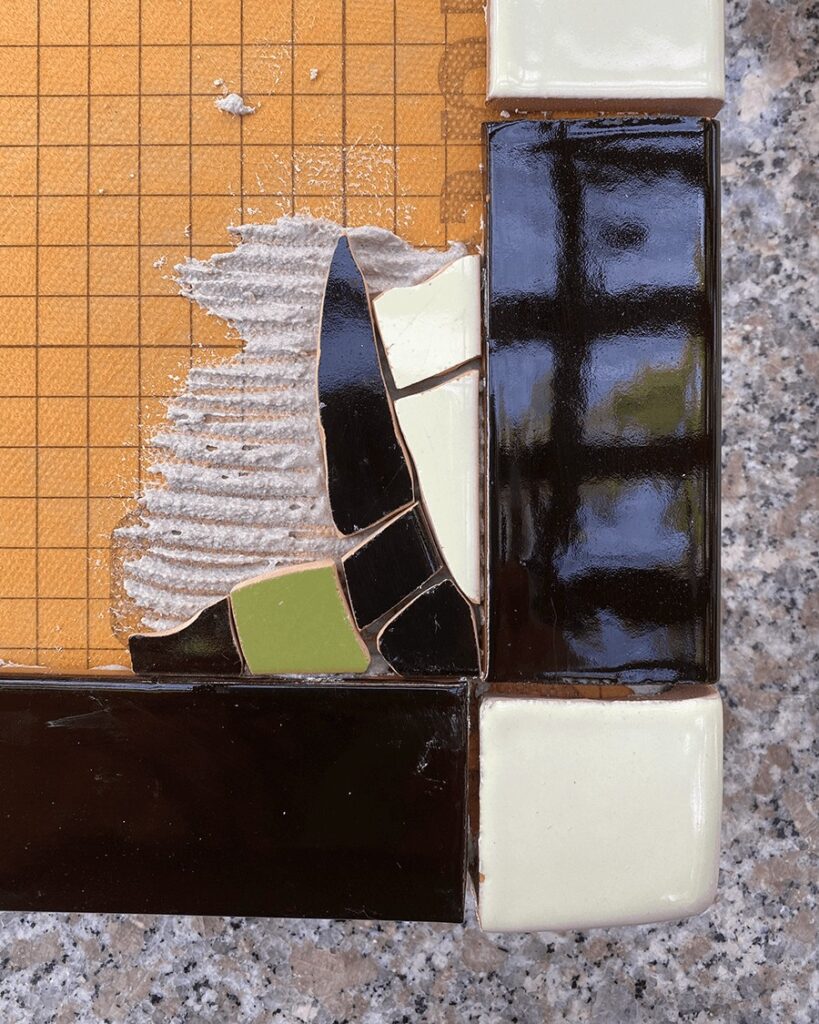
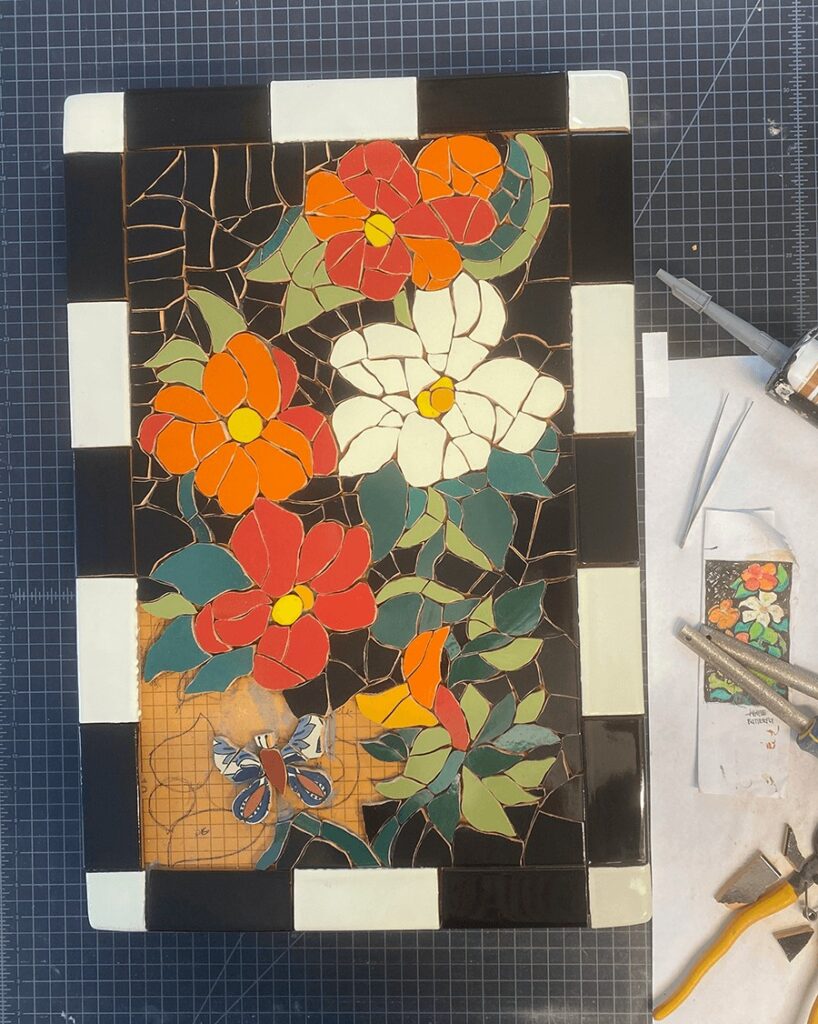
Cutting, Shaping and Glueing the Mosaic Tile
Progression. The framing trim pieces were glued on first. Once those were set and dried, I cut and placed the flower blossoms and leaves. Then I infilled with the background pieces.
This is messy, dusty work. I started off working inside, but quickly realized the fine red terra cotta dust was settling everywhere. I saved myself a lot of cleaning by working outside.
IMPORTANT TIP: Little bits go flying about when cutting, nipping and filing glazed terra cotta tiles. I always wore safety glasses when I was working with the tiles. Even so, I could feel tiny shards hitting my face now and then. It would be just awful to catch one of those in the eye. If you decide to do this kind of work, wear some eye protection.
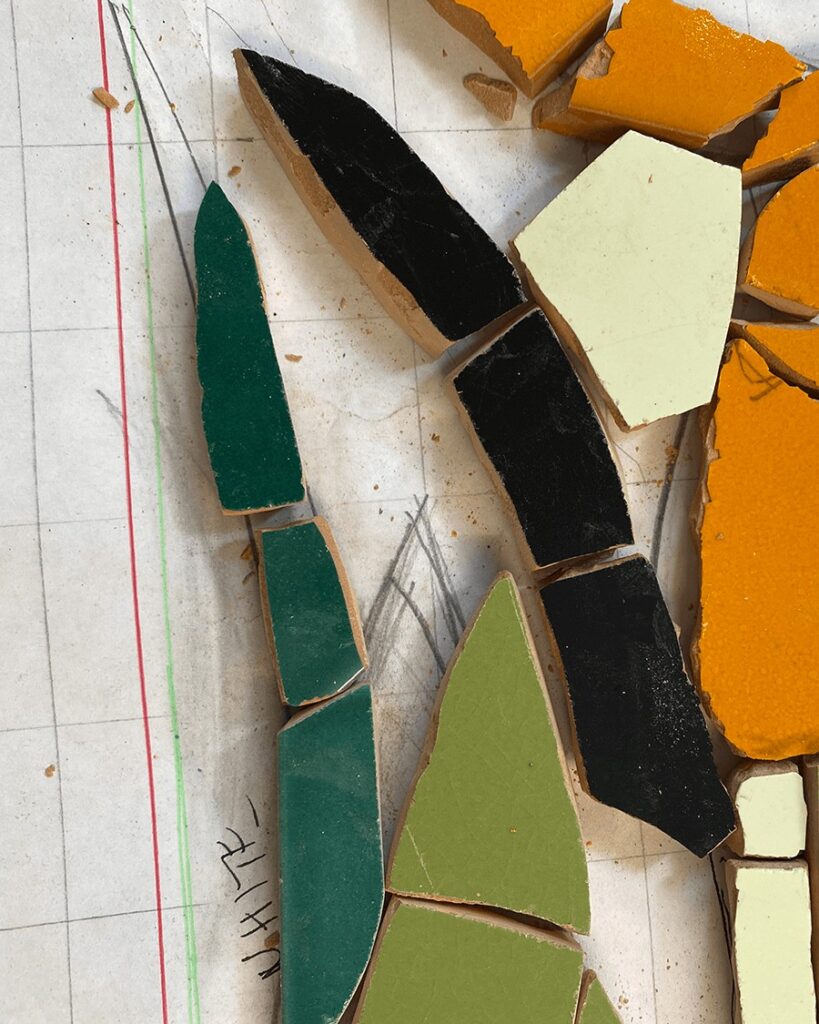
I’d begin by soaking the broken tile pieces in water. I found the wet tile behaved differently and I was able to more easily crack, nip and file the pieces into the shapes I needed. I would use the hammer and tile cutter to break down tile to smaller sizes. Then I’d nip, file the edges smooth to shape each piece exactly right. I noticed the darker color glazes cut and filed easier than others. For example, the lime green and bright orange glazes were extra brittle as compared to the black or dark green.
Once I was satisfied with the shape of a piece I’d glue it in. When I finished the gluing on both tabletops, it was time to grout.
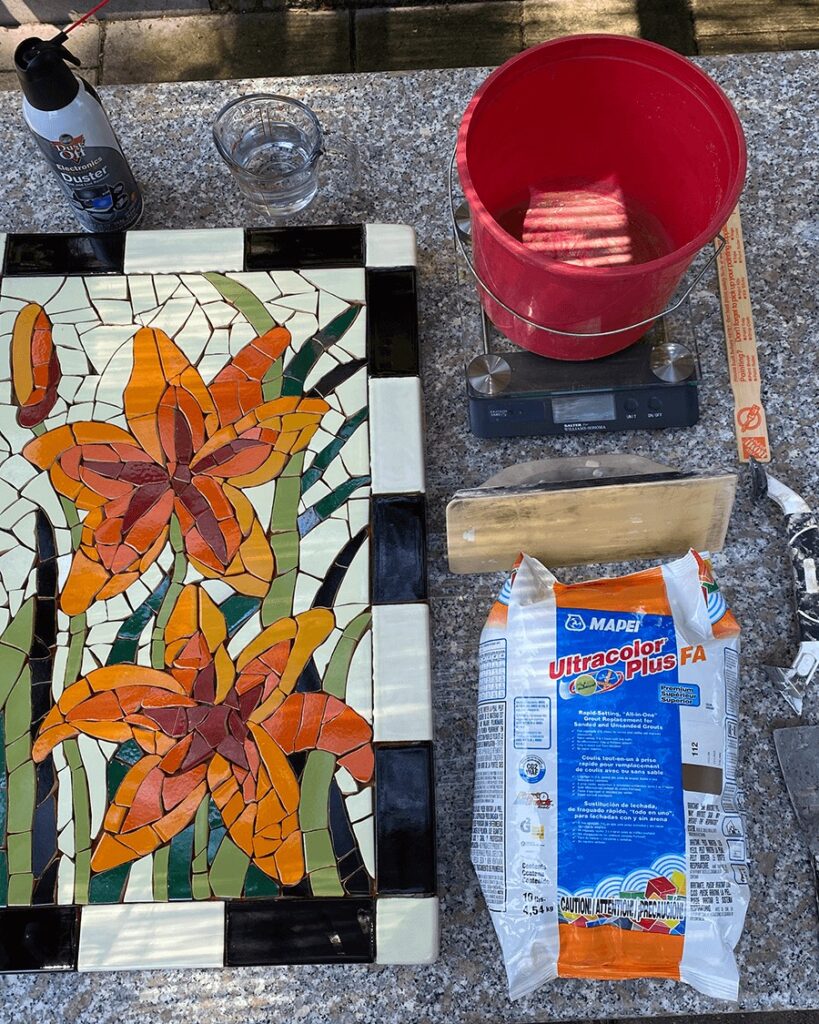
Grouting
Using a hand vac and compressed air spray, I cleaned away every bit of dust and debris accumulated in spaces between the mosaic tiles. This is also the time to check and make sure every tile is glued in securely.
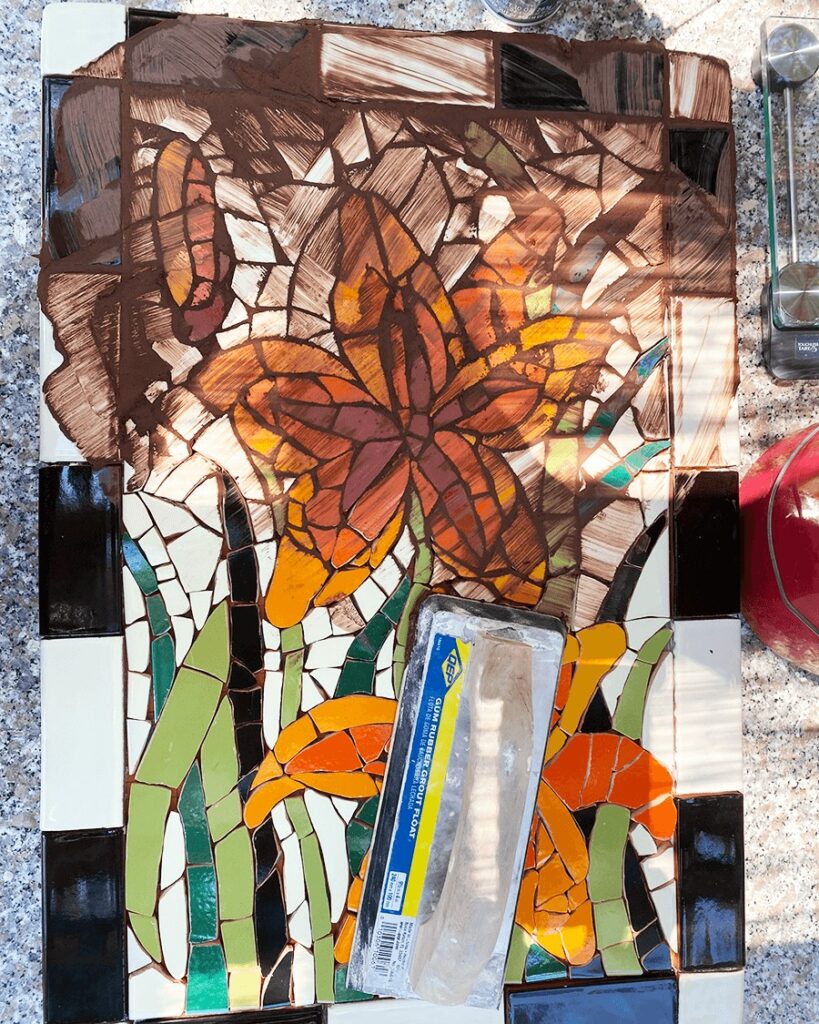
I chose unsanded grout to garner the best result. A sanded grout doesn’t work well within tiny joints found in mosaic work. Sanded grout can also damage the glazed surfaces. After mixing up the grout per the instructions on the package, I used a float to move the grout across the tabletop at a 45° angle. Then, I made sure to squish and squoosh grout into every nook and cranny. Once satisfied with the coverage, I let the grout dry for 20 minutes. Next, using a clean moist grout sponge, I wiped the excess grout from the mosaic surface, being careful not to disturb the grout resting in the joints. When dry, I used cheesecloth to buff off the little bit of grout haze that remained.
TIP: Keep multiple buckets of clean rinse water on hand. When wiping excess grout from the mosaic surface, make sure to change your rinse water very frequently to get your sponge as clean as possible.
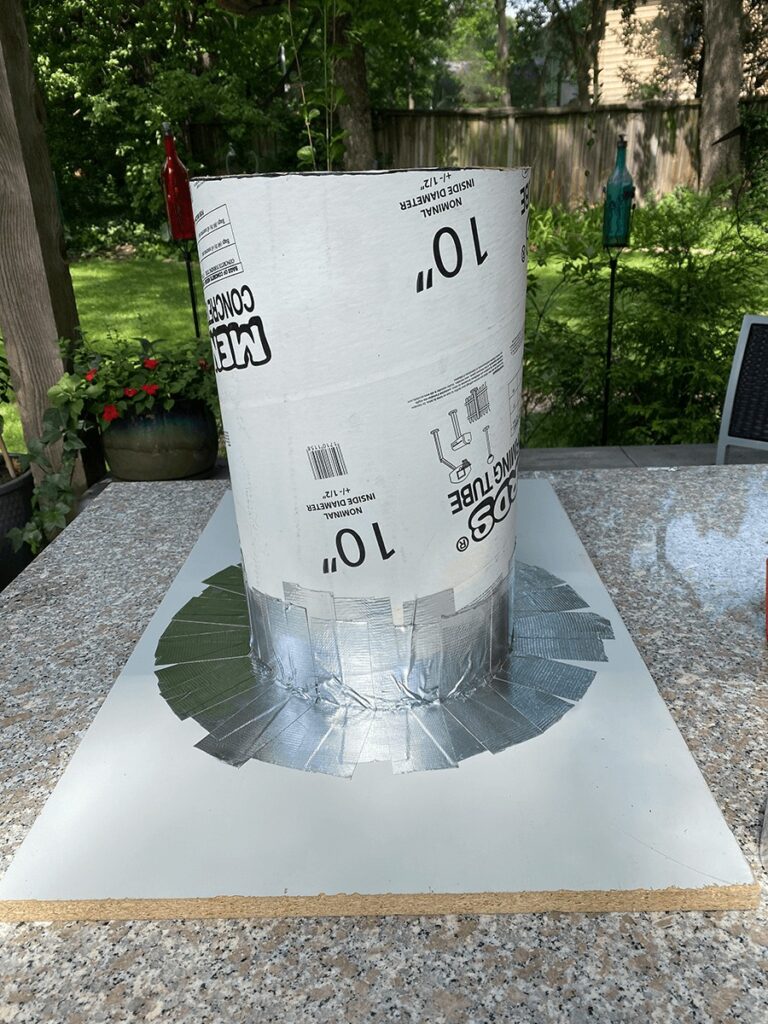
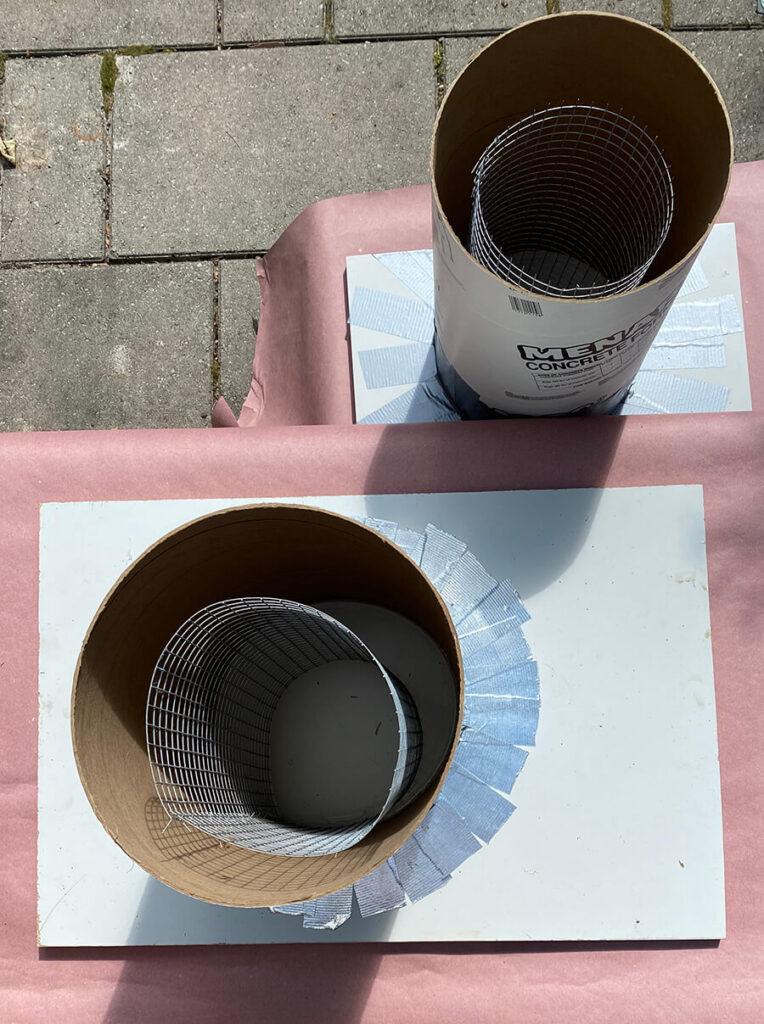
Making the Bases
Prepping the forms: We had a couple scraps of plastic laminated particle board to use for the base of the concrete form. After cutting the form to the right height, I taped the tube to the board with a LOT of duct tape. I didn’t want any concrete leaking out. I added a tube of chicken wire to the center for added reinforcement.
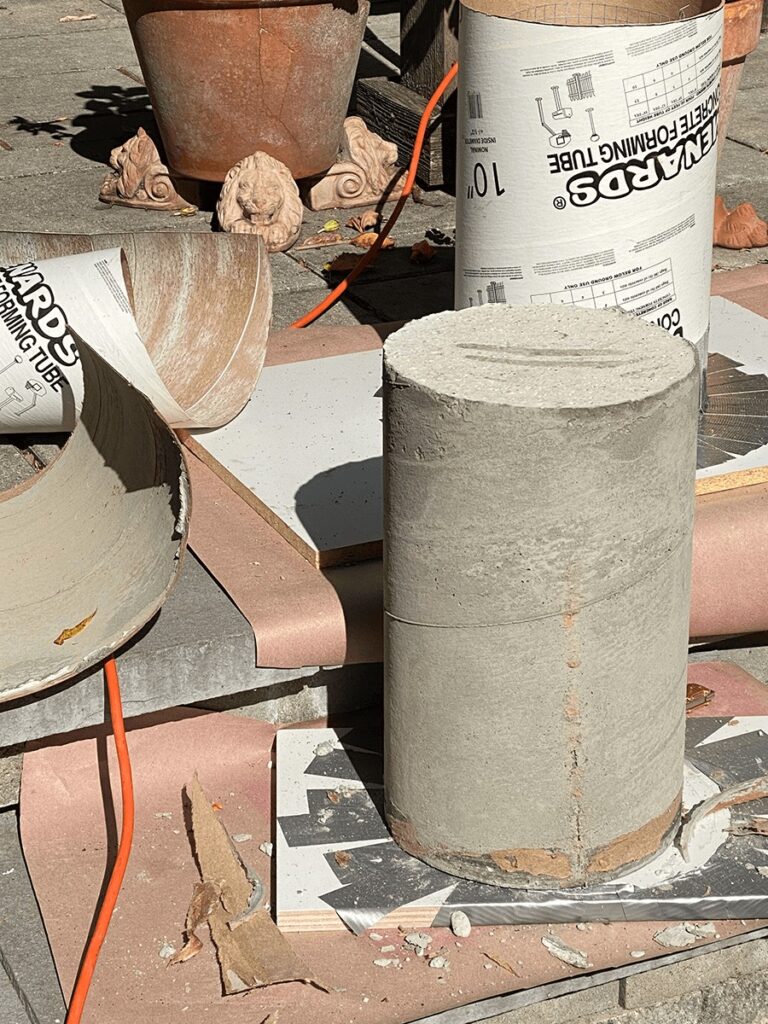
The concrete: Brian helped me with this part because mixing concrete in a bucket with a drill and paddle is a pain in the butt. You have to get the consistency right. Filling the two forms to the brim required a little bit more than three bags of Quikrete.
We let the bases cure within the forms for a couple of days before peeling off the paper. I had planned to stain these bases black, but the raw concrete really blends well with our patio pavers as is.
End Results
I just LOVE our mosaic tile patio tables. ❤️
This was one of those happy makeling instances where the end result surpassed all expectations.
I didn’t actually execute a pure broken tile mosaic technique, as I purposefully cut and shaped most of the pieces. Pictorial mosaic takes time. Abstract designs are easier and quicker. Hence, the upcoming corner table will be more Gaudi-esque to sustainably use up all the leftover bits and pieces.
Nevertheless, I’m so happy Brian worked together with me on the design and construction of these mosaic tables. Though utilitarian in purpose, they will always be a reflection of our garden, a reminder of our travels, and an expression of our life together.

Leave a Reply