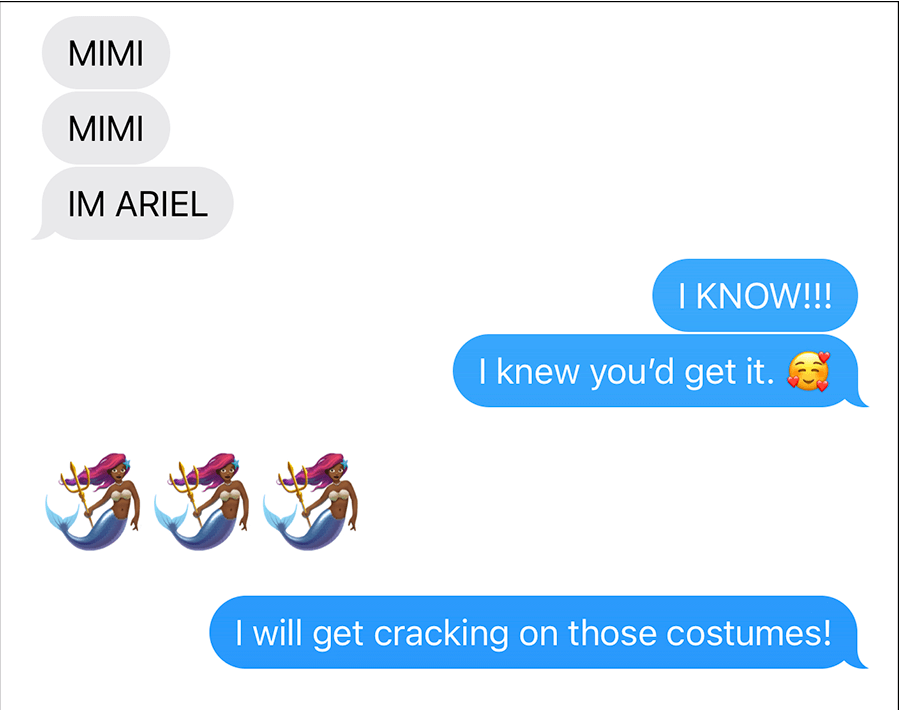
My granddaughter Felicity has always been a little mermaid obsessed. When Disney released the live-action version of The Little Mermaid, she was captivated. This new, contemporary Ariel was a character Felicity definitely related to. When she auditioned for her local youth theater production of The Little Mermaid Jr., we kept our fingers crossed, as she so badly wanted that Ariel role. It was just thrilling when I received the “I’m Ariel” text (the grandkids call me “Mimi”) I was so happy for our Felicity!
A Little Background
In the past, I always enjoyed making Halloween costumes for my kids. I now find special pleasure in working with my grandkids to make their costume dreams come true.
With Felicity active in youth theater, I sometimes get to work on stage costumes that can have some distinct challenges. The role of Ariel required two costumes: an under-the-sea fishtail for mermaid-Ariel, and an above-the-sea dress for human-Ariel.
These little mermaid costumes also needed to facilitate several off-stage quick changes, as Ariel transforms from mermaid to human and back again several times during the production. You can read about the making of the fishtail costume (and see Felicity sing Part of Your World 😁) in my post titled A Sparkly Under-the-Sea Costume for a Beautiful Little Mermaid
Costume Design Decisions
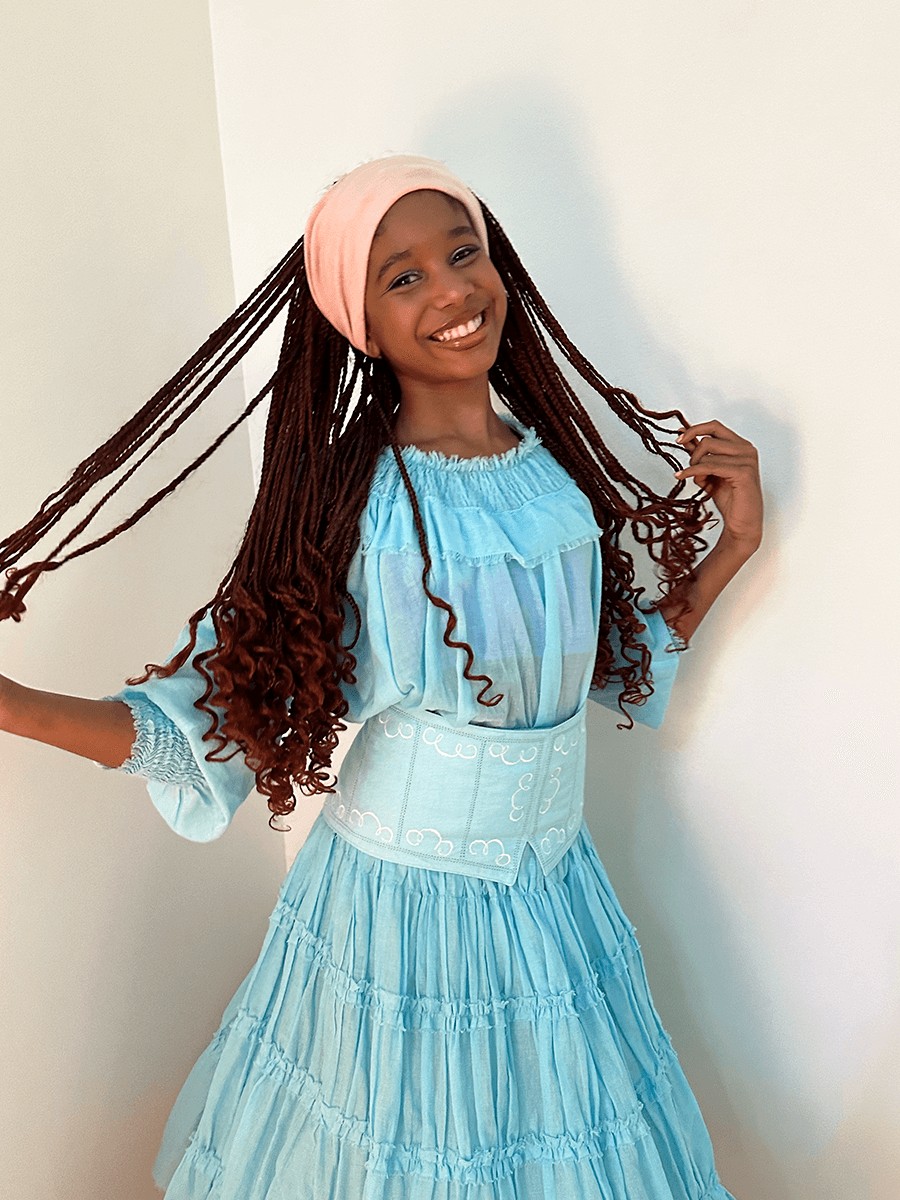
Felicity wanted her on stage persona to be more in keeping with her favorite 2023 live-action Ariel, versus the 1980’s animated little mermaid most are familiar with. As a first step to achieving the desired look, Felicity had her long hair done up in auburn-toned box braids, thus avoiding wearing a wig that could be hot and uncomfortable on stage.
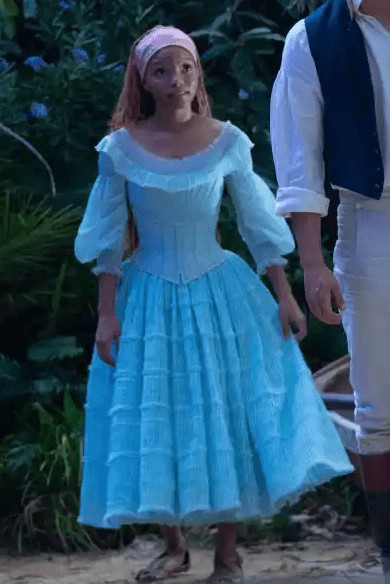
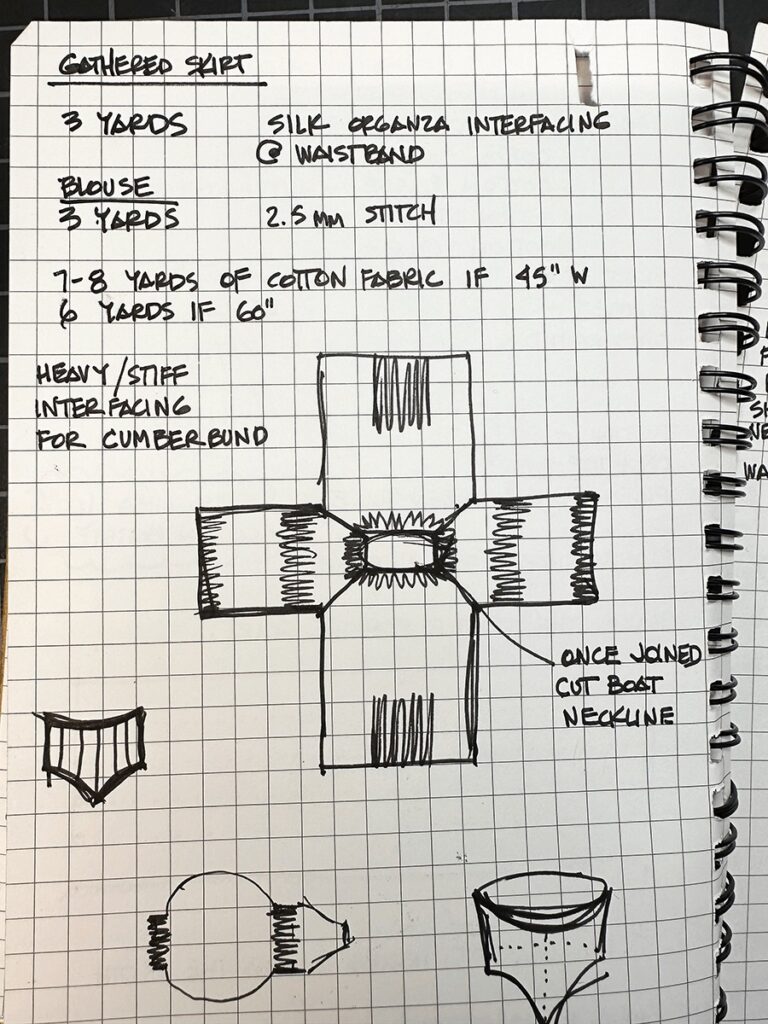
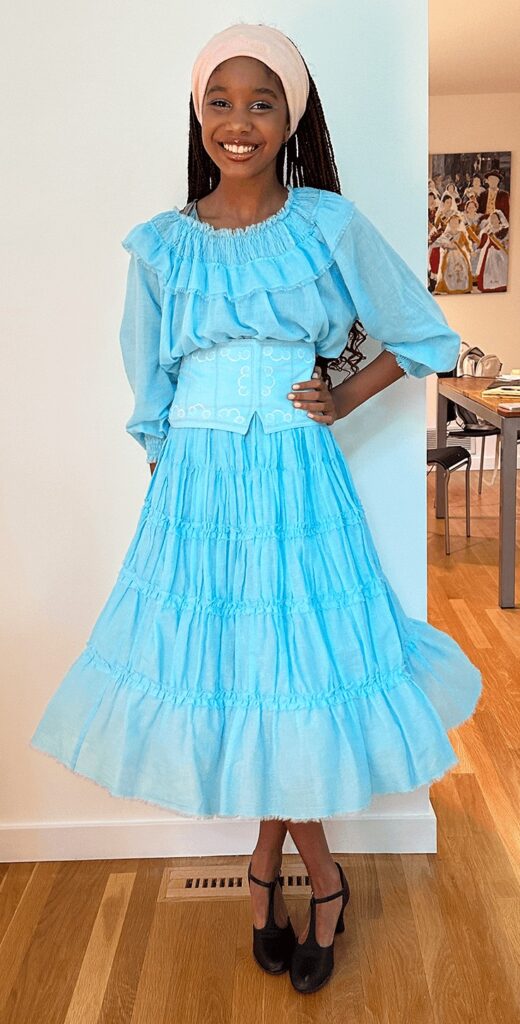
Felicity definitely wanted her above-the-sea look to mimic the lovely blue cotton dress she’d seen in the live-action movie. After doing a little research on the dress and reading about the costume designer’s intent, I decided I could accomplish the look by making a 3-piece ensemble: a loose blouse, a gathered skirt, and an embroidered cumberbund.
Upon further research – reading every article and looking at every photo I could find – I could see this dress is quite a complex creation. The costume designer used some hand smocking, pleating and embroidery techniques to create her “18th century meets the Caribbean” dress. But I figured I could probably mimic these techniques on my machine – well enough, anyway, to get the idea across on stage.

Fabric Choice
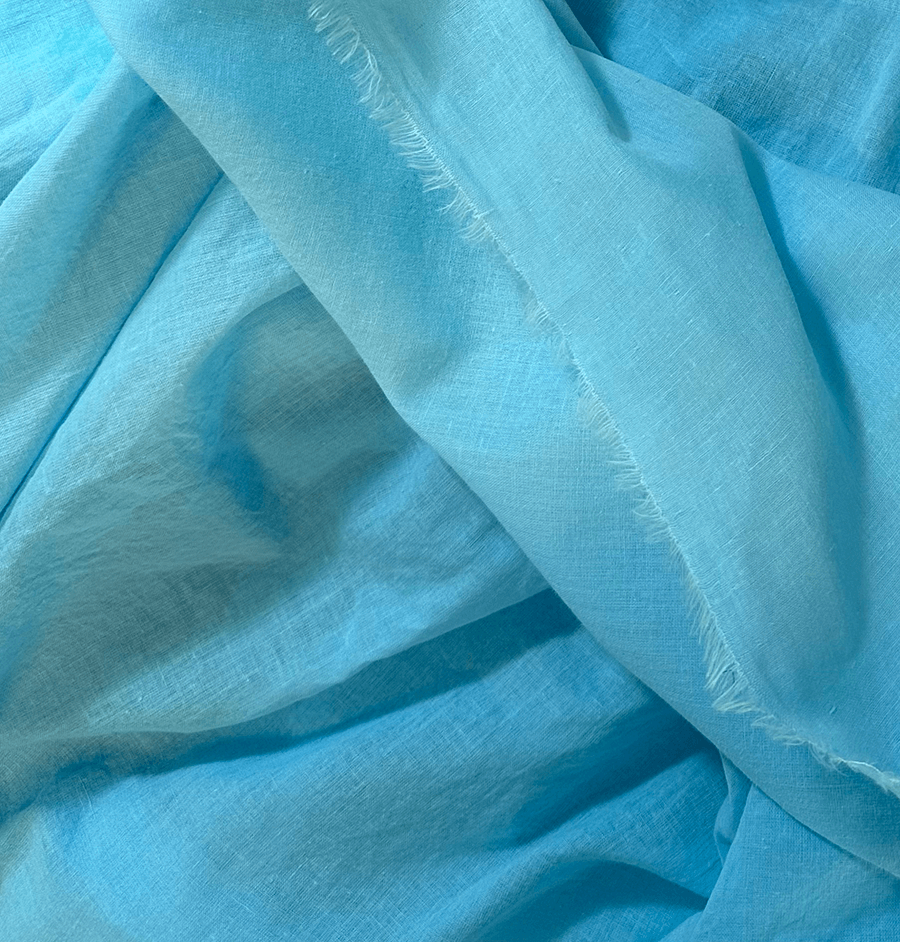
At first I tried to find blue cotton organdy to match the fabric used for the movie dress. No luck on that front. Figuring that they must have custom dyed the fabric, I switch gears and ordered this aqua blue 100% cotton voile fabric from an Etsy seller.
I was so pleased when the voile yardage arrived. The shade of blue was spot on.Voile is the French word for veil, and true to its name, the fabric is soft and airy, but stable in weave – perfect for all the smocking, shirring, ruching and fraying required. After washing and pressing the yardage, it was finally time to start making. Yay!
The Skirt
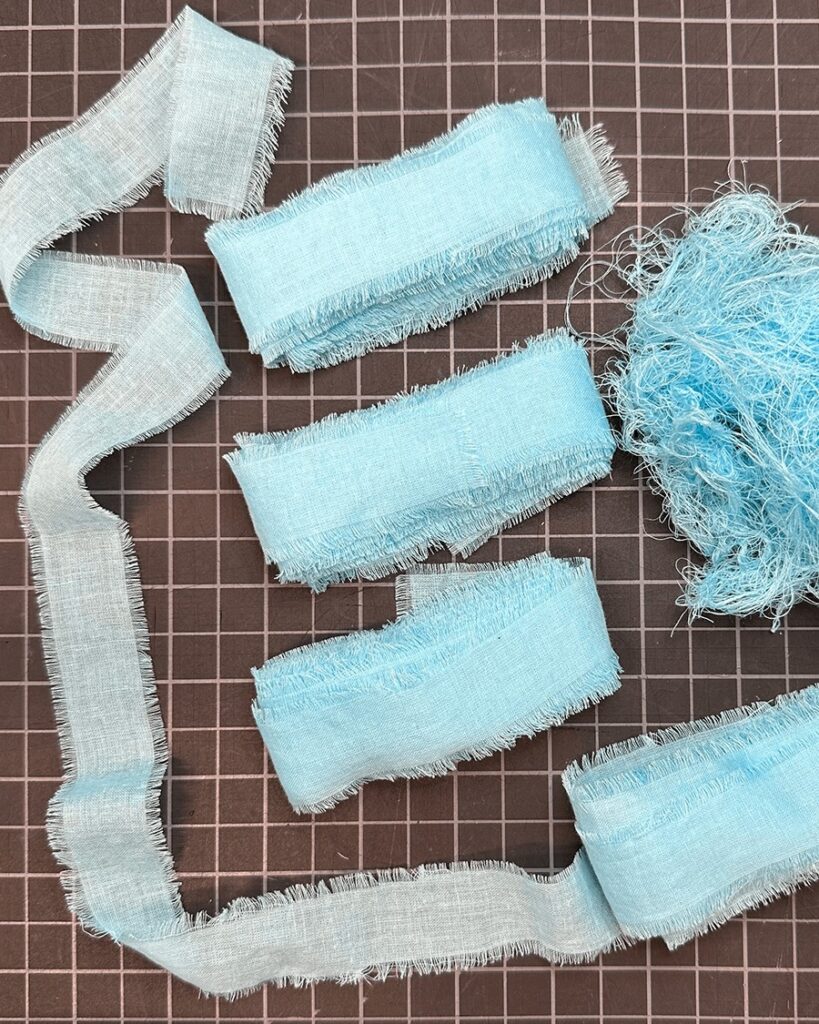
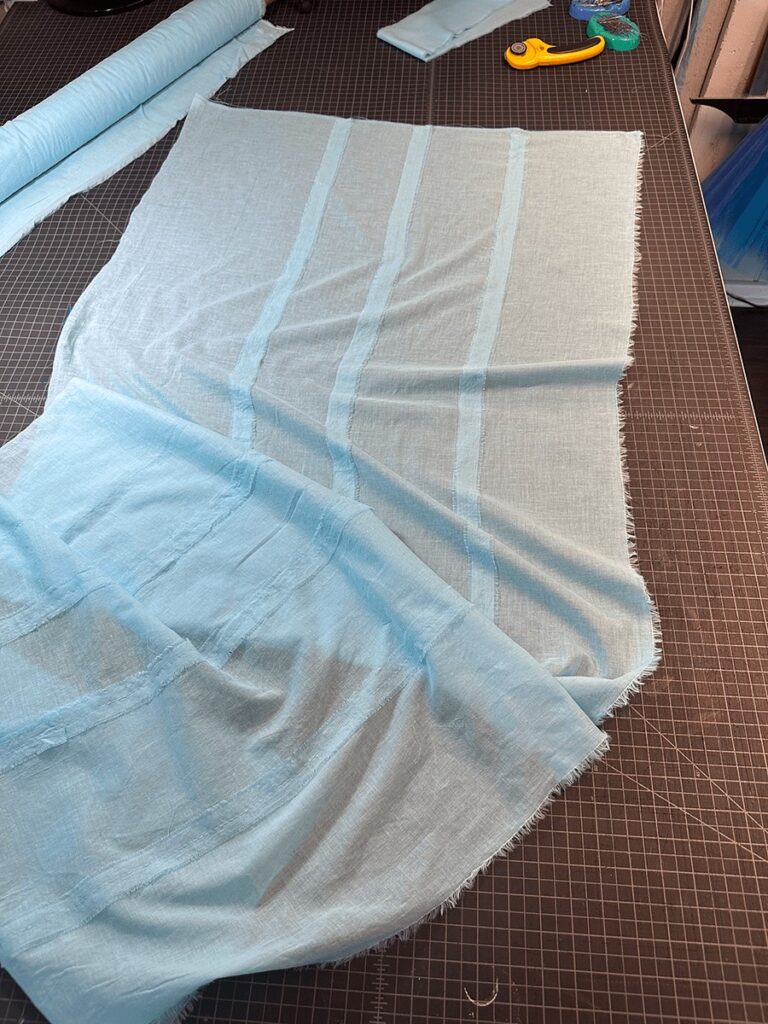
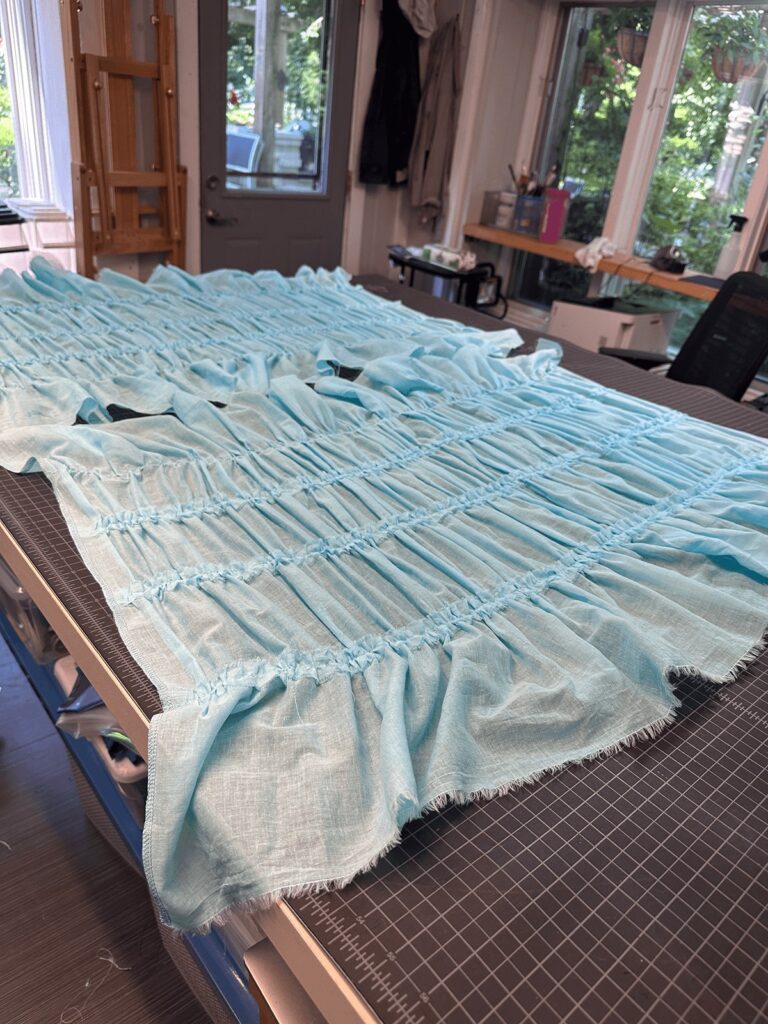
I began by cutting (2) 2-yard wide panels to be the skirt front and back. The fabric came with frayed selvedge edges, so one selvedge became the finished hemline. Next, I cut 16 yards of 1.5″ wide voile strip to make the ribbons, which I hand-frayed along the both edges. All of the fraying this costume required was tedious – one of those mindless tasks I accomplished while watching Pride and Prejudice for the umpteenth time 🙂
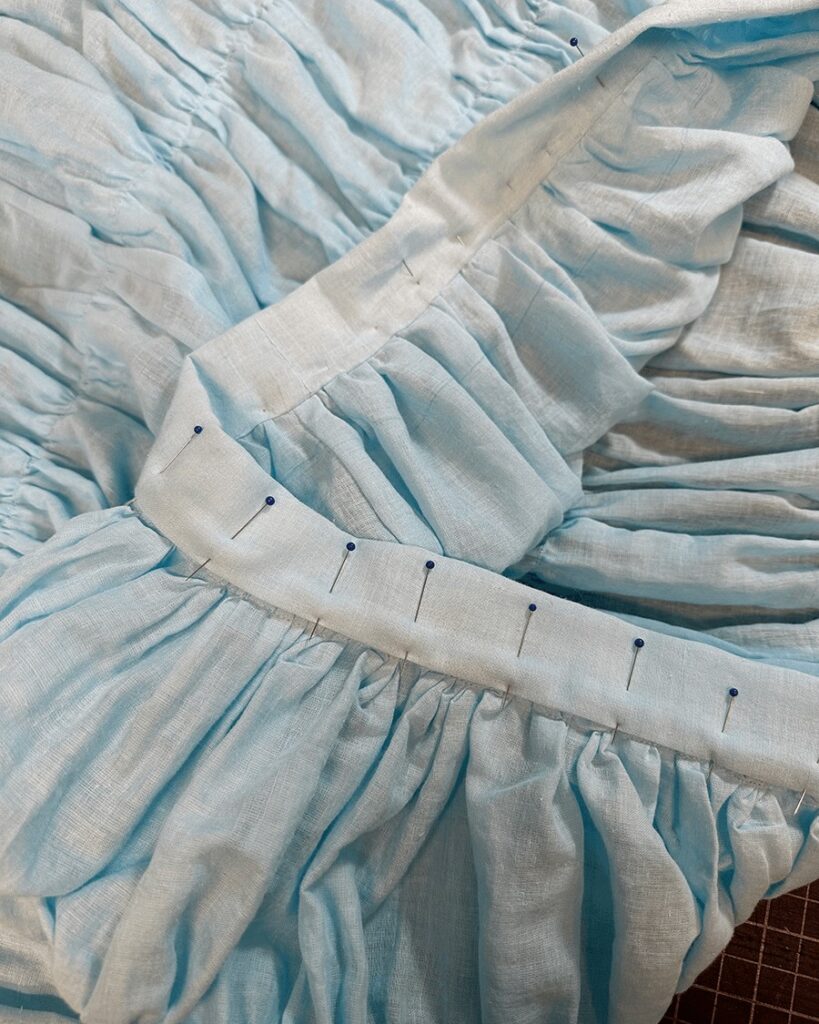
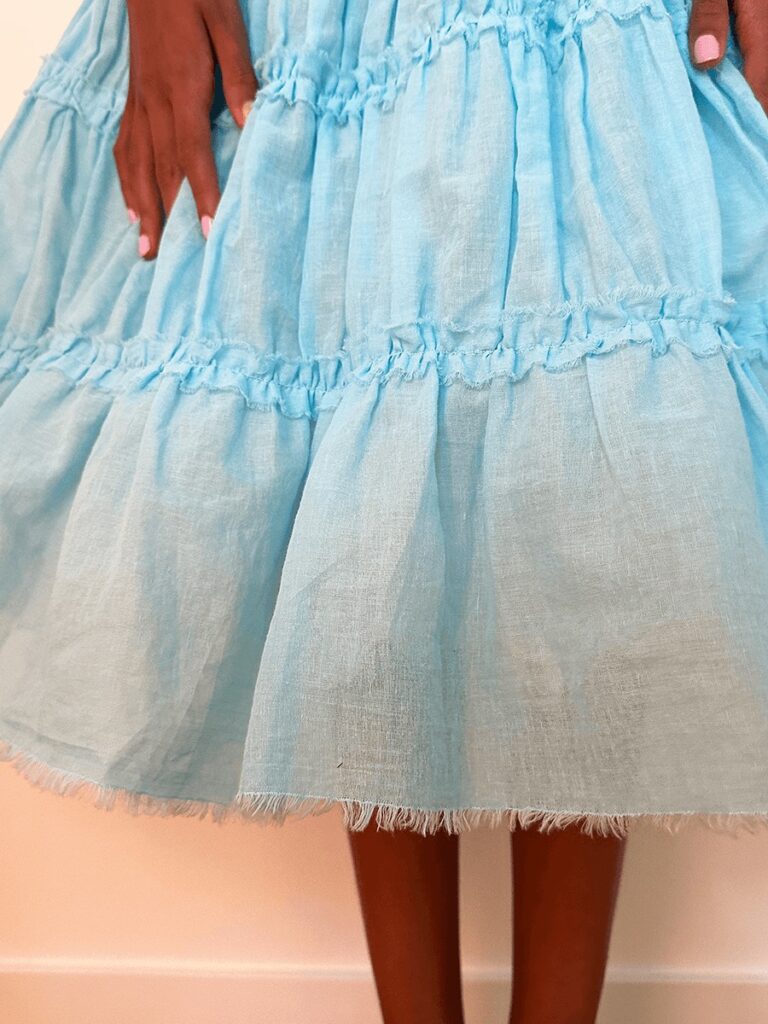
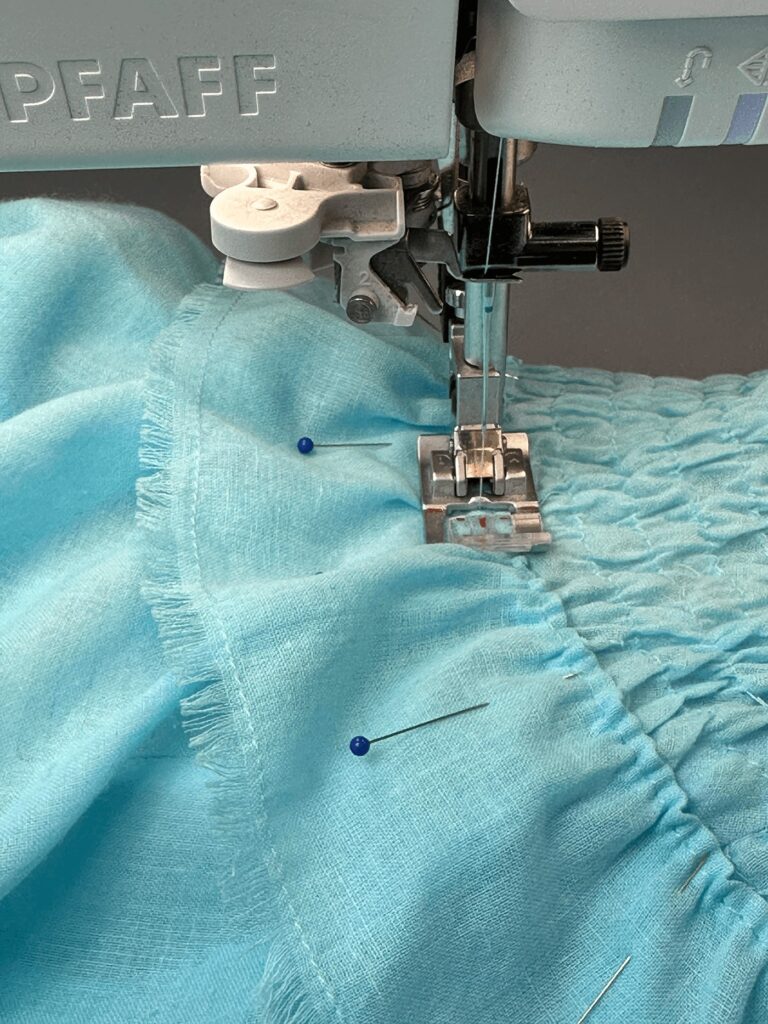
I sewed the frayed ribbon flat onto the skirt panels with a loose gather stitch. Once gathered, I stitched the ruching in place to create a textile to imitate the hand pleating on the skirt. After joining the panels, I finished the skirt with a simple casing and elastic waistband. There was a lot of fabric in this skirt, and it looked fulller on with the addition of a crinoline slip.
The Blouse
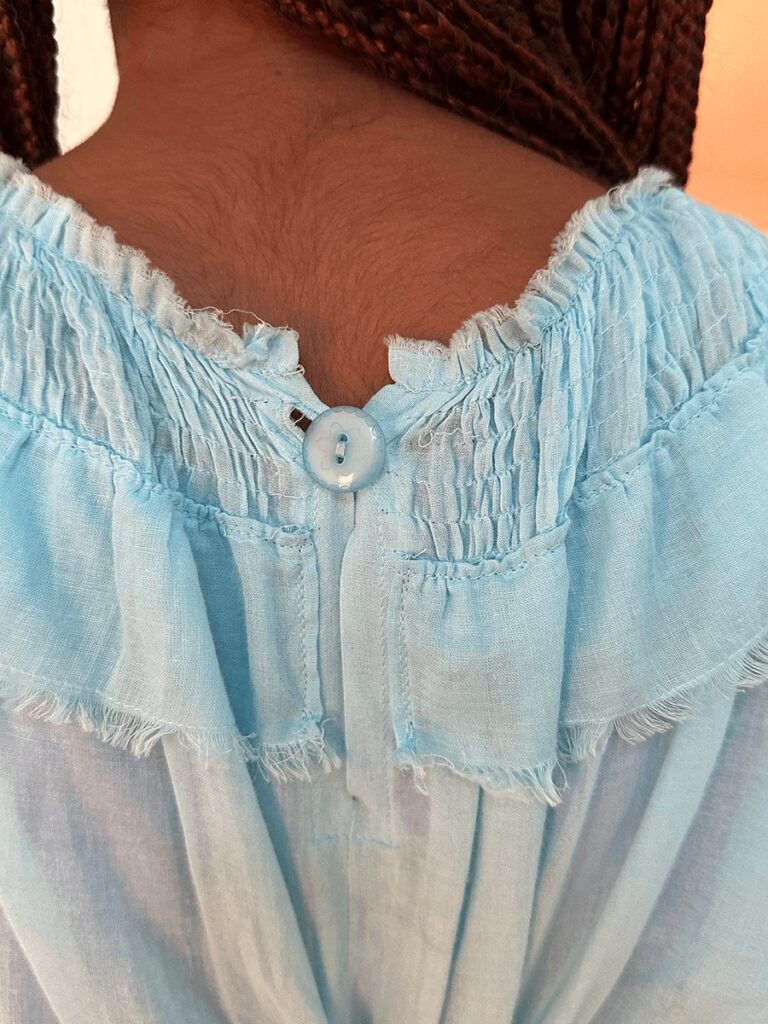
For the blouse, I cut an oversized peasant style blouse with raglan balloon sleeves. I added a single button placket opening to the back because at this point I wasn’t sure if the blouse would slip easily over the head once smocked. This turned out to be a superfluous detail.
Every piece was sewn at the neckline area with six rows of loose gathering stitching, .25″ apart. Once pulled into position, the gathered rows were stitched down to secure the smocking effect in place. These edges were also hand-frayed.
I cut a 4″ x 57″ wide strip of voile to make the distinctive gathered ruffle around the shoulders. One edge was stay stitched and frayed, the other edge was finished with a tiny folded hem. I gathered the ruffle along the folded edge, fitting it along the bottom of the smocking all the way around the blouse (so much gathering, I know!) and sewed it in place.
Using elastic thread in the bobbin, I shirred the cuffs with 9 rows of stitching, and frayed the cuff hem. I was really nervous about shirring. This was the first time I ever shirred anything, and I wasn’t sure how my machine would perform. I watched a few shirring videos, and did a couple mock ups before attempting the cuffs. I was surprised by how easy it was. This will be a fun technique to use in the future 😁


The Cumberbund
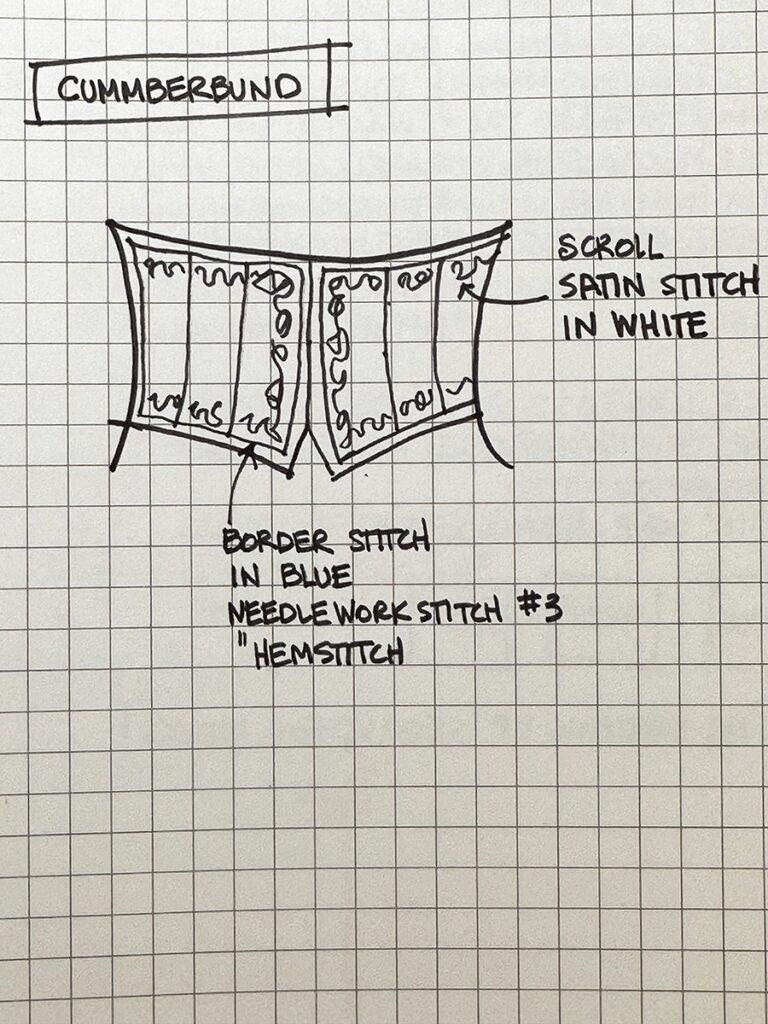
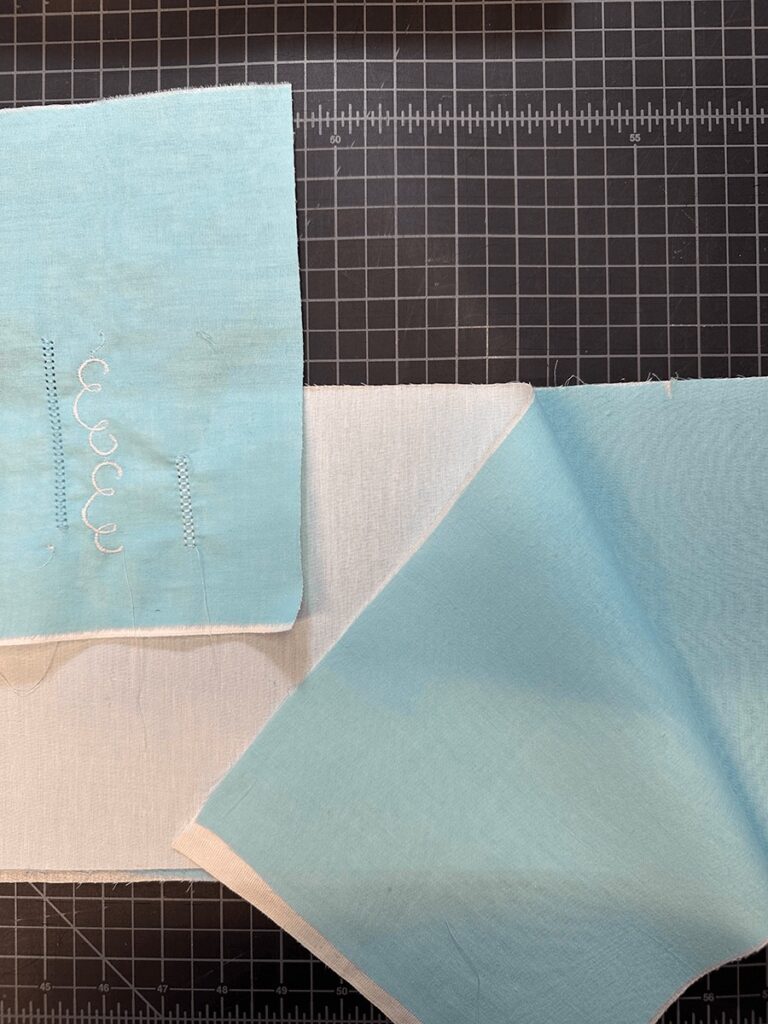
To make the cumberbund, I drafted a shape to fit Felicity’s tiny 22″ waist, dividing it into sections to indicate the machine embroidery lines and borders. I then backed some voile with a medium weight woven cotton iron-on interfacing to cut (1) cumberbund piece and (1) lining piece on the fold.
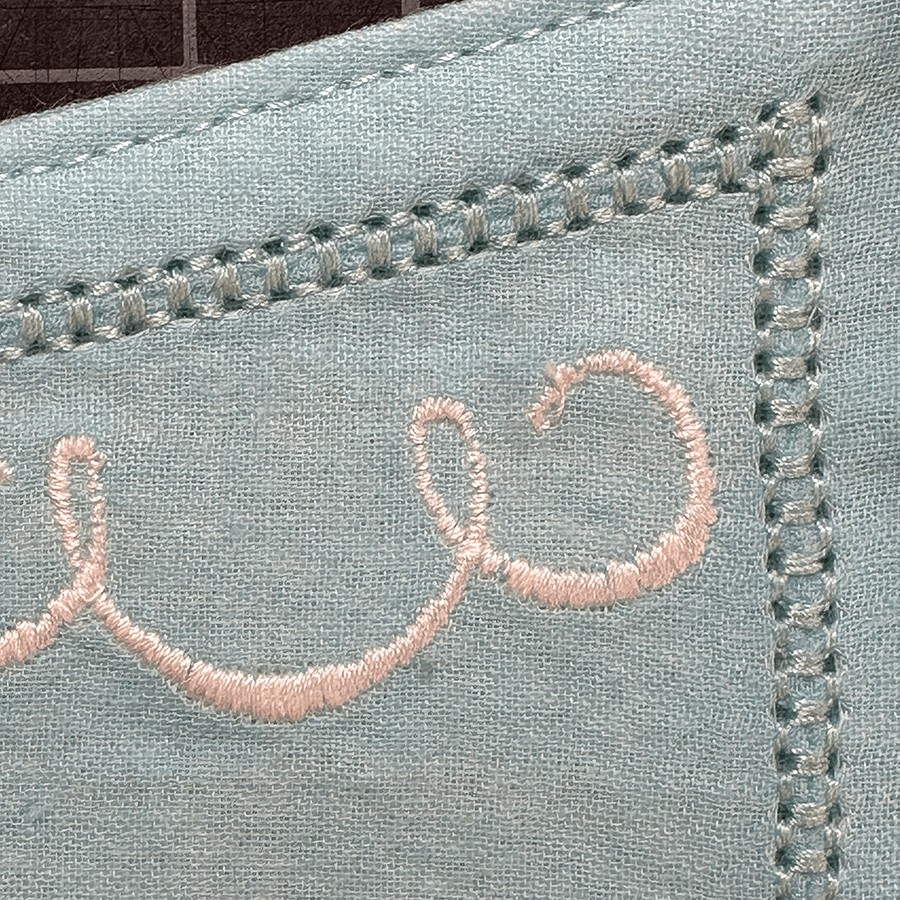
I like to hand embroider, and I’m not one to use the machine embroidery features on my Pfaff Performance Icon. But for this purpose and timeframe, I decided to give machine embroidery a shot. Using white wax transfer paper, I marked the embroidery guidelines on the face of the cumberbund, then stitched the following machine embroidery stitches to imitate the embroidery on the movie dress:
Borderstitch:
3. Needleart> 3.2 Needlework Stitch #3 Hemstitch with wing needle and blue 30wt cotton all purpose thread
Scrollwork:
4. Satin > 4.1 Scallop Edges #22 with a 70 universal needle, white 30wt cotton thread and Sulky Tear-Easy stabilizer.
I then added four twill tape channels to the lining piece to accommodate some metal boning at the sides and front, to ensure the cumberbund kept a nice upright shape. After joining the embroidered face to the lining, I turned and edgestitched the entire thing. The cumberbund attaches in the back with a single giant snap, to make it easy for the quick change.


The Performance
The three pieces were prepped and kept in the wings with the crinoline slip positioned on the floor inside the skirt. For the quick change, Felicity would slip the stretchy mermaid tail off, pull the blouse on over the mermaid crop top then pull the skirt and slip on as one. The cumberbund went on in a snap (literally). 8 seconds total – whew!
Ariel’s on-land costume was a Makeling challenge, but both Felicity and I were happy with the end result. I have so much fun working together with her to figure out and make these costumes.
And I have such a great time going to see her youth theater productions. These kids are all having so much fun on stage – the whole theater just radiates joy! 🤗❤️


Yay