This is the last installment of a four part series on making a Ukrainian vyshyvanka blouse.

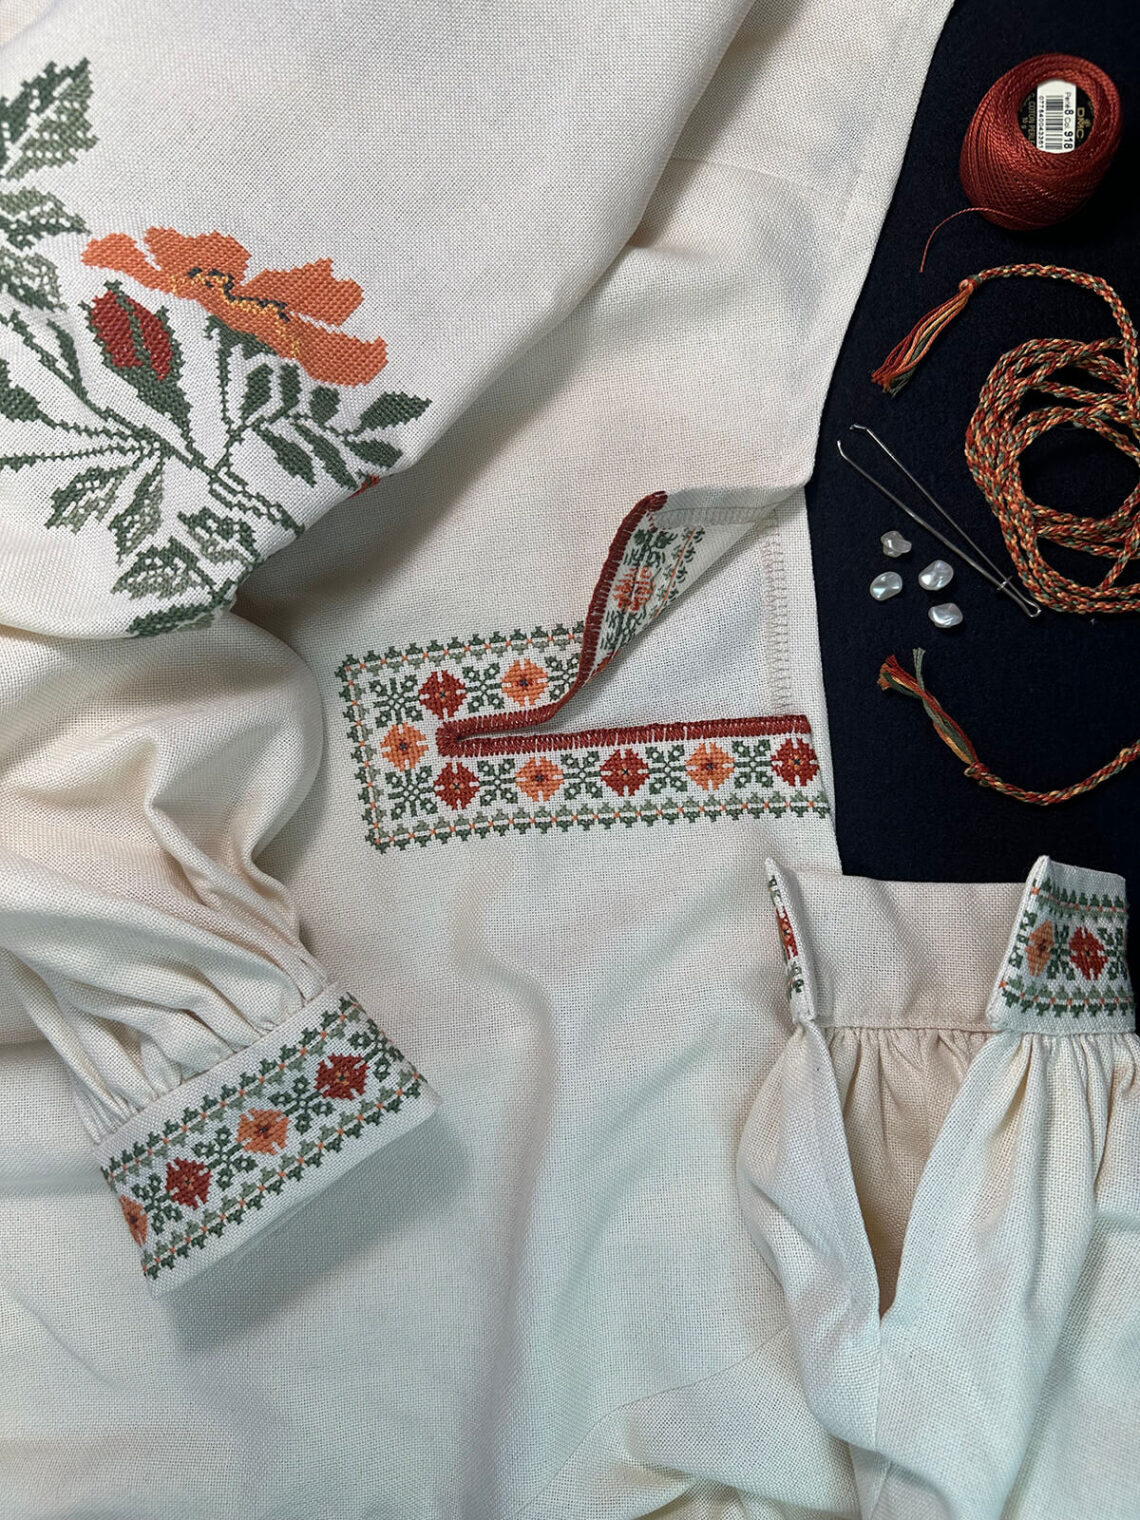
It seems the hours I spent pondering color selection, embroidery motifs and blouse design paid off. I am very happy with how my Ukrainian vyshyvanka is progressing.
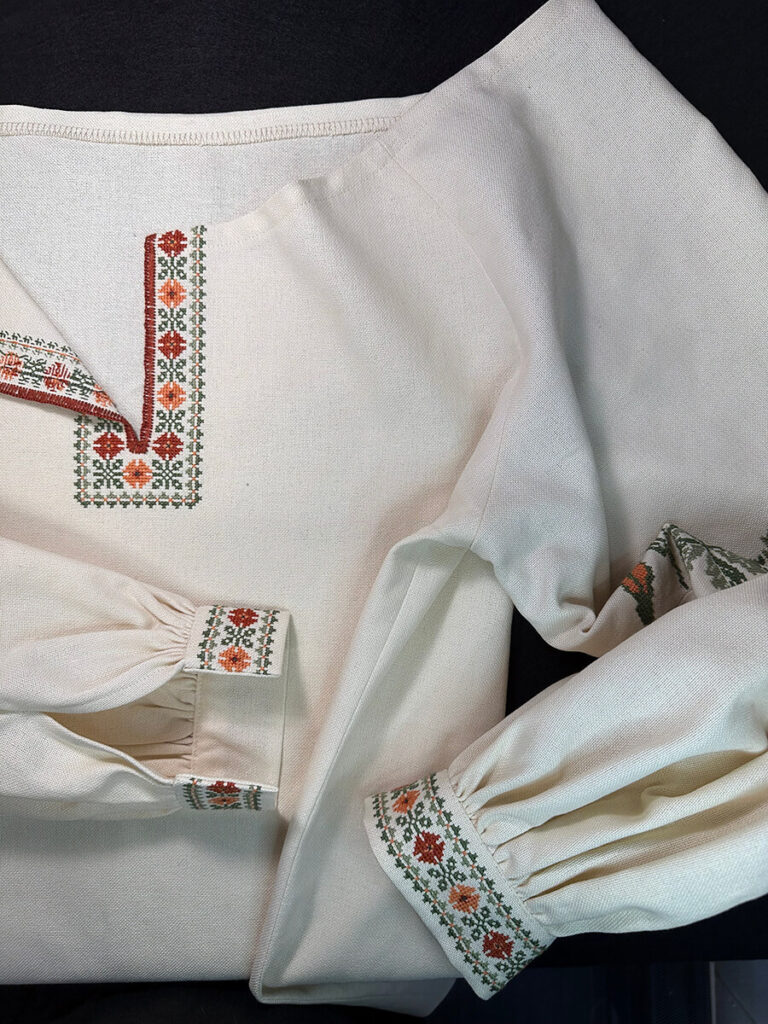
I did make one edit to my original design. Once embroidered, organic poppy motif on the sleeves turned out wider than I had envisioned. As a result I decided to forego adding the stylized borders on the sleeve bands. The motif is beautiful on its own and the borders are unnecessary.
Now that I have the cross stitch embroidery completed, it’s time to assemble the parts and pieces into a full fledged vyshyvanka blouse and add all of the finishing touches.
The Neck Opening Finish
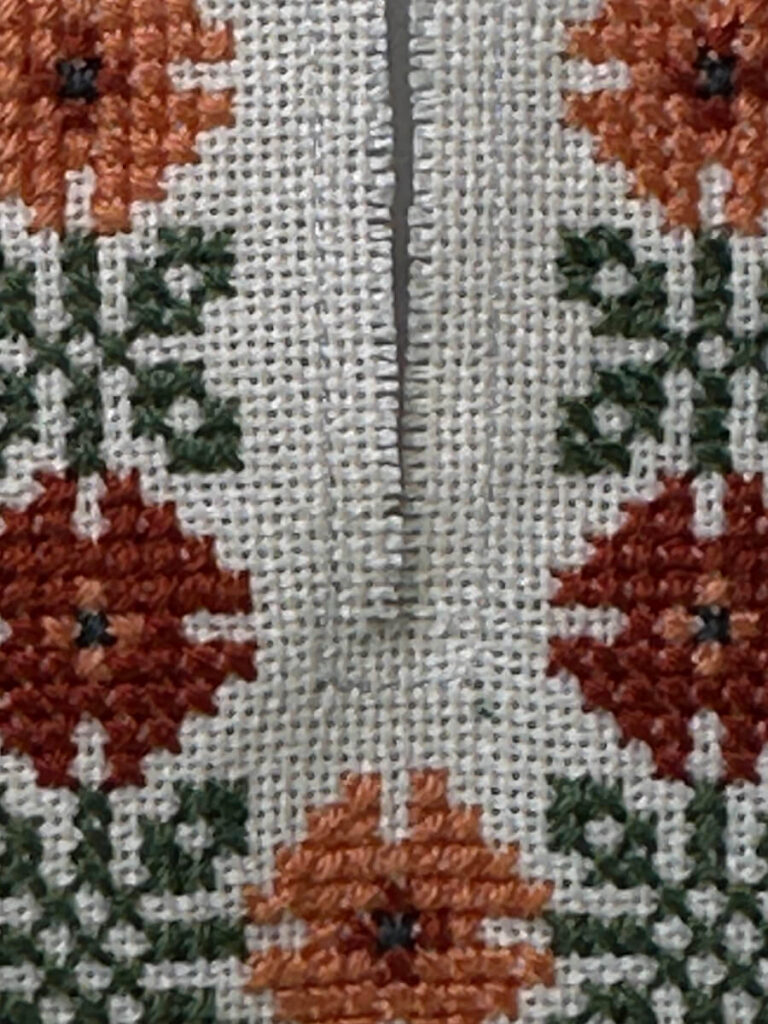
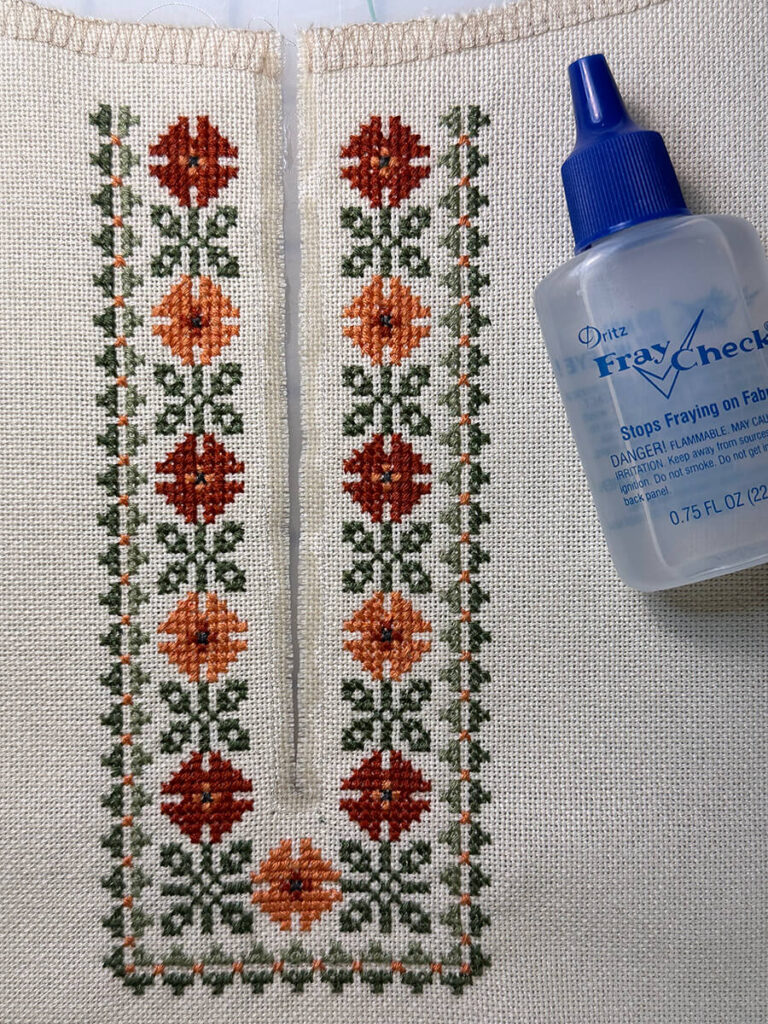
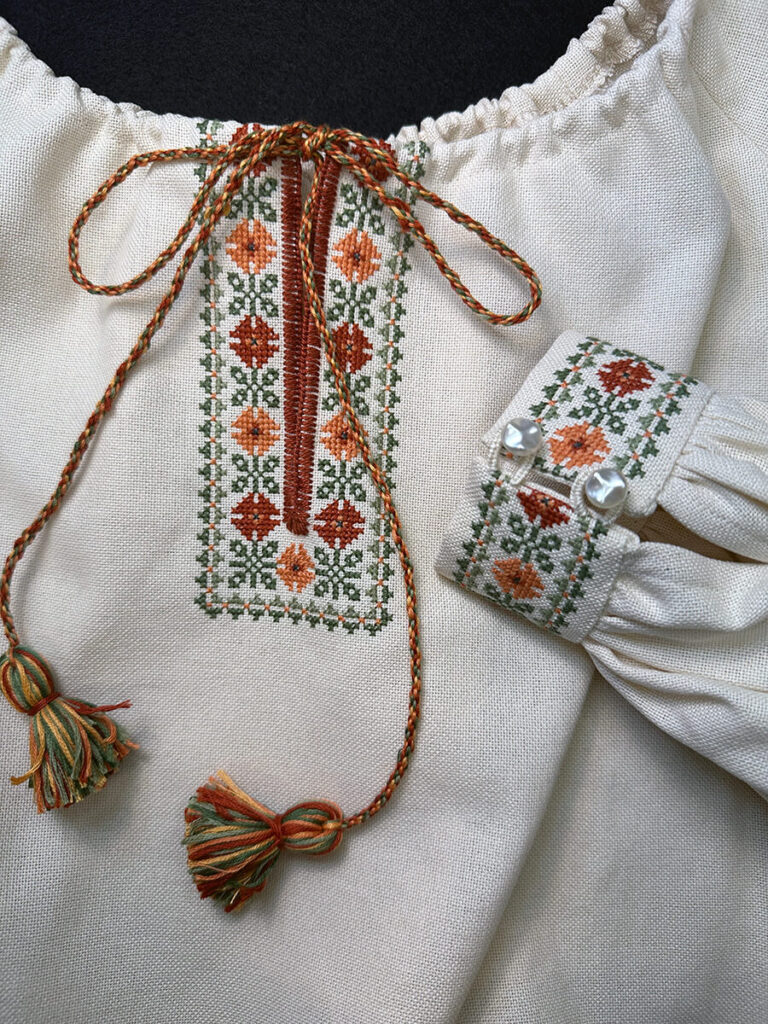
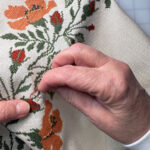
Before sewing the blouse together, it’s important to cut and sew a sturdy finish at the neck opening. This area must withstand the stresses of pulling the blouse on and off. I did not want to add facings, as per the instructions in the original Style Arc Anita pattern. Instead, I wanted to use the traditional finish technique of binding the edges of the opening with an obmitka handstitch. Obmitka is the same as a buttonhole stitch. By using this technique, I am essentially treating the neck opening as a huge, open ended buttonhole.
To begin, I carefully cut the opening down the center between the two border motifs. In order to minimize fraying while sewing, I stabilized the cut opening with a 2mm machine stay stitch. I then used a tiny bit of Fray Check to further stabilize the edges.
Mastering the Obmitka Stitch
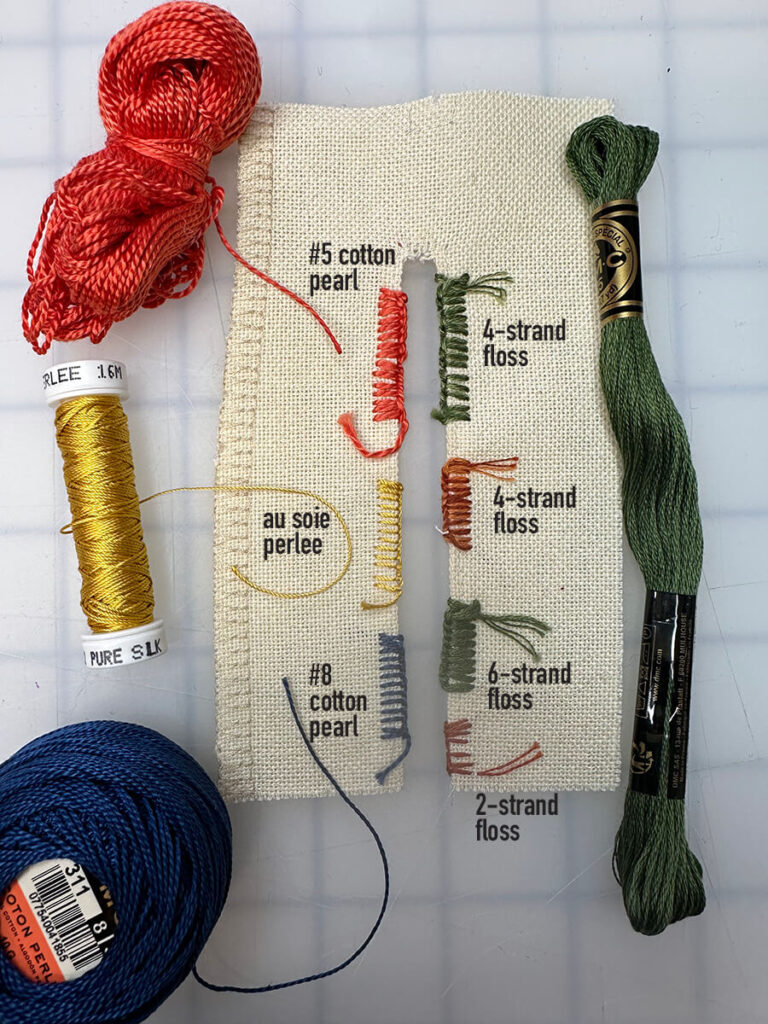
I began by practicing the obmitka stitch on a scrap of evenweave, experimenting with various threads types to determine which would give me the nicest result. At first I used the same DMC cotton embroidery floss that I used for the cross stitching. I tried 2-strand, 4-stands and 6-strand, and I just didn’t like the floss. The results looked sloppy or bulky.
Although I didn’t have the right color, I tried some #5 and #8 DMC perled cotton thread. #5 was just too thick. But for this purpose, the #8 perle cotton looked promising – much neater and more even looking. As a lark I also tried some silk embroidery thread – Au Ver Perlee Soie. Even though it produced nice stitches, the silk was too shiny compared to the cotton cross stitching. I ended up settling on #8 DMC perle cotton. Off to the embroidery shop to pick up a ball of dark rusty orange to match the embroidery! Threading my tapestry needle with a double strand of perle cotton, I sewed a 5-thread wide stitch every 2-threads to get a nice row of pearls along the edge.

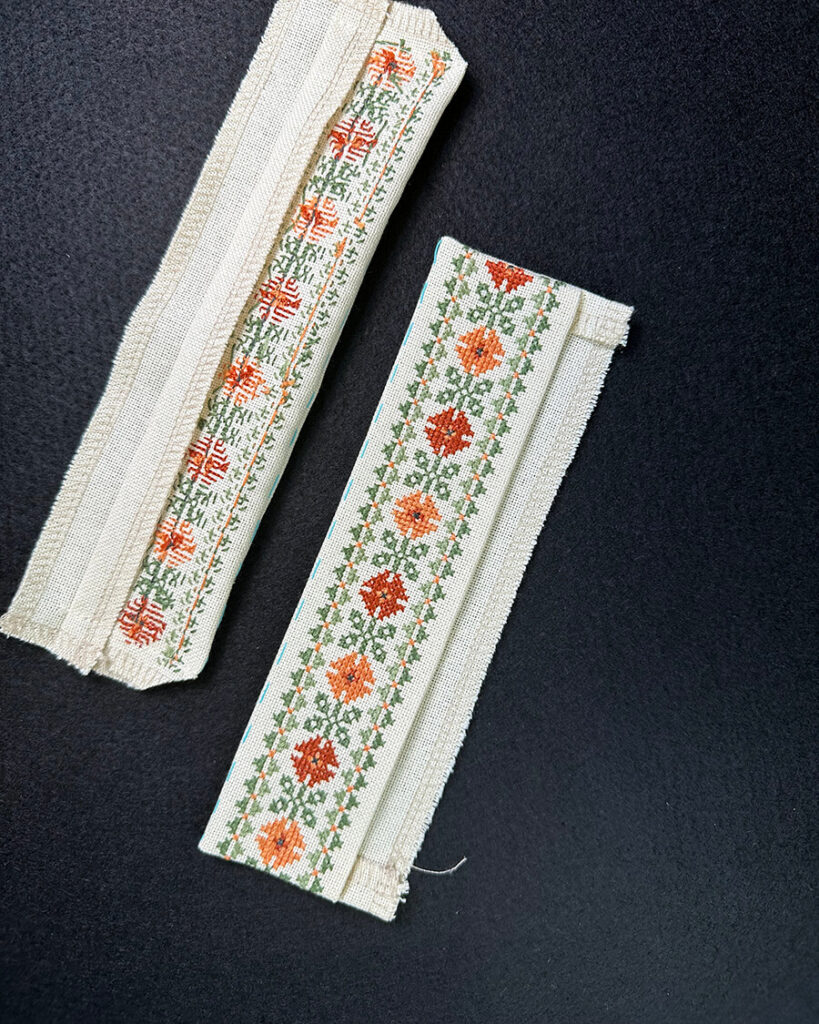
Constructing the Balloon Sleeves
I started with the cuffs. After folding the embroidered cuff pieces right sides together, I pressed up the embroidered long side by .5″. Using a .5″ seam, I sewed the two short ends. Corners clipped, cuffs were turned to the right side using a corner tool to get a nice sharp corner.
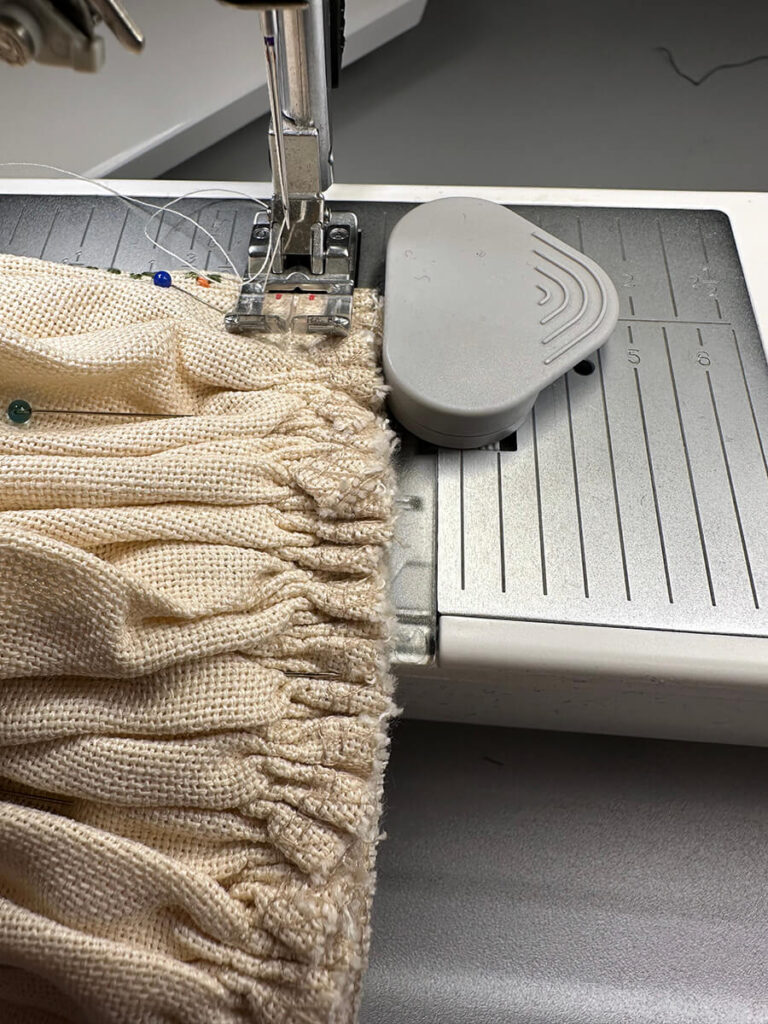
The next step is to prepare the sleeve pieces. To create a sturdy sleeve vent, I stitched a 3″ long narrow hem at the wrist end of each sleeve. After that, the wrist end of the sleeve are stitched with a double row of machine basting stitches. These basting stitches are then gathered tightly to fit within the width of the cuff piece.Then, the inside face of the cuff is carefully machine stitched the gathered sleeve end. Turning the cuff to the embroidered side, I then encased the gathered edge inside the cuff with an invisible slipstitch.
Sewing the Body of the Blouse
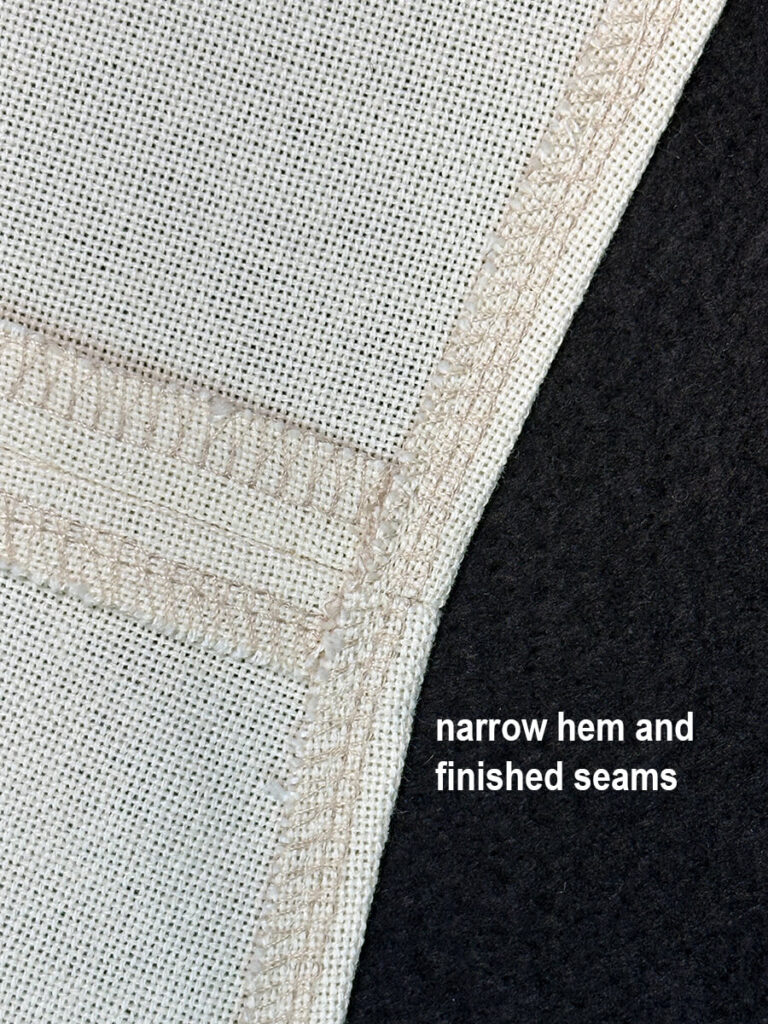
Without a doubt, sewing the body of this blouse together is the easiest part of the process. For one thing, all seams were prefinished as I had previously overlocked all the edges during the preparation phase of the project. This Ukrainian vyshyvanka is a very simple construction with raglan sleeves, a neckline casing for a drawstring, and a narrow hem. I started by sewing the angled raglan part of the sleeve to the blouse front and back. Subsequently, I joined the sides in one long seam from sleeve vent to bottom hem. Voila! All of my seams were now nicely finished. After pressing the side seams open, I narrow hemmed the bottom edge, and sewed in the neck casing.
Braiding the Drawstring
From the onset I envisioned this vyshyvanka with a multi-colored drawstring made up of my cross stitch embroidery floss. To braid a 7-strand cord, I made a 6-inch wide circle loom from foam core board with a hole in the center and eight evenly spaced notches. knot your threads together, poke the knot through the hole and start braiding. Using 1 skein of DMC floss per color, I made a 62″ long cord. Albeit a bit too much, I’d rather trim some off than have a skimpy drawstring.
I used my trusty bodkin, to fish the drawstring through the casing. After trimming the cord to a reasonable length, I added some jolly embroidery floss tassels to finish the ends.
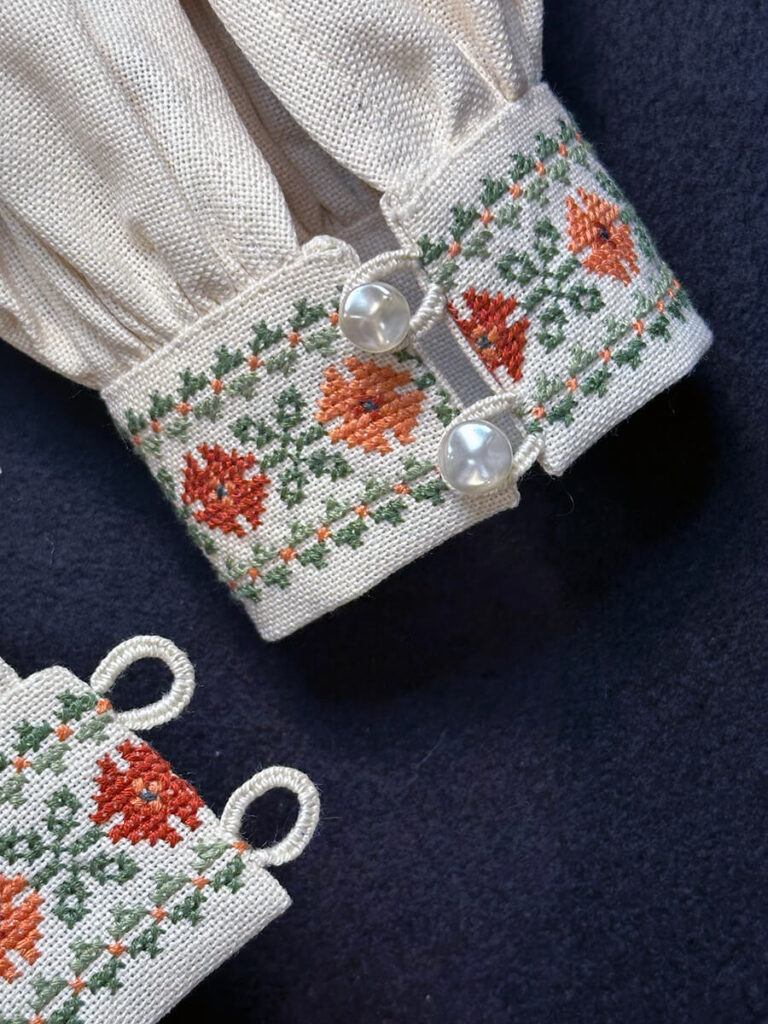
Finishing the Cuff Closures
I found four lovely pearl buttons my button hoard. They are the perfect size and shape for a double-button cuff closure. After securing the buttons, I hand stitched button loops with some DMC #5 ecru perle cotton to match the evenweave fabric.
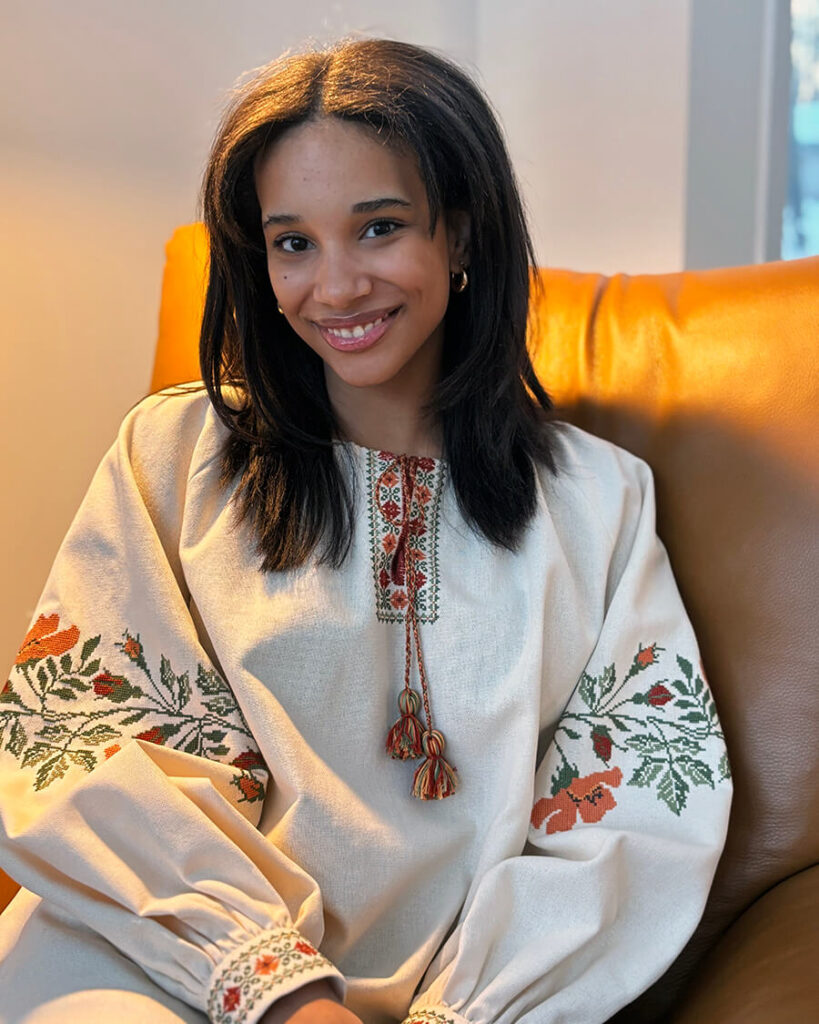
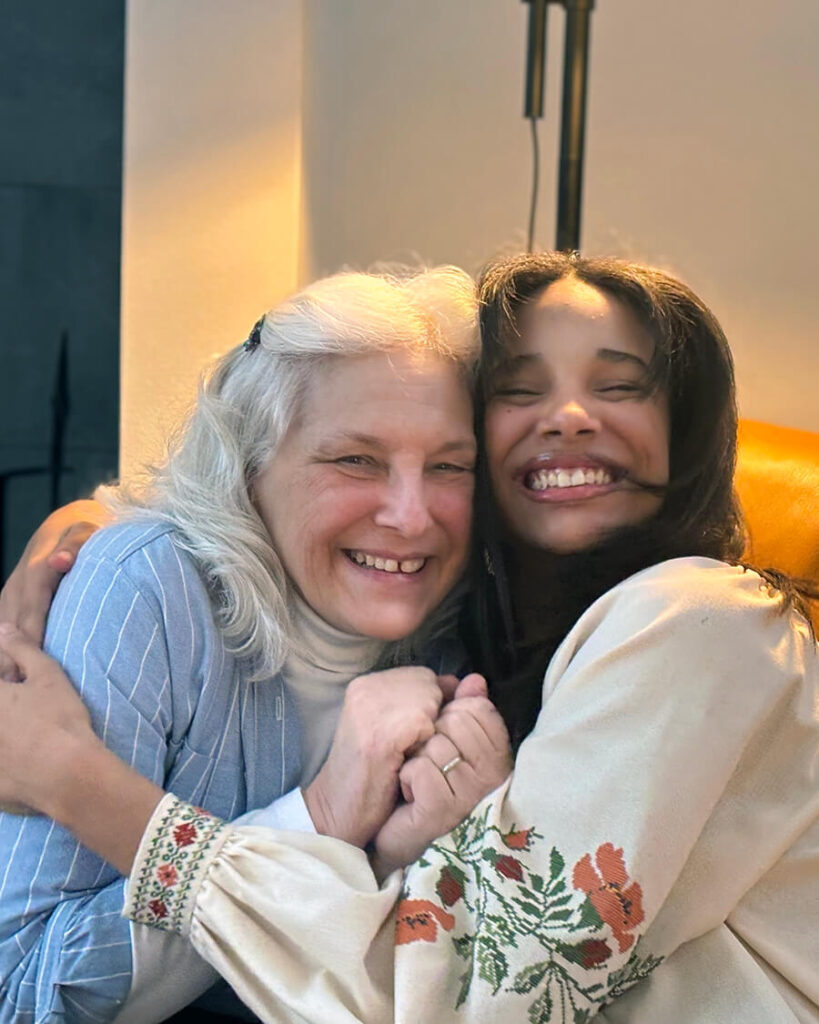
This embroidered Ukrainian vyshyvanka blouse is now complete! Though initially I planned to have it finished in time for my granddaughter Gloria’s birthday back in December, it took me longer than I foolishly anticipated to execute this project. Our Gloria is such a sweet person, and she patiently waited the extra weeks I needed to finish her MImi-made surprise.
All Passes, Art Alone Endures.
All in all it was such a joy to have refound this art that was lost inside of me for so many years. I rediscovered a tradition that revived feelings of pride in my cultural heritage, and connected me to many happy memories. Consequently, by virtue of needle and colorful thread, my granddaughter Gloria is now, also connected.
Embroidering these designs became a form of meditation – a time to savor the moment of creation and craft, to think about the women who formed my past, and the very special young woman who is beginning to fashion her future. Gloria’s vyshyvanka is a very satisfying make, and a real labor of love.
For more information on vyshyvanka planning, preparation, and technique, see my previous posts in the Handcraft section:
How to Make a Ukrainian Vyshyvanka Blouse – The Planning
How to Make a Vyshyvanka Blouse – Ukrainian Embroidery Prep
How to Make a Vyshyvanka Blouse — Ukrainian Embroidery Technique
Success is not fame or money or the power to bewitch. It is to have created something valuable from your own individuality and skill – a garden, an embroidery, a painting, a cake, a life.
Charlotte Gray
Leave a Reply