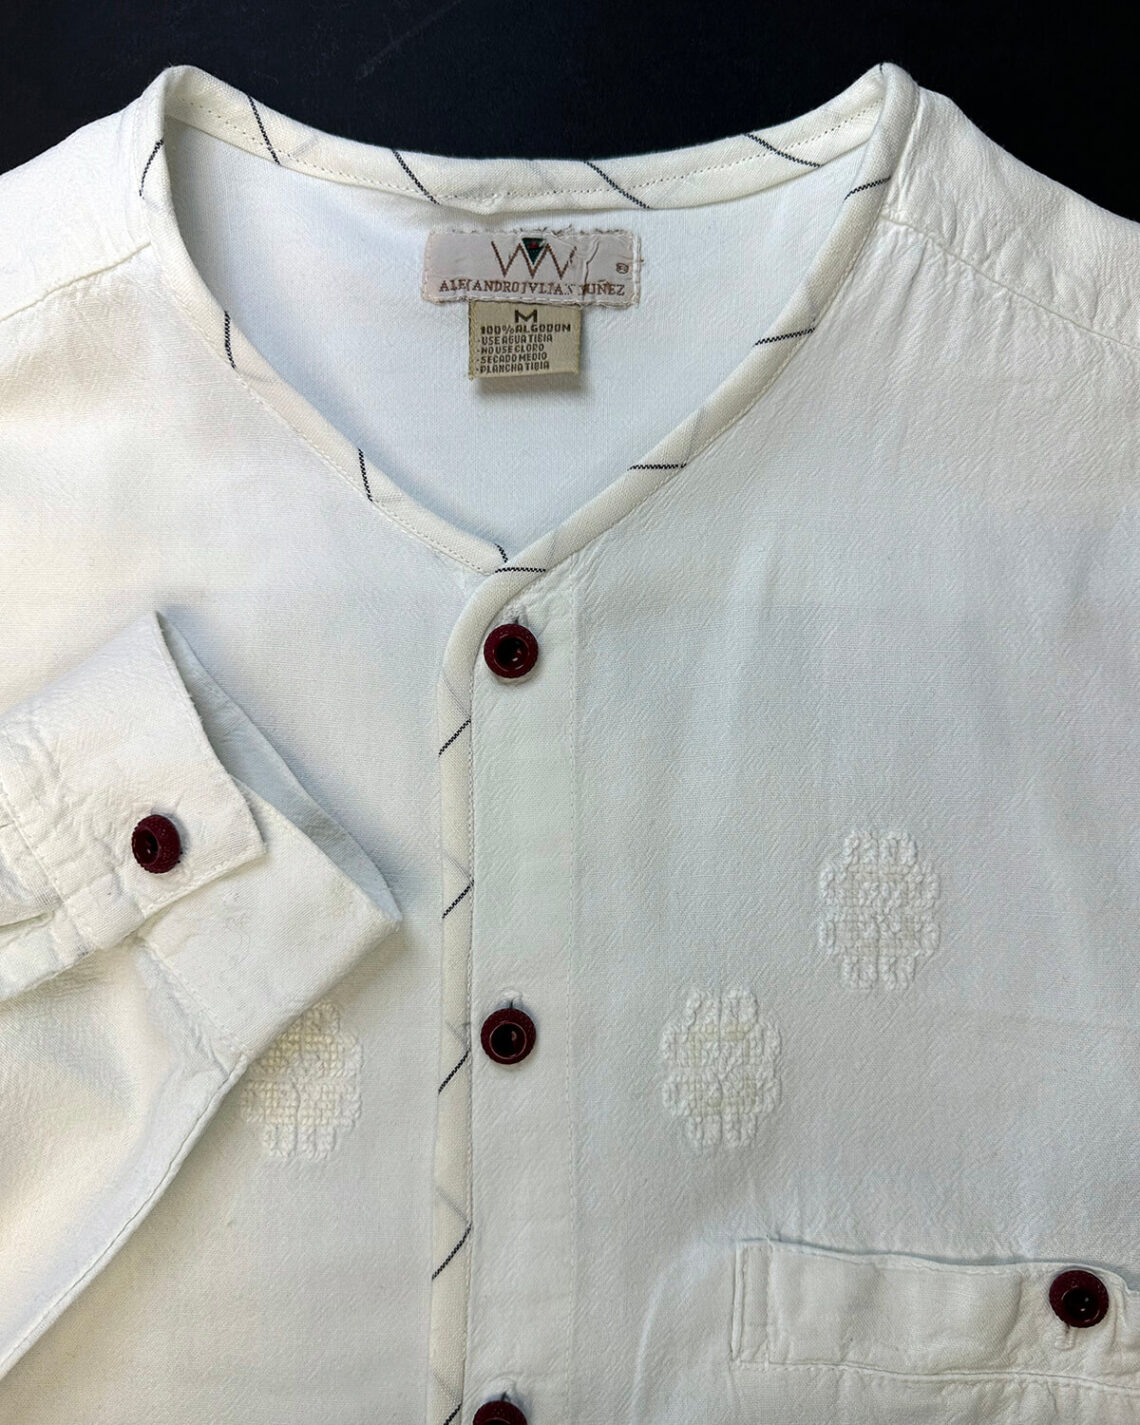
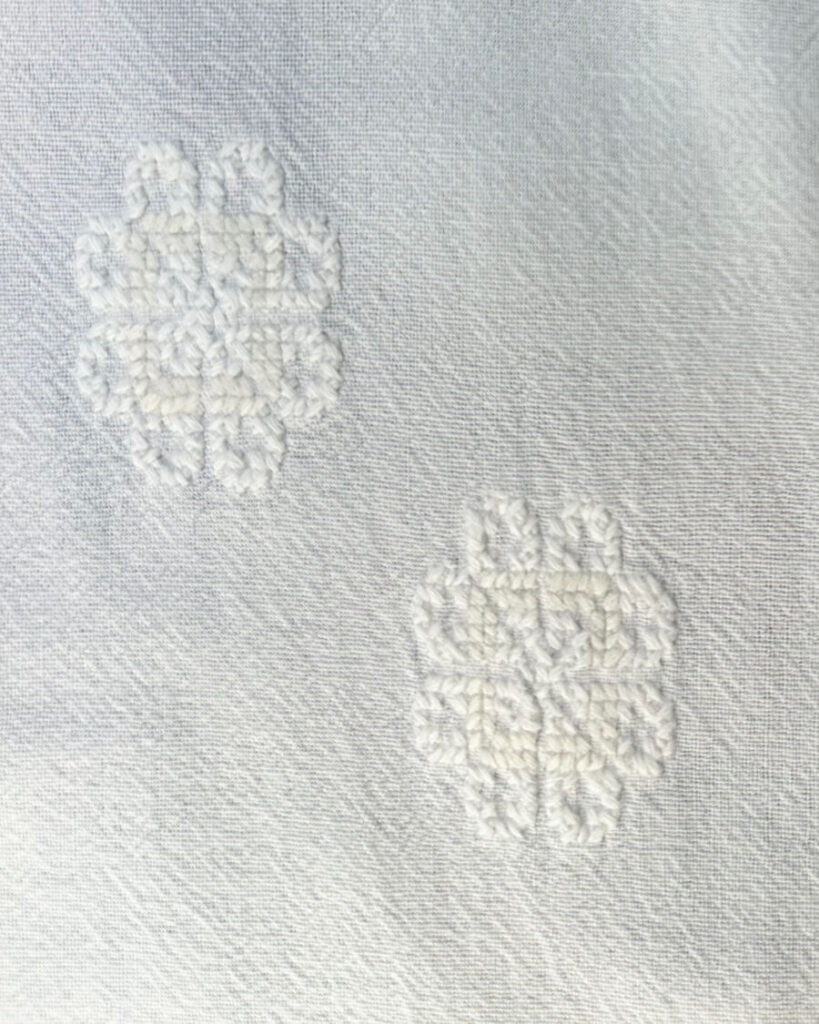
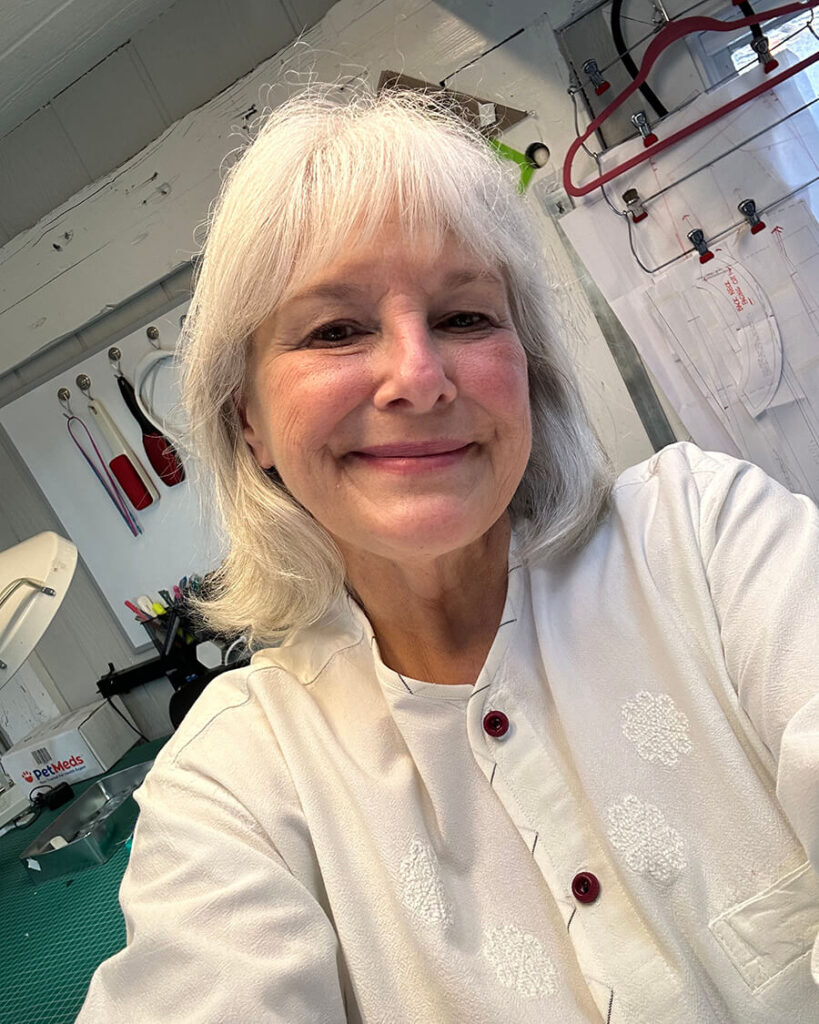
More than 25 years ago, I bought a shirt in Puerto Villarta in a store called Hecho A Mano. 100% algondon the label states. It’s a man’s shirt – oversized for me — and why I’ve been able to fit into it all of these years. The cotton fabric has a dense weave, with a little basketweave texture that is thicker than standard shirting. Though the shirt was machine sewn, the white-on-white cross stitched medallions were definitely hand embroidered. I loved this shirt. This souvenir shirt quickly became a favorite shirt. And like a fine wine, it only seemed to get better with age, softer and more comfortable as I wore it, and the years wore on.
You don’t have to say good bye.
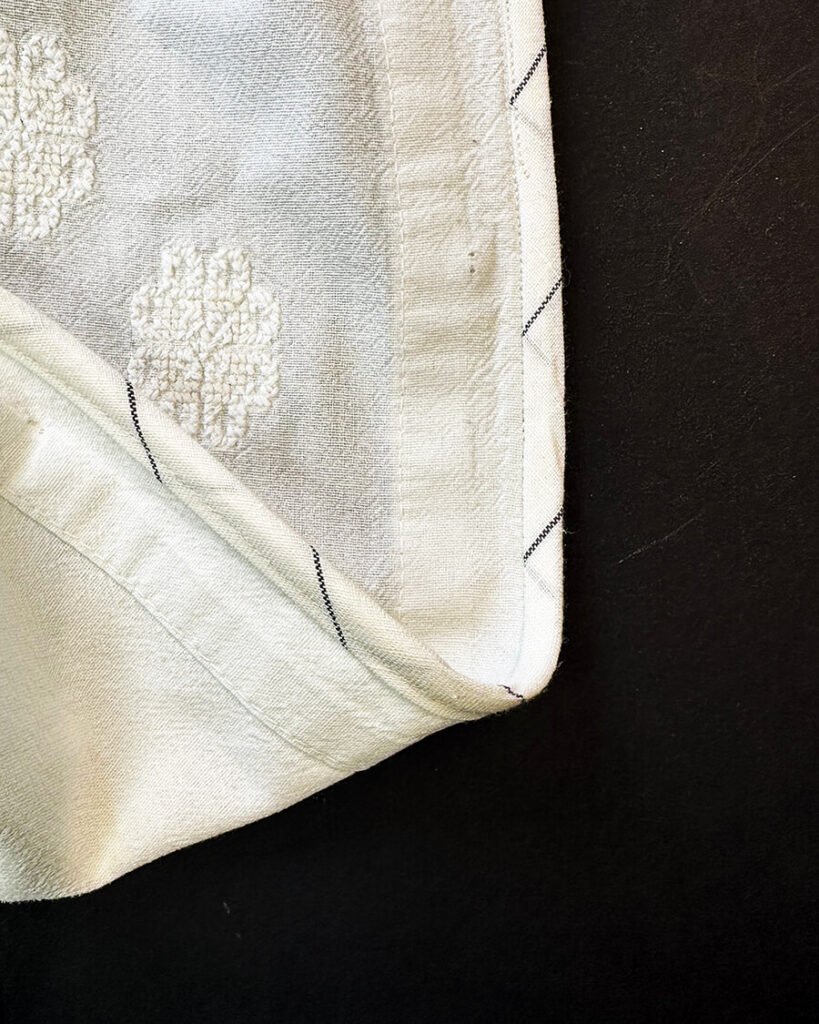
So you can imagine how my heart sank when this old favorite came out of the wash with the binding around the neckline burst apart, terribly frayed. “How many times have I worn and washed this shirt?” I wondered. One time too many, I suppose. But yet I couldn’t bring myself to either toss or give away this old amiga. She went into the mend bin and there she languished for a couple of years.

The time is now, the day is here
After the holidays I sat down to plan the make of a travel blazer out of a fine back/gray microcheck wool suiting. This new blazer was going to be the basis of the carry-on wardrobe for a springtime trip to Spain. White shirts and blazers seem to go hand in hand. I decided now is the time to upcycle my treasured shirt and bring her along for the ride.
How to fix her?
My first thought was to do a creative mend with hand-stitched embroidery and a colorful cotton floss. I considered using the same picot stitch technique I used on my Murder Mystery Blouse to mend the frayed neckline. When I pulled the old girl out of the mend bin, she was in worse shape then I remembered. The neckline was really falling apart and definitely not stable enough to support a hand-stitched edge. Plus, I noticed the fabric binding was also failing along the vertical button placket edges. What I really needed to do was refinish the entire shirt opening with new bias binding tape.
Making a new binding
Sure, you can purchase bias binding, but I find the store bought stuff is kind of stiff for garment making. Definitely too stiff for my old amiga. It’s easy enough to make your own tape using one of these nifty bias tape making doohickeys. And when you make your own binding you can get creative with fabric type, color and pattern.
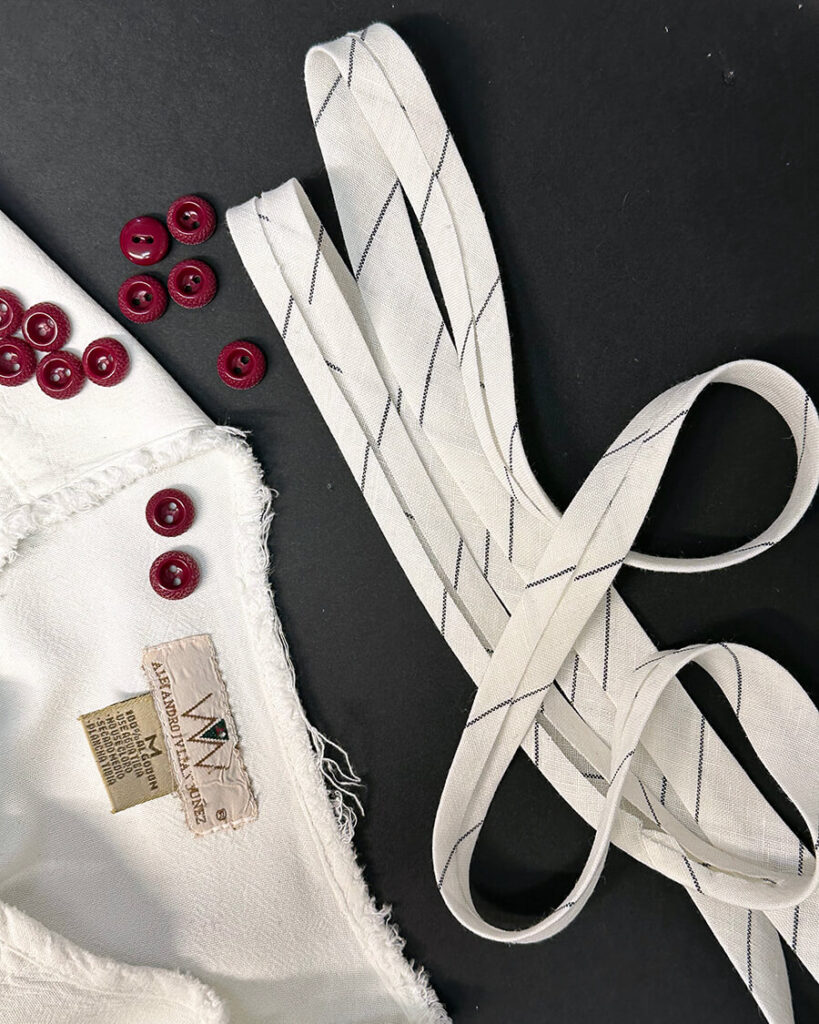
The existing binding I needed to replace was made from the same fabric as the body of the shirt. Matching white is hard, and I though knew I wouldn’t be able to find a perfect match, I still thought white was my best bet. In reviewing my stash fabrics, none of the whites I had on hand were quite right. The white was either too cool or too warm, or the texture wasn’t quite right… Hmmph!
Back to the fabric stash
Ugh! This closet is a mess… I thought. I stood there and stared at the stash, willing it to produce something. It was really cold and snowy out and I did not want to go shopping for the 2 little skinny strips of fabric I needed… Then I noticed it. A mini bolt of white pinstriped linen that had been pushed to the back of the shelf. Taa-da! Tee-dee! Too-doo!
I usually visit a fabric store or two when traveling, and I will buy fabric if it catches my fancy without really having any clear plan for using it. Actually, I do that even when I’m not traveling 🤪 hence the many yards of fabric in my stash. Back in 2019, I picked up 3 meters of white Irish linen with a thin yarn-dyed black pinstripe in Dublin at a nice little shop called Cloth. Such lovely things there – I still regret not pulling the trigger on a few meters of wool tweed, but I digress.
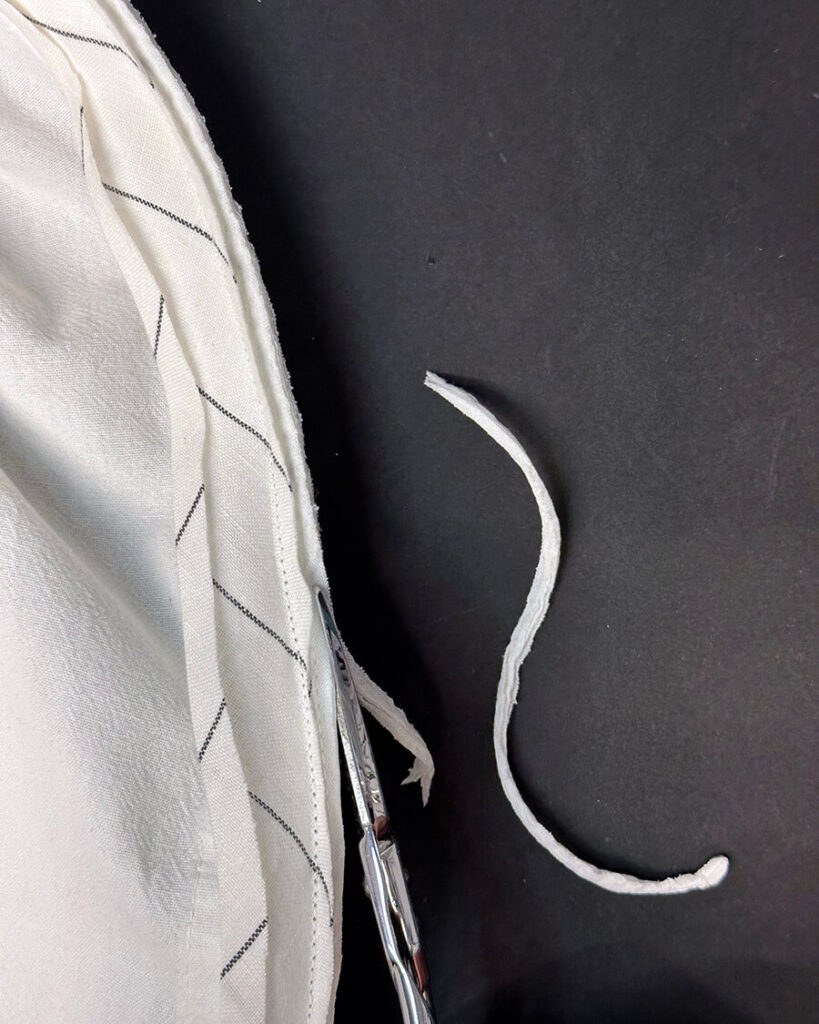
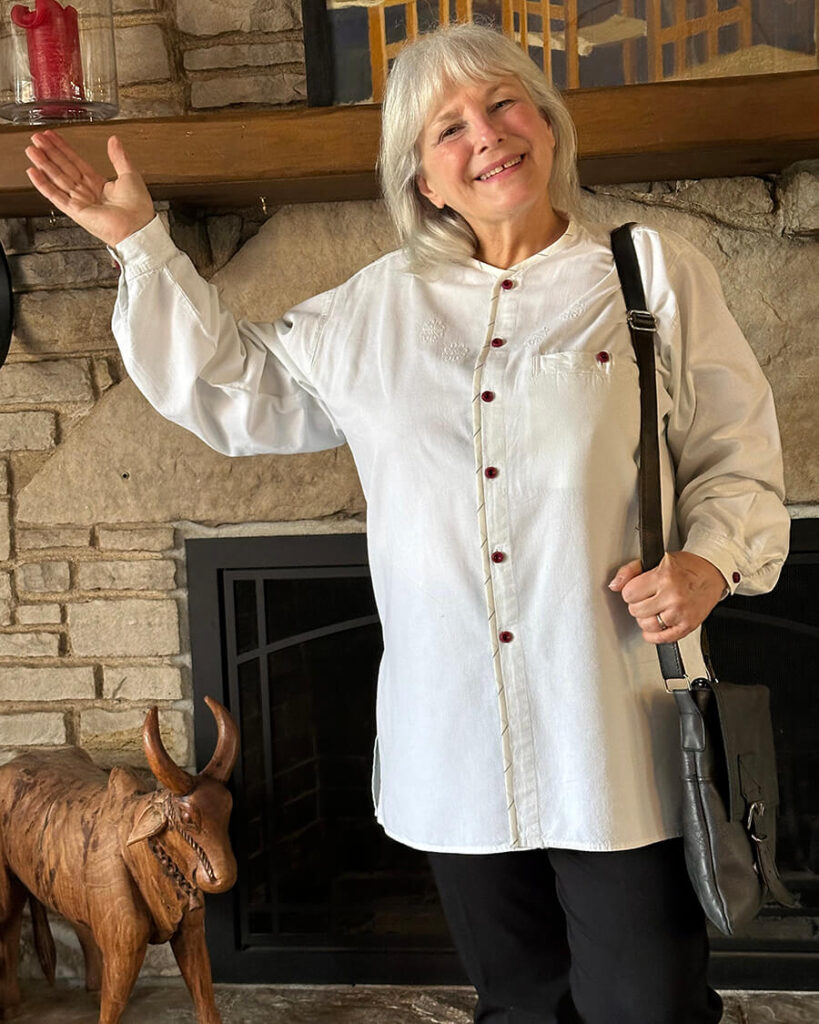
The Irish linen was a compatible match to the shirt for whiteness and texture. Cut on the bias, a bit of angled pinstripe would also add a little flash of interest to the edging of the shirt. I balked a bit at the idea of cutting into my linen yardage on a 45° angle to get the two 30″ strips I needed, but I quickly assuaged myself by deciding to make a little linen neckerchief with the resulting triangle scrap.
Prepping for the upcycle
With the fabric selected for the bias, it was time to get to work. First I trimmed away all the fray and worn edge all along the bound edge of the shirt. One of the shell buttons was missing and one button was badly chipped. The rustic shell buttons really didn’t suit the vibe of the new binding anyway. Yep, the buttons had to go – I cut them off and added them to the ol’ button hoard. They are still nice buttons and I’m sure I’ll find a use for them.
Rebinding the shirt
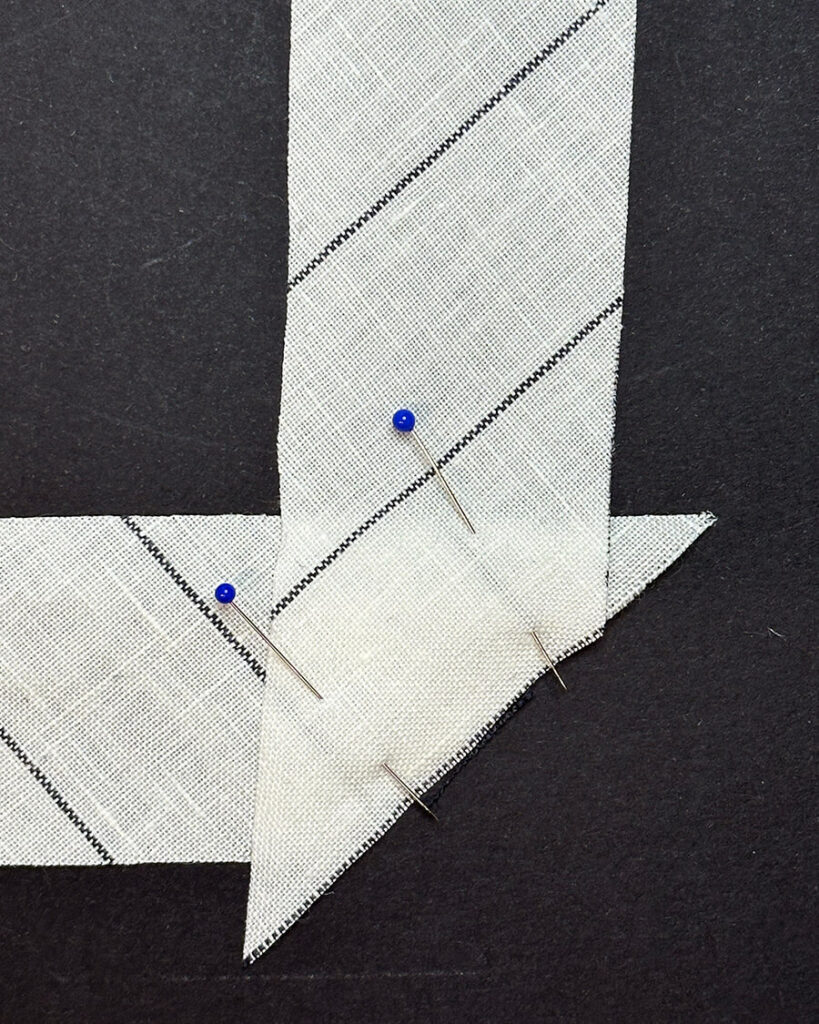
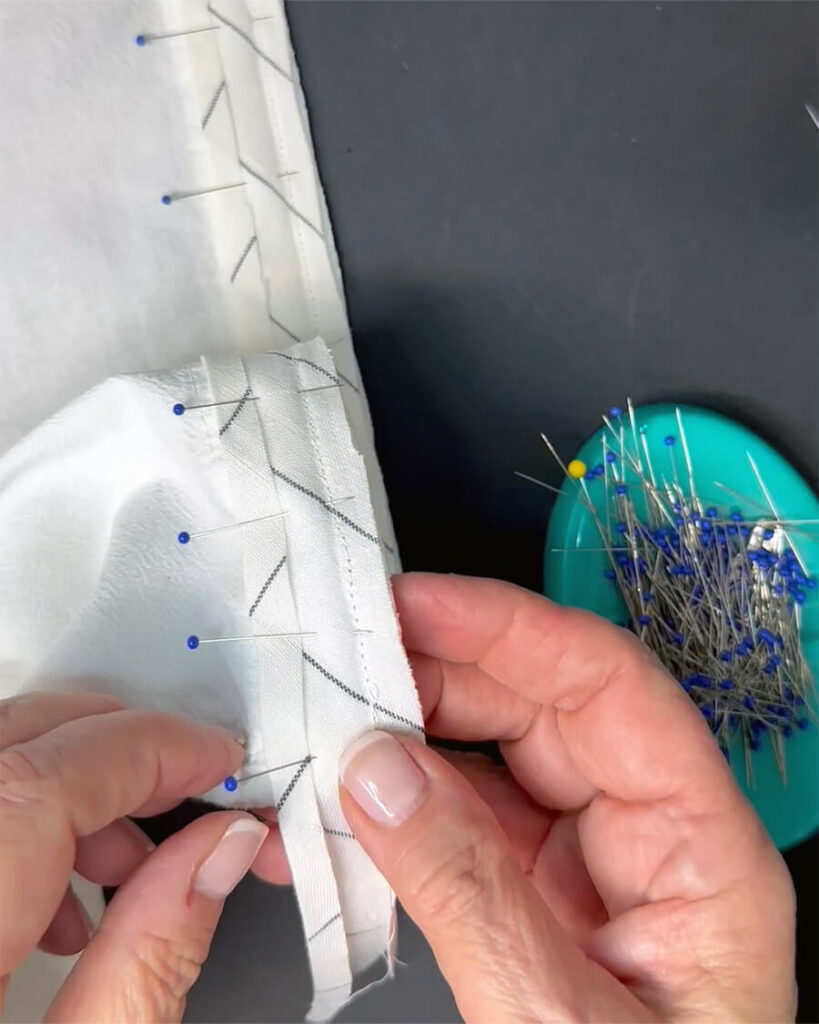
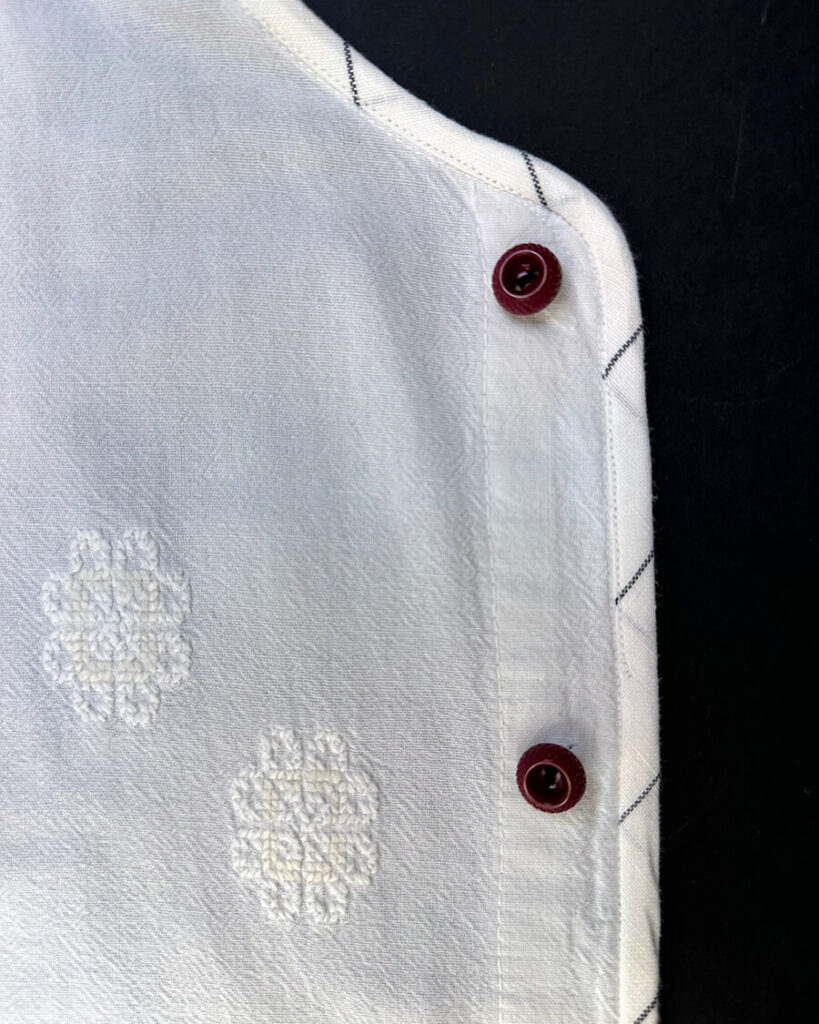
After cutting two 30″ long x 1-3/8″ wide strips of the linen on the bias, I joined them together with an angled 1/4″ seam to create a 60″ long piece of fabric bias tape. I then pulled the linen strip through an 18mm bias (3/4″) binding making tool while steam pressing the folds.
Opening one fold, I pinned the bias tape to the shirt, right sides facing and raw edges aligned. I sewed the bias tape to the shirt, stitching along the pressed in fold. At this point, I trimmed away the shirt edge by about 1/8″.
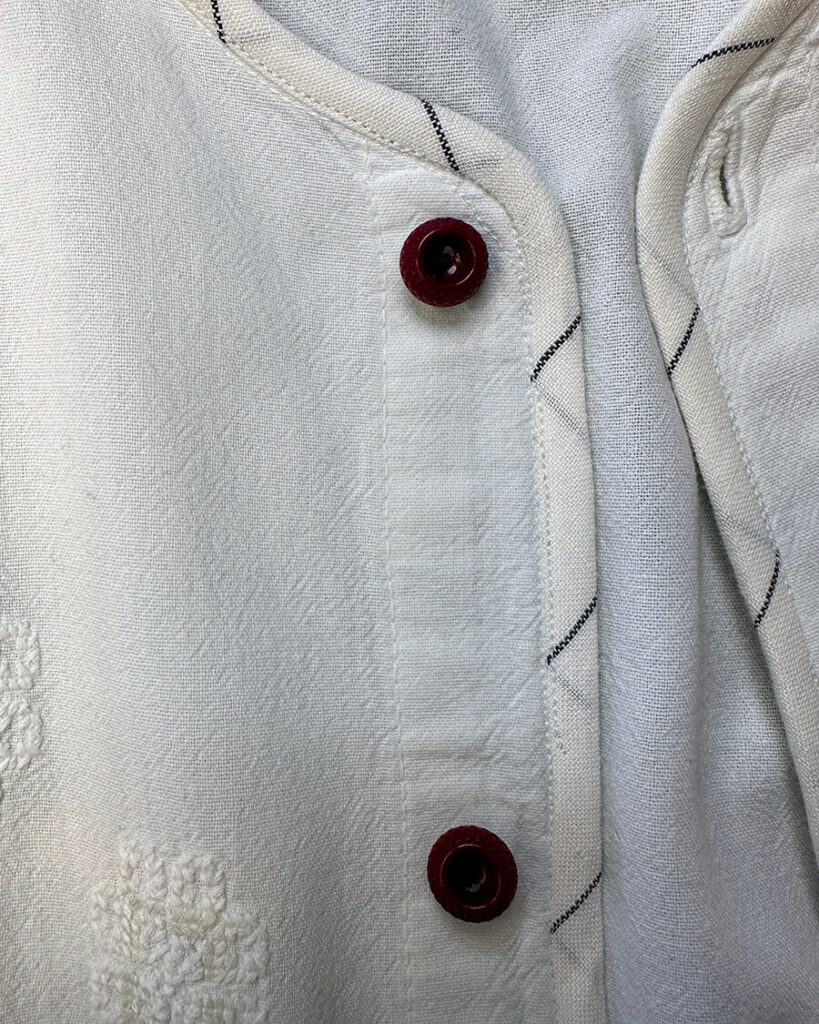
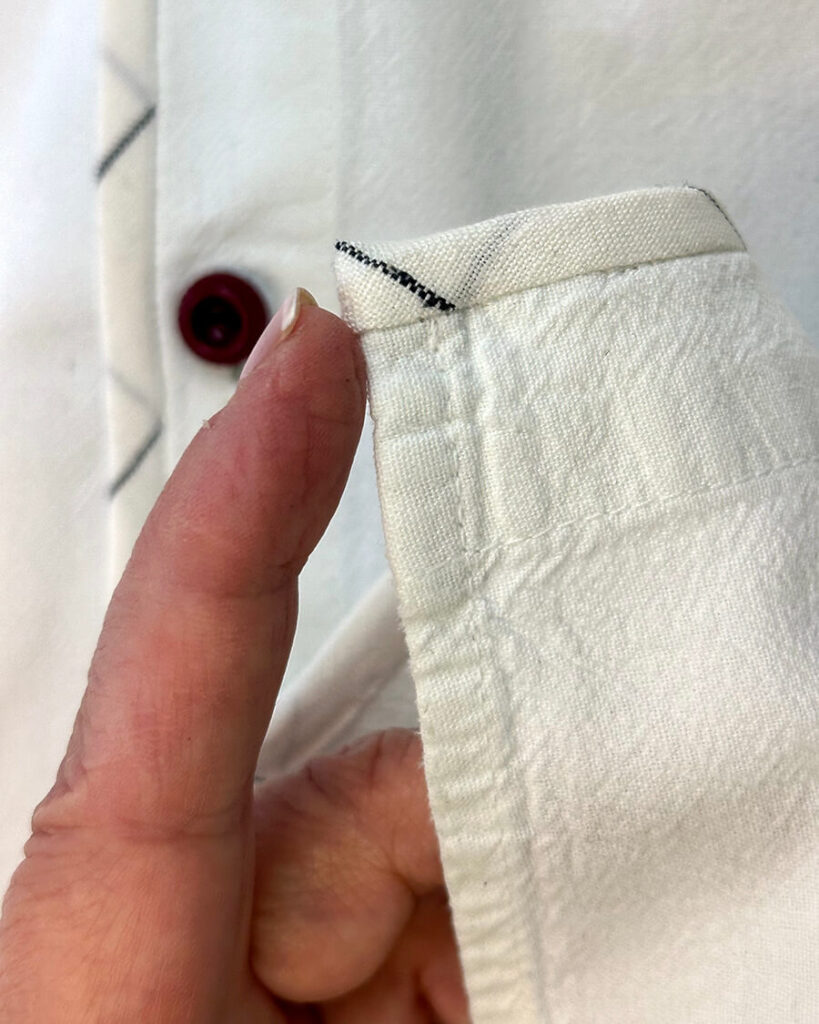
Now it was time to fold the tape around the edge and press the tape in place, taking care to get a smooth curve at the collar. I also made sure to overlap my previous stitching. On the front, being careful to stay in the seam ditch and “catch” the tape on the backside of the shirt, I sewed around one more time. Then I hand stitched the last inch on both sides of the placket bottoms, tucking in the raw end of the tape to get a durable finished end.
Zipping it up with some “new” old buttons
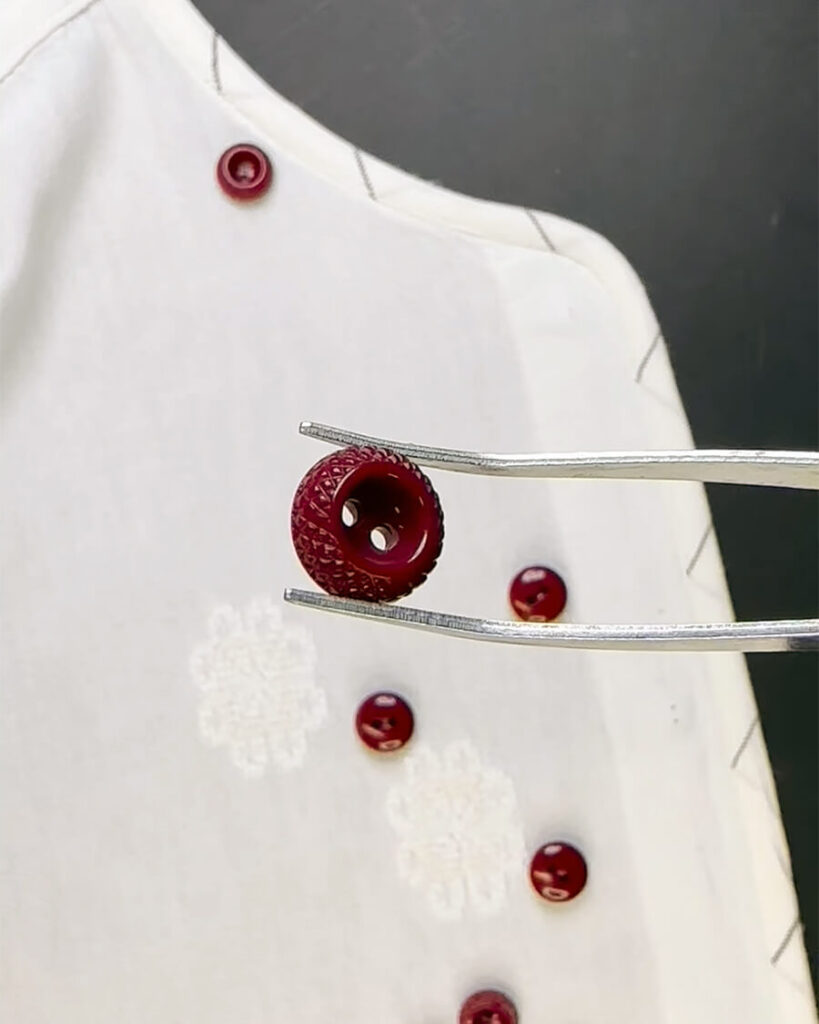
Historically, I spend way too much time on button selection, and this upcycle project was no exception. I finally decided on some vintage textured doughnut buttons I had purchased from the Button Hive on Etsy. The deep red just made sense with the thin black pinstripe – a little pop of color that adds some zip to a neutral shirt.
Create new memories.
Though upcycling clothes is a planet friendly, waste-saving process, for me, it’s also about saving memories. This old shirt and I have been through a lot together, and I’m really glad I didn’t let her go. Adding a sturdy and interesting binding and some fun buttons did take some time and effort, but it’s great to breath new life into this old favorite.
Check out my upcycle reel on Instagram.
Upcoming: Upcycling this shirt also made me realize I really need to roll up my sleeves and get my fabric stash in order. Stay tuned for my upcoming blogpost: Take a Peek Inside my Fabulous Fabric Stash


Leave a Reply