
Using Ukrainian embroidery techniques, I’m making a vyshyvanka blouse for my eldest granddaughter, Gloria. This is the third of a four part series documenting my process. Check out my previous posts for detailed information on planning your vyshyvanka and preparing your vyshyvanka materials.
This post describes some of the methods and techniques that have led me to embroidery success. If you are new to cross stitching, you might also want to take a little time to read a good guide to basic stitching techniques.
The Approach
Now that I have all of my materials in hand and organized I am ready to start embroidering. Because it has been so many years since I’ve done any Ukrainian embroidery, I decided the best way to get my mojo back would be to begin by embroidering the simple geometric design on the cuffs and neckline. Once those are complete, I will be in the stitching groove, and ready to move on to the more expansive and organic design on the sleeves. When I have all of the components embroidered, I will sew them together then finish with button and loop fasteners at the cuffs and corded floss drawstring at the neck.
Thread Count
I’m embroidering this vyshyvanka using a two thread over four thread stitch on 28 count evenweave fabric. The techniques described in this post also work well when you are embroidering using waste canvas or aida cloth embroidery canvas.
Where to Begin
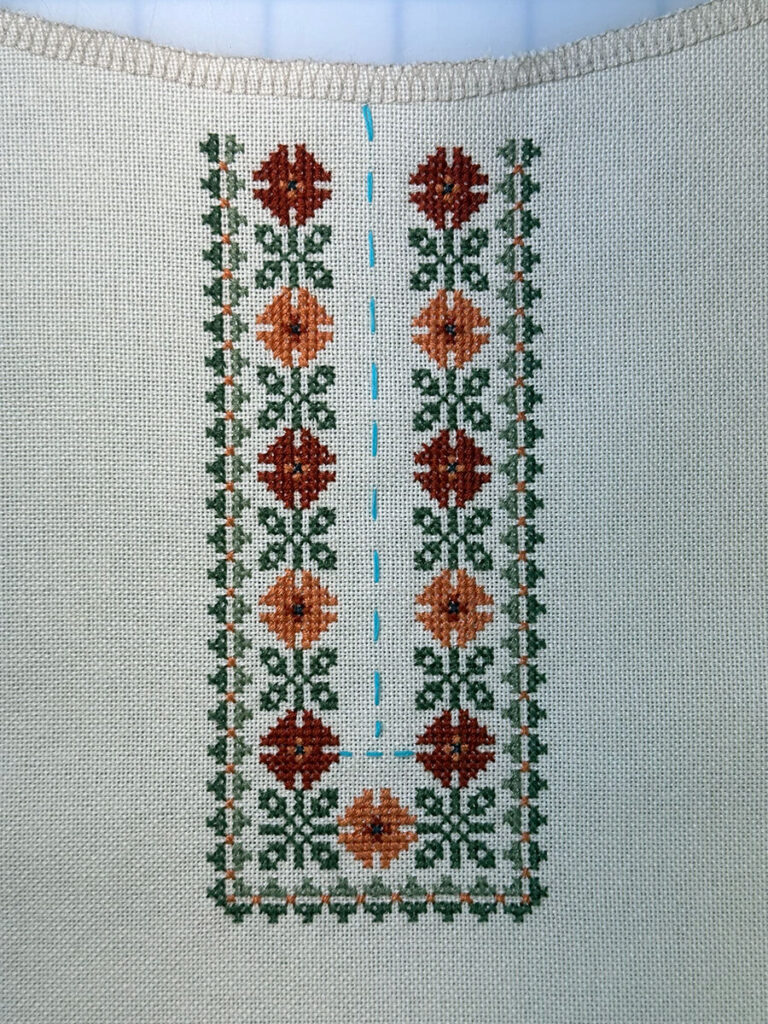
Determining the placement of motifs to account for neck openings, seam allowances, cuff edges, and corners is crucial for a finessed end result. In my previous preparation post I described basting in the important guidelines to place my embroidery designs to their best advantage.
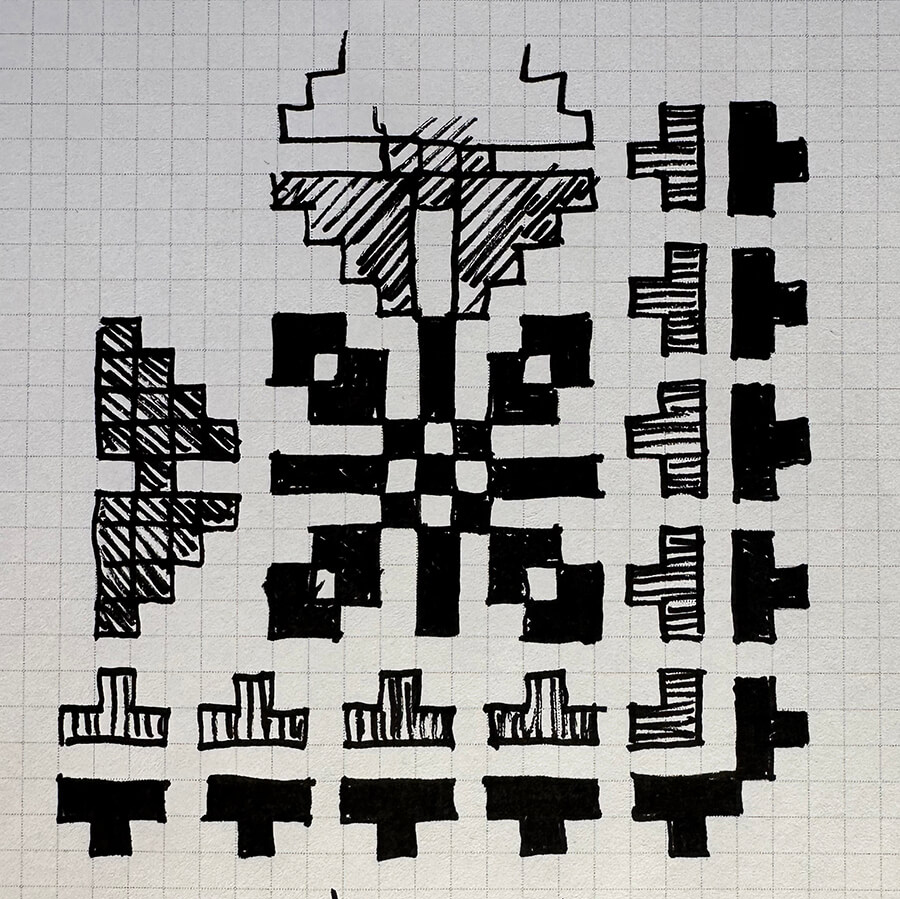
Study your motifs to determine placement. I knew that I wanted to turn a 90° corner at the bottom of the neck opening, but the motif pattern I chose did not include a corner. Using some graph paper, I plot out the corner turn before attempting to do so with needle and thread.
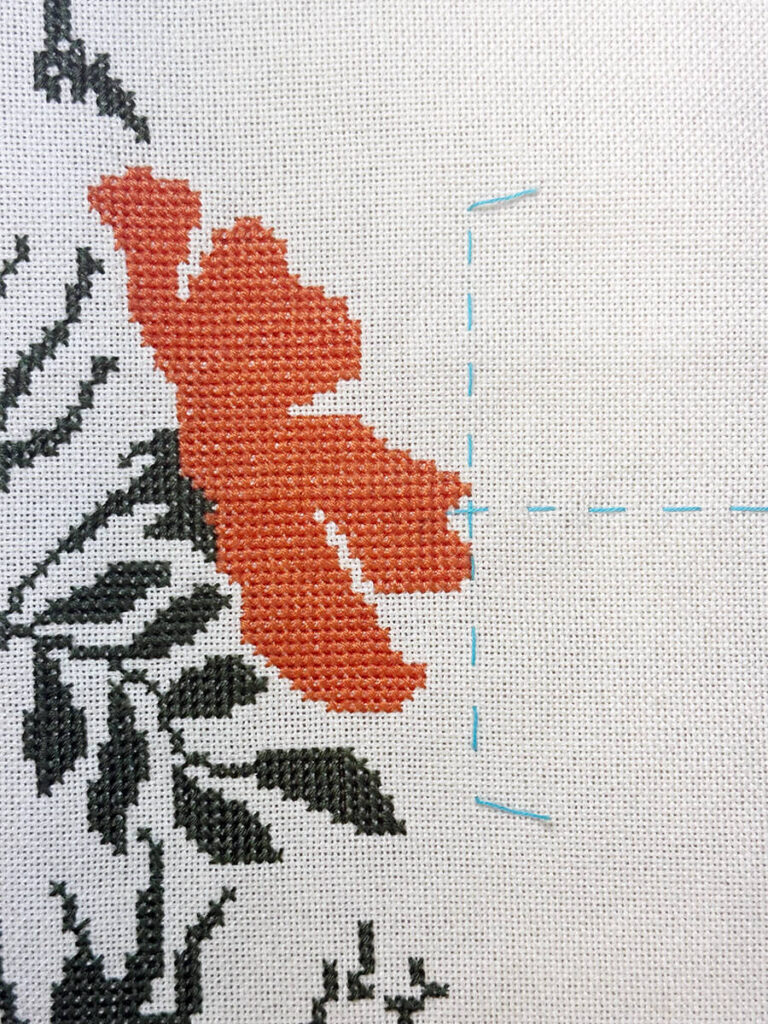
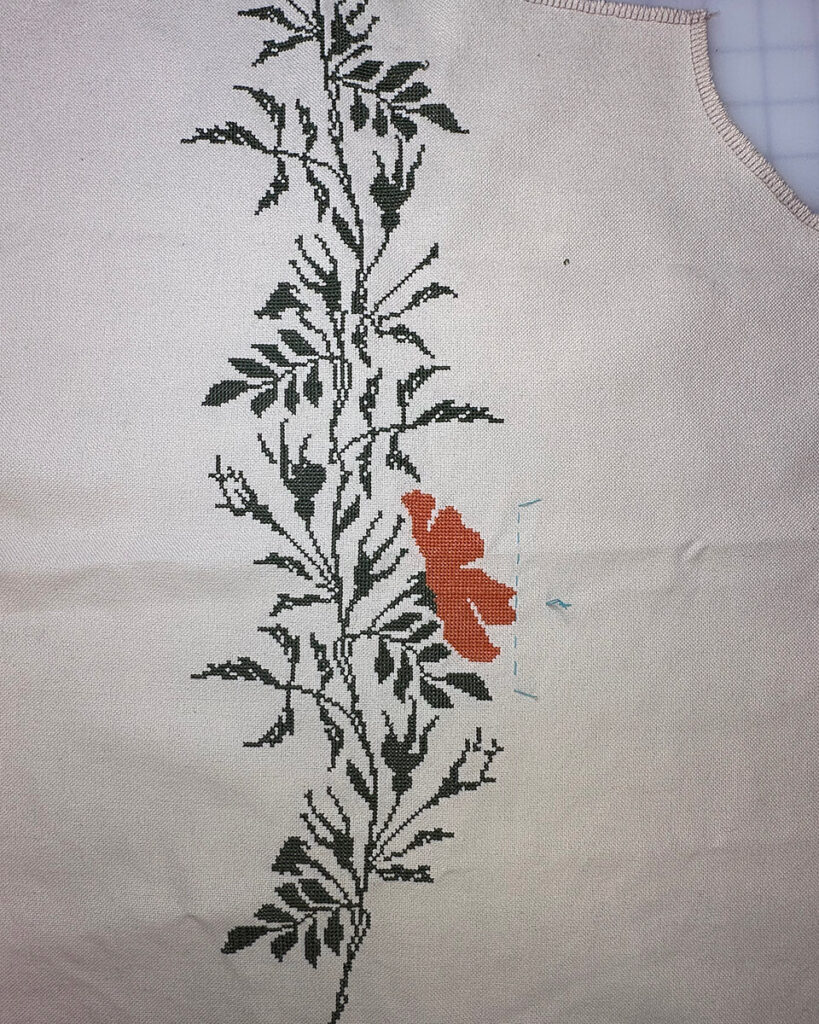
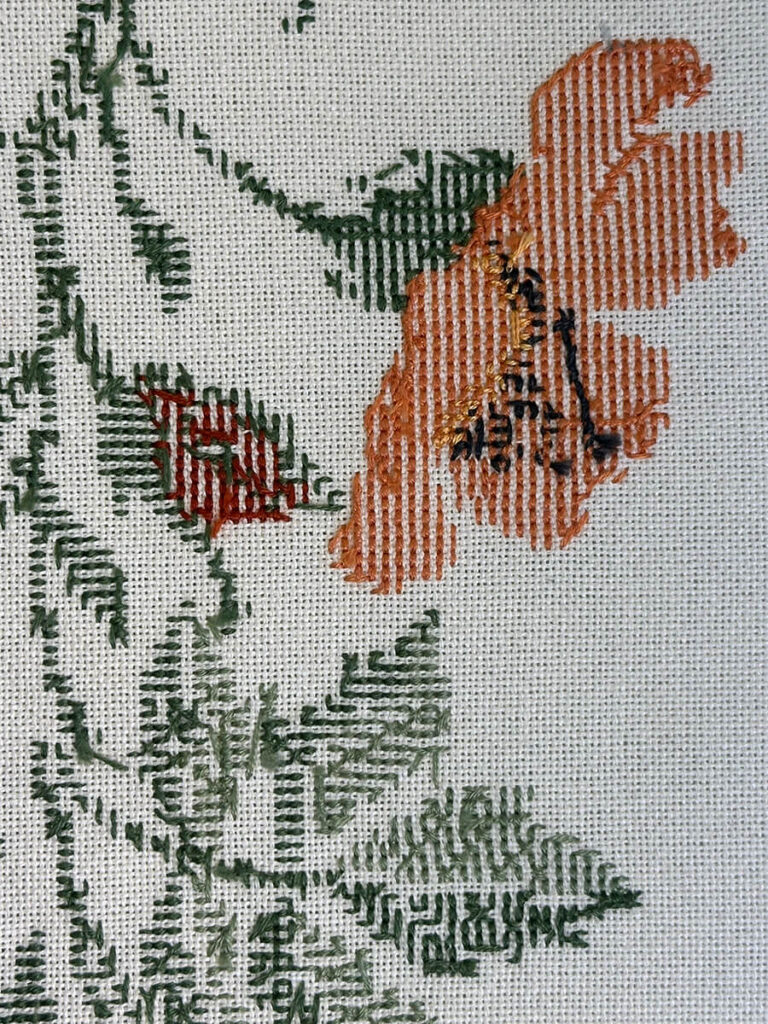
For the balloon sleeves, I planned to position the organic poppy motif as a horizontal band across the balloon sleeve. I wanted to center one big poppy flower at the top of the sleeve band. Using the printout of my pattern, I determined my starting point on the design, and matched it to the markings on my fabric.
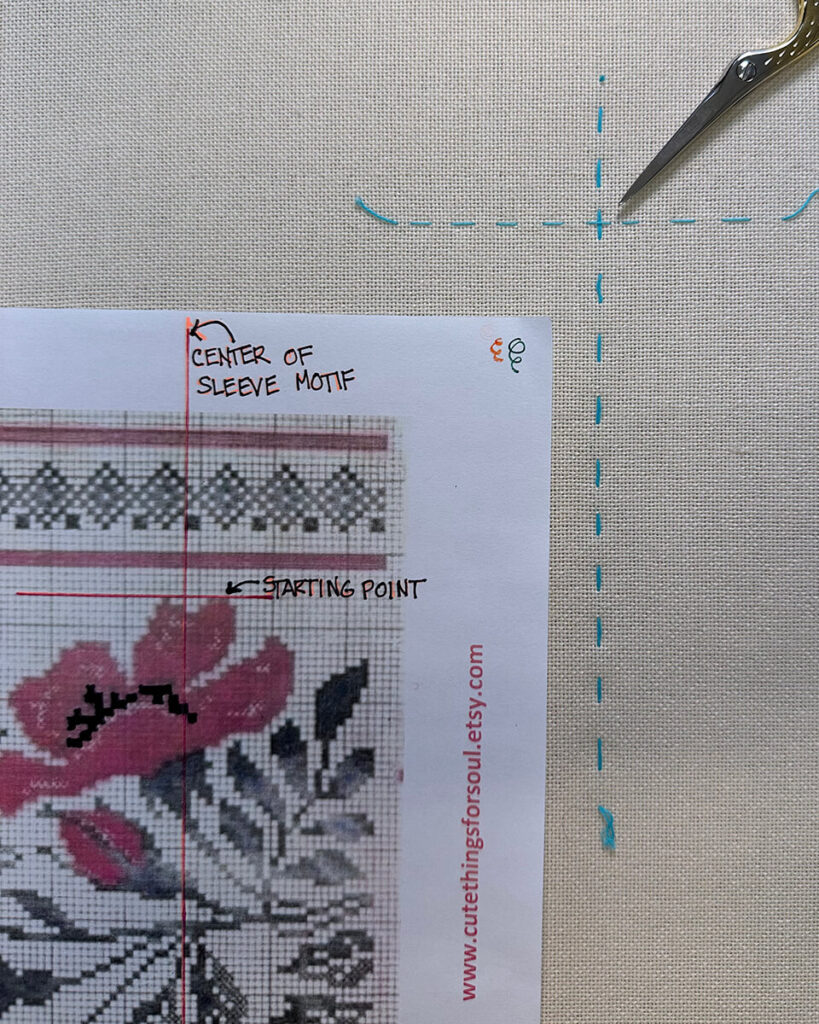
design top and center basted onto fabric
Thread Management
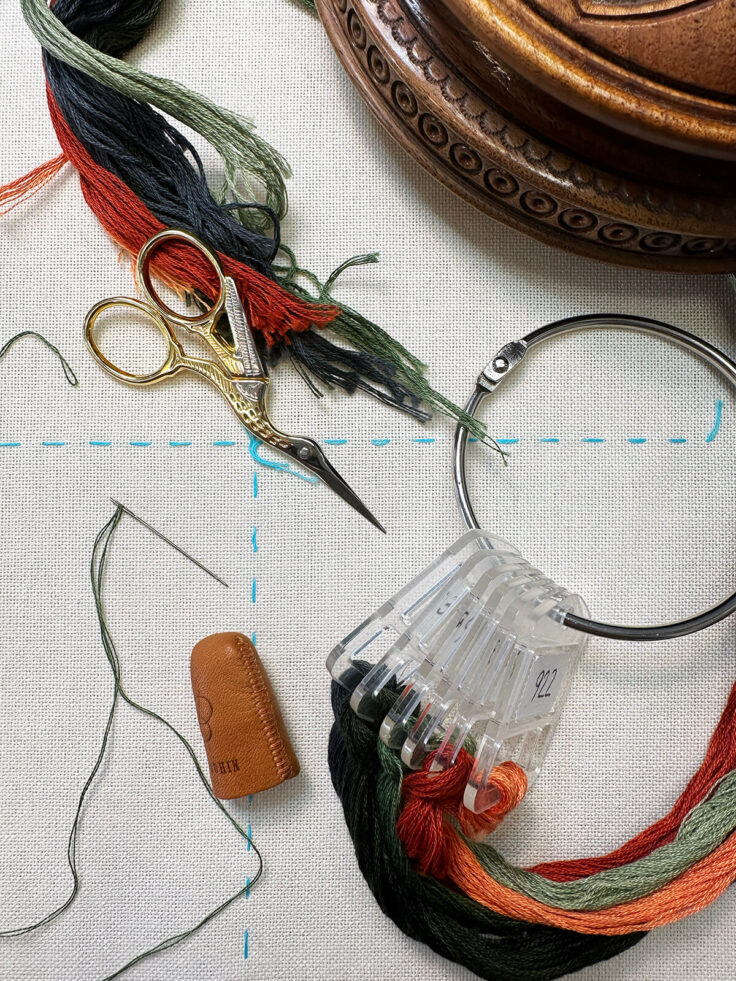
Threading the needle is an important step. It is a task done over and over again, so having a good system increases your efficiency. Keep the length of your floss reasonable. Too long, and you are continuously detangling as you embroider. Too short, and you are constantly threading a new needle. I find a length of around 52″ (which doubles up to 26″ long) to be the sweet spot for me. See my previous post for details on cutting and prepping embroidery floss.
Threading Your Needle
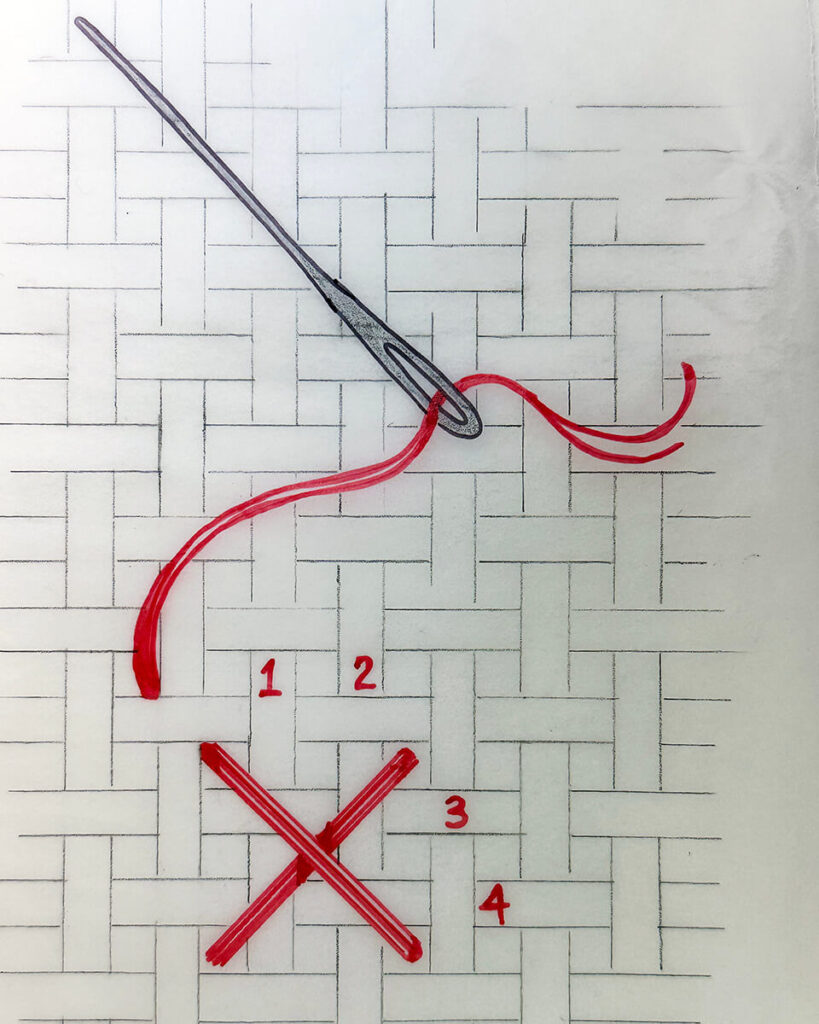
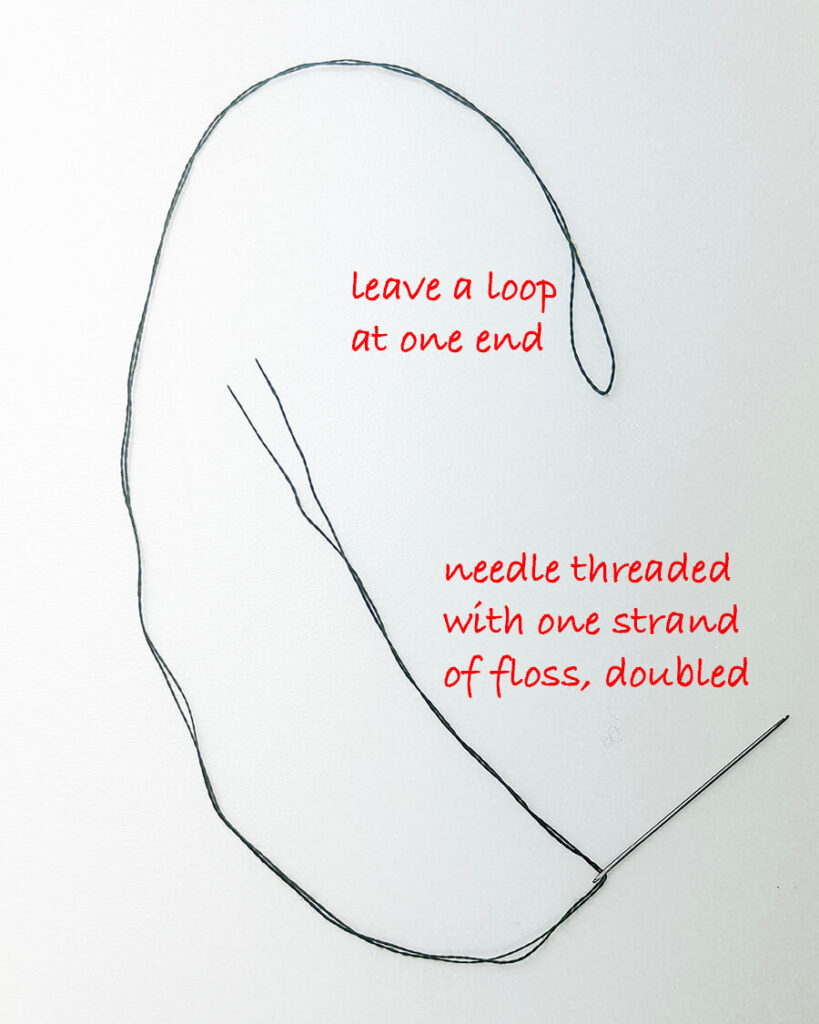
After pulling a single strand of floss, I double it and thread my needle to keep a loop at one end. This will accommodate a “no-knot” beginning, which is illustrated further along in the blog.
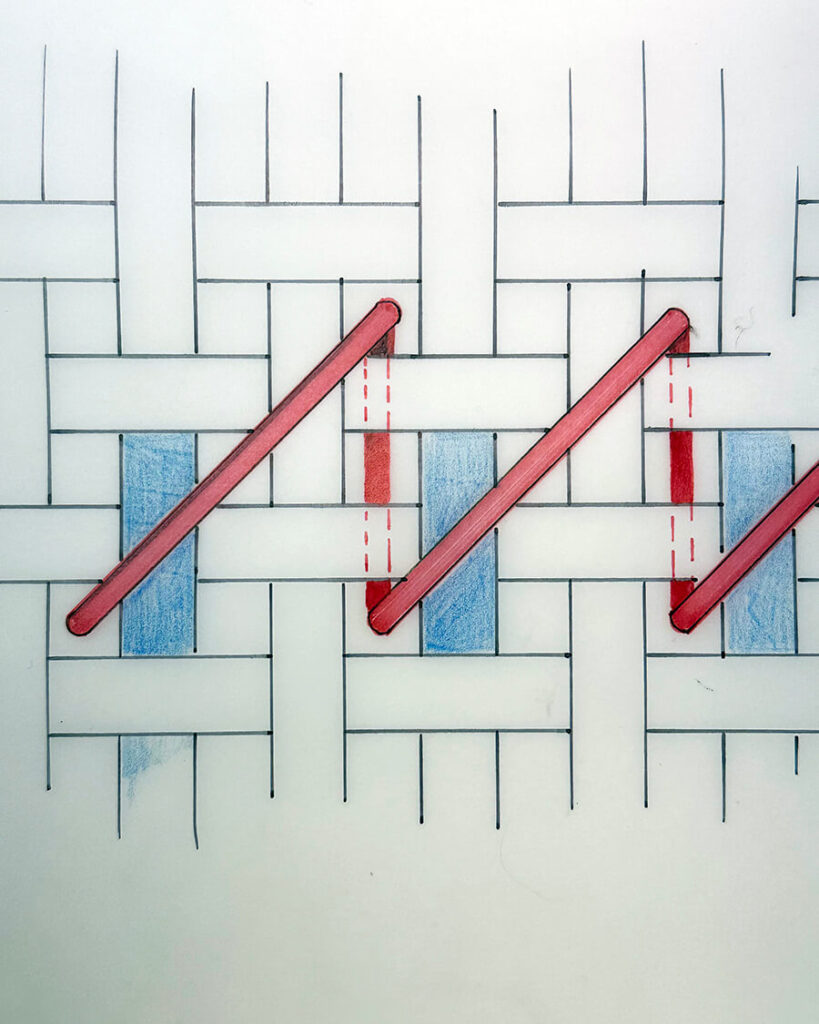
Stitch “Against the Post” to Start
Stitching “against the post” refers to a technique used in cross stitching on linen or evenweave fabrics. When you stitch “against the post” you start your stitch by “leaning” against a vertical fabric thread that is passing over a horizontal fabric thread.
Start your first stitch next to the “post” created by the intersecting threads. Though I always try to start against the post, it is not the end of the world if you don’t. Stitching against the post results more even stitch appearance. This diagram illustrates the vertical threads, or “posts”, in blue.
.
Sewing versus Stabbling
Ukrainian embroidery is traditionally accomplished using the “sewing technique” – holding fabric in hands – without the aid of an hoop or frame. The intricate designs and large expanses often found in Ukrainian embroidery are easier to maneuver without the constraints of a hoop. That said, sewists who are more comfortable with a hoop should feel free to use one.
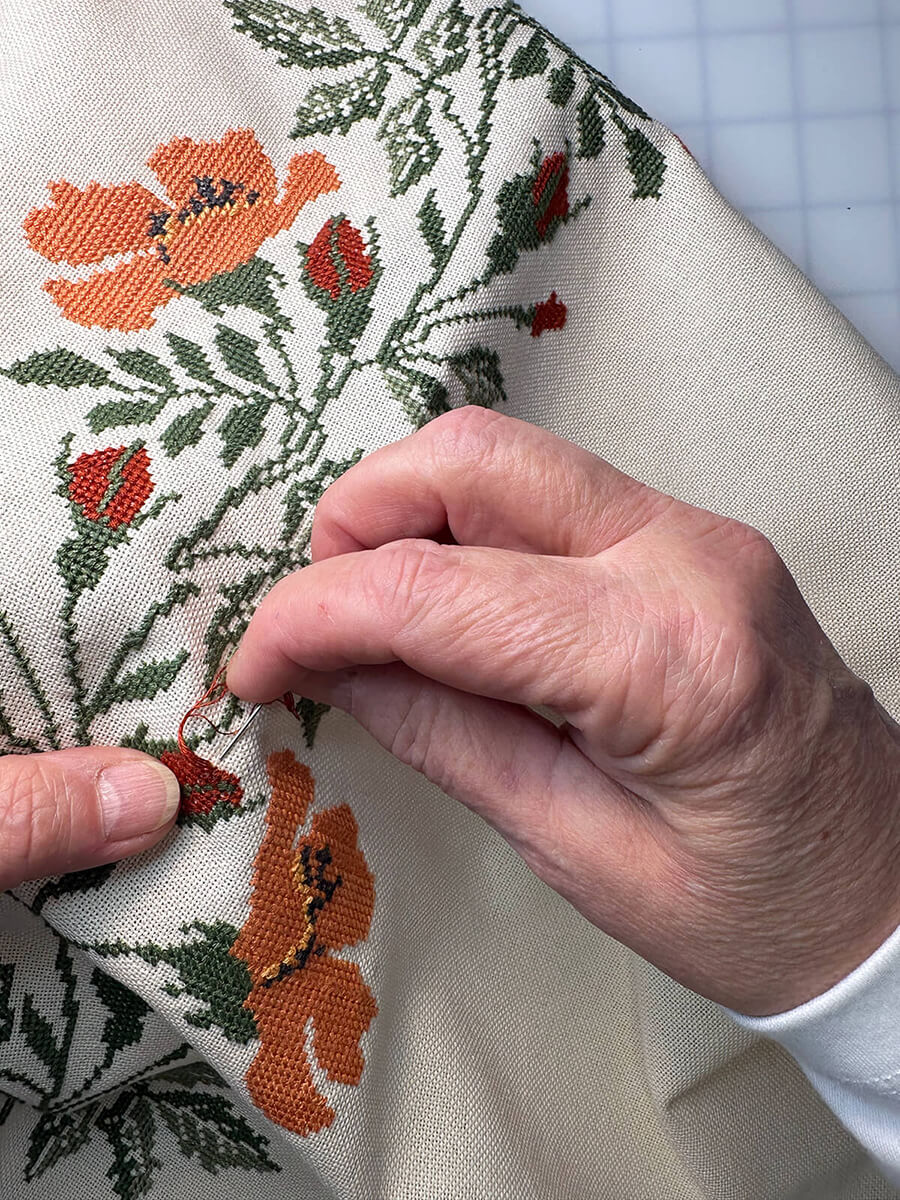
The Sewing Technique – is where the needle is pushed through the fabric at a steeper angle, pulling the thread through multiple holes at once. I use the “sewing” technique. It gives me better control over thread tension and I definitely embroider much faster and can cover more ground with the sewing technique.
The Stabbing Technique” – requires a hoop or a frame. When “stabbing”, the fabric tautly stretched over a hoop allows for a vertical insertion of the needle. The thread is then pulled through to the back and front sides one hole at a time. On this crewel embellished dress, I used a hoop and stabbing technique, which allows for very precise stitch location.
Establish Your Base
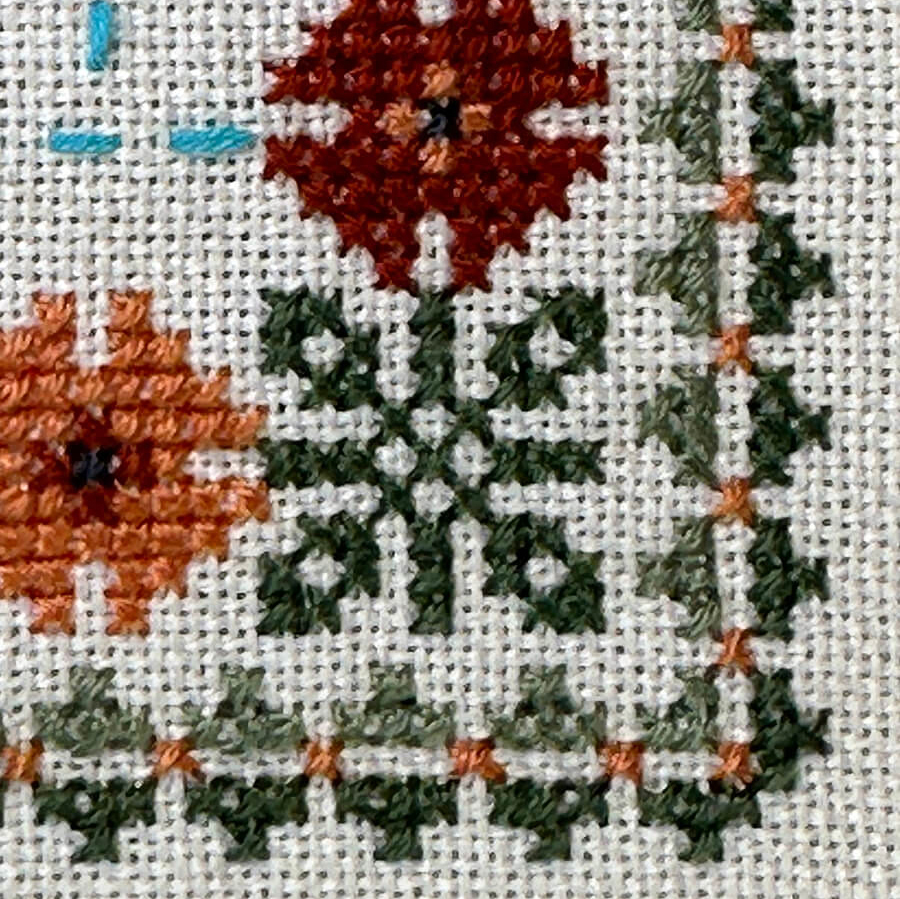
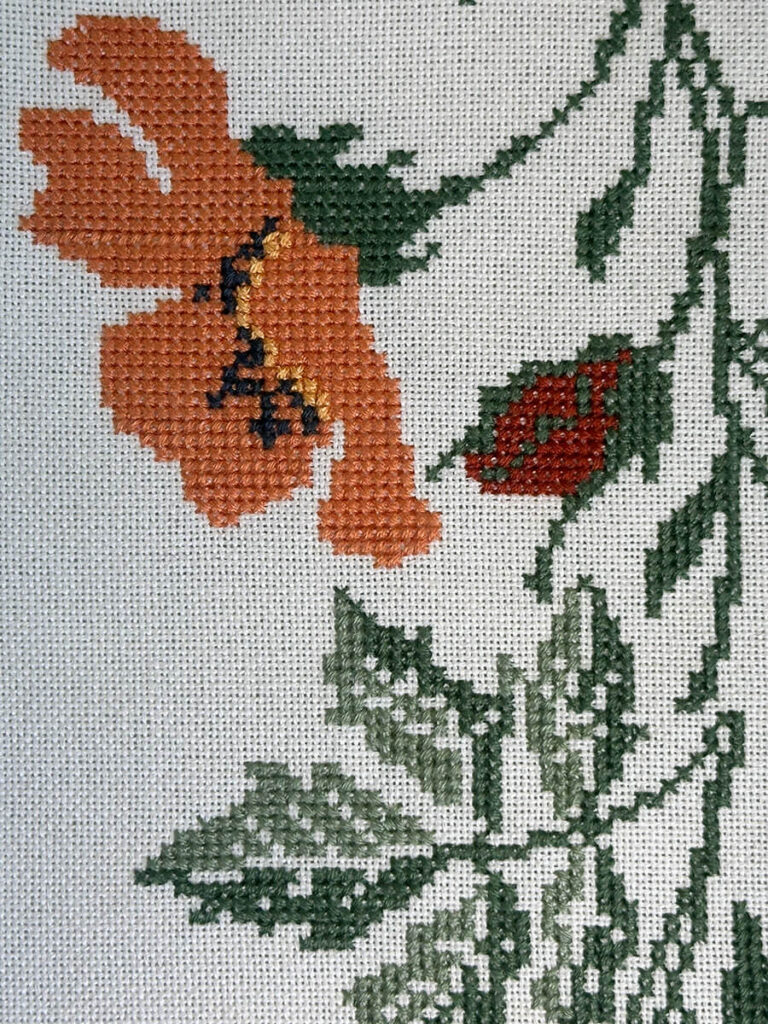
It is always helpful in counted cross stitch to sew what I call the “base”, and then fill in with color. In Ukrainian embroidery, the base is usually black, or the darkest color. Examine your motifs to determine the base. For example, on my organic sleeve motif, the base is the dark green twining leaves and stems. Once your base is sewn, placing other colors and flourishes goes much quicker, without much counting required.
Keeping It Tidy
As a young girl in Ukrainian embroidery class, I remember bringing my recently stitched work over for inspection by the lady who was instructing us. Without even giving the frontside a glance, Mrs. Sawczak would immediately flip my piece over and examine the backside. “Neatness on the backside is equally as important as the beauty on the right side,” she would say. This concept was drummed into us.
For an embroidered garment worn against the skin, the embroidery needs to be durable and as smooth as possible on the underside. A well-embroidered vyshyvanka should have a very tidy appearance both front and back. Maintain even tension in your cross stitching to avoid puckering. Secure thread ends on the back to prevent your beautiful embroidery from unraveling over wearings and washings. Plan your thread pathways to avoid loosey-goosey strands on the inside that can easily snag on jewelry or undergarments. I strive to have zero visible knots, woven-in thread pathways, and neatly aligned stitches by using the following techniques:
Tidy Techniques
Leave no bulky knots – Use the no knot looped thread technique at the beginning of a thread. Use a no knot finish at the end of a thread by weaving under existing stitches.
Minimize thread travel – Think about direction where you are going and where you want to end up. Loose thread pathways can be avoided by being mindful of what you want to accomplish with each threaded needle. Carefully plan the area you are sewing to avoid leaving strands of loose thread carried across the back of the fabric. Don’t skip around from one area to another. I limit loose thread travel to no more than three cross stitches away. Any distance greater than that, I weave the thread through existing stitched on the backside to get there.
One last sleeve to finish! Stay tuned for the last Installment of this series: How to Make a Ukrainian Vyshyvanka Blouse — Finishing Touches, where everything comes together.


 How to Make a Vyshyvanka Blouse – Ukrainian Embroidery Prep
 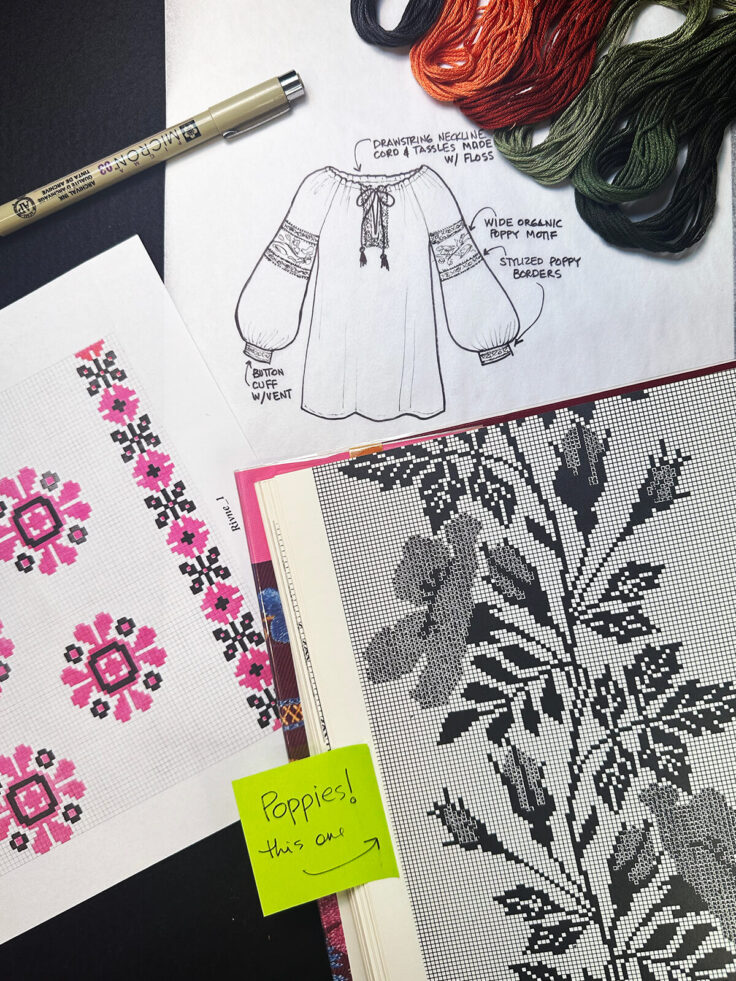 How to Make a Ukrainian Vyshyvanka Blouse – The Planning
  Make it Special with a Beaded Picot Edge Finish
Your work is amazing, and I absolutely love how detailed both your process and documentation is – both sewing and embroidery! I know I will keep coming back to your articles when I make an embroidered garment next. Thank you so much for sharing!
Thanks! I hope you do give it a shot and make an embroidered garment. Adding even a little bit of embroidery to a makes makes it so special.